Settings for APNs Certificate (iOS)
You need a auth key in .p8 format or a certificate file in .p12 format to send push notifications. Please follow below instructions to prepare your certificate.
Create APP ID
Create an APP ID in order to create certificates.
If you already have an APP ID, please move on to Generate certificates.
Login to iOS Developer Center and move to Account page and click Certificates, Identifiers & Profiles.


Click Identifiers.

Click + button and open the registration page for a new Identifier. On the next page, select APP IDs and click Continue.


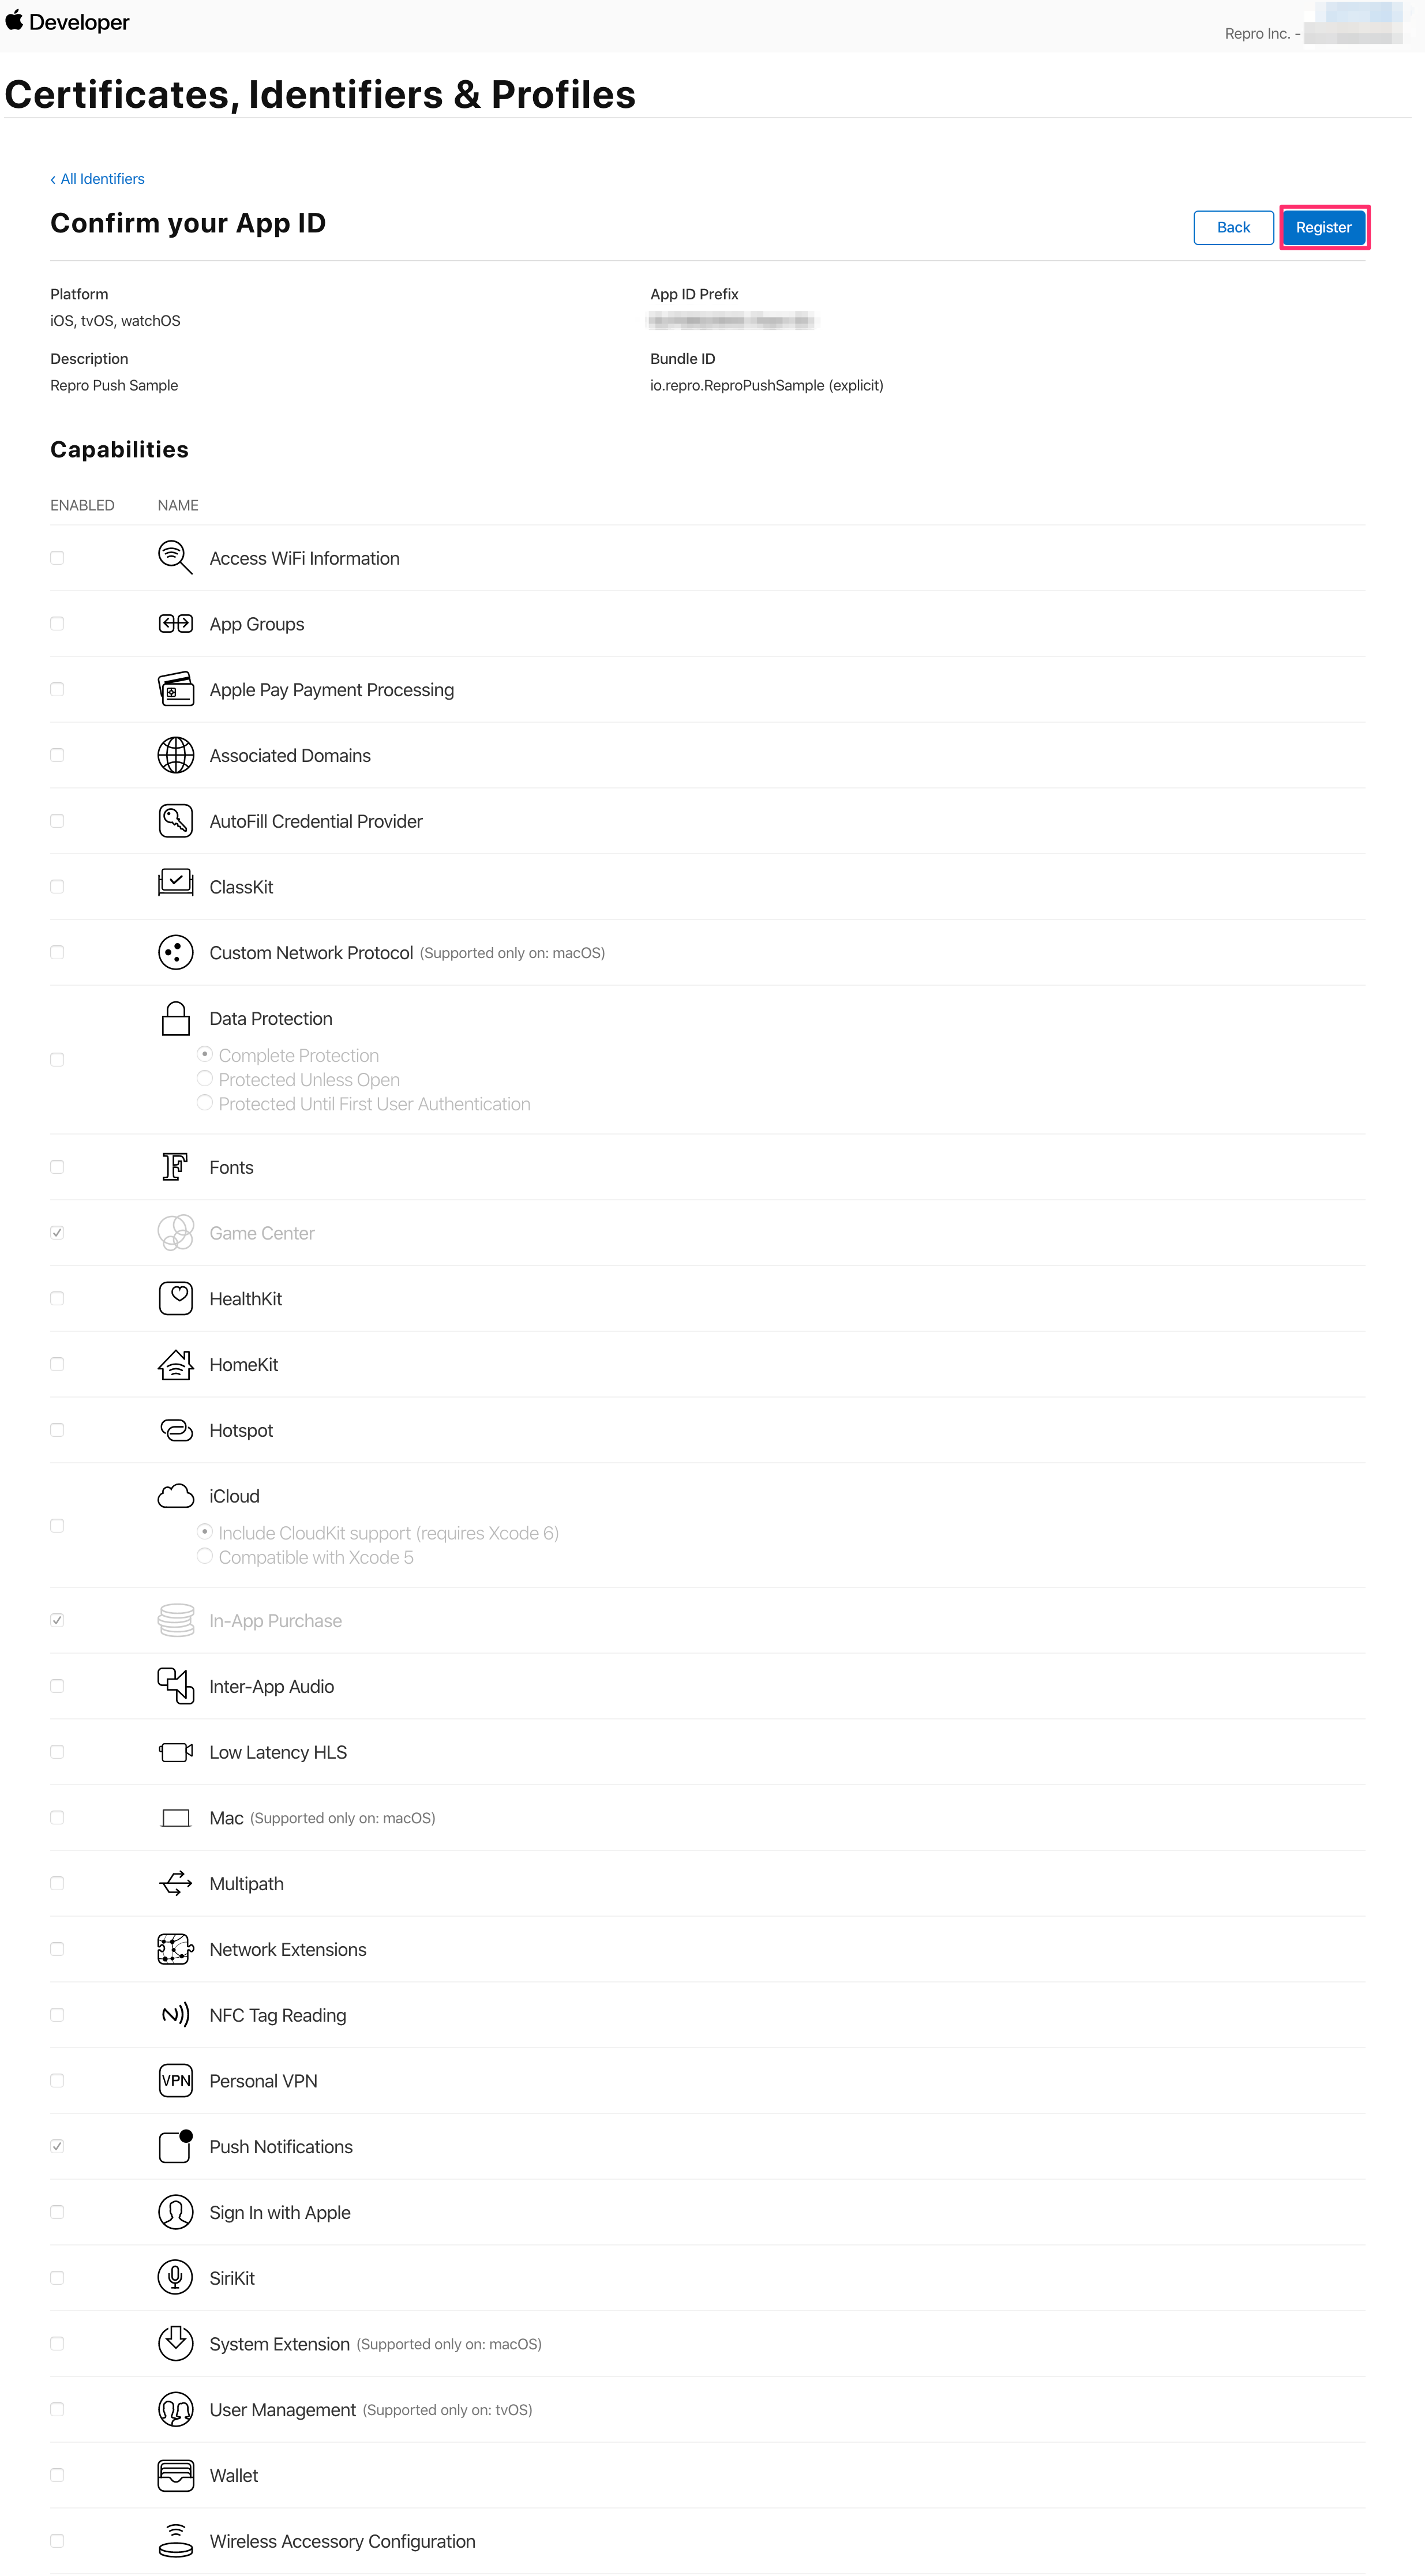
Fill out below items and click Continue.

Description:
Write a short description of the APP ID. Write something easy to understand for future reference.
Bundle ID:
Decide the type of APP ID. Choose Explicit and fill in your Bundle ID. Please set the same id as your Bundle ID for the one you want to send the push notification to.
Capabilities:
Sets the service for the app. Check Push Notification here.
Confirm the contents, and click Register and generate a certificate.
Generate certificates
Using p8 format auth key
Generate p8 format auth key
Move to page Certificates, Identifiers & Profiles within iOS Developer Center. Select “Keys” from the side menus and click plus button.

After the screen as below shows up, check Apple Push Notifications service (APNs) and give a name to the Key and click the “Configure” button.

Select the desired environment and key restriction, then click “Save” . Repro supports all environments (Sandbox, Production, and Sandbox & Production).
You can also select either “Topic-specific keys” or “Team-scoped keys” as the key restriction. The number of p8 keys that can be created and their limitations vary depending on the selected key restriction.
For more details, please refer to the Apple official documentation.
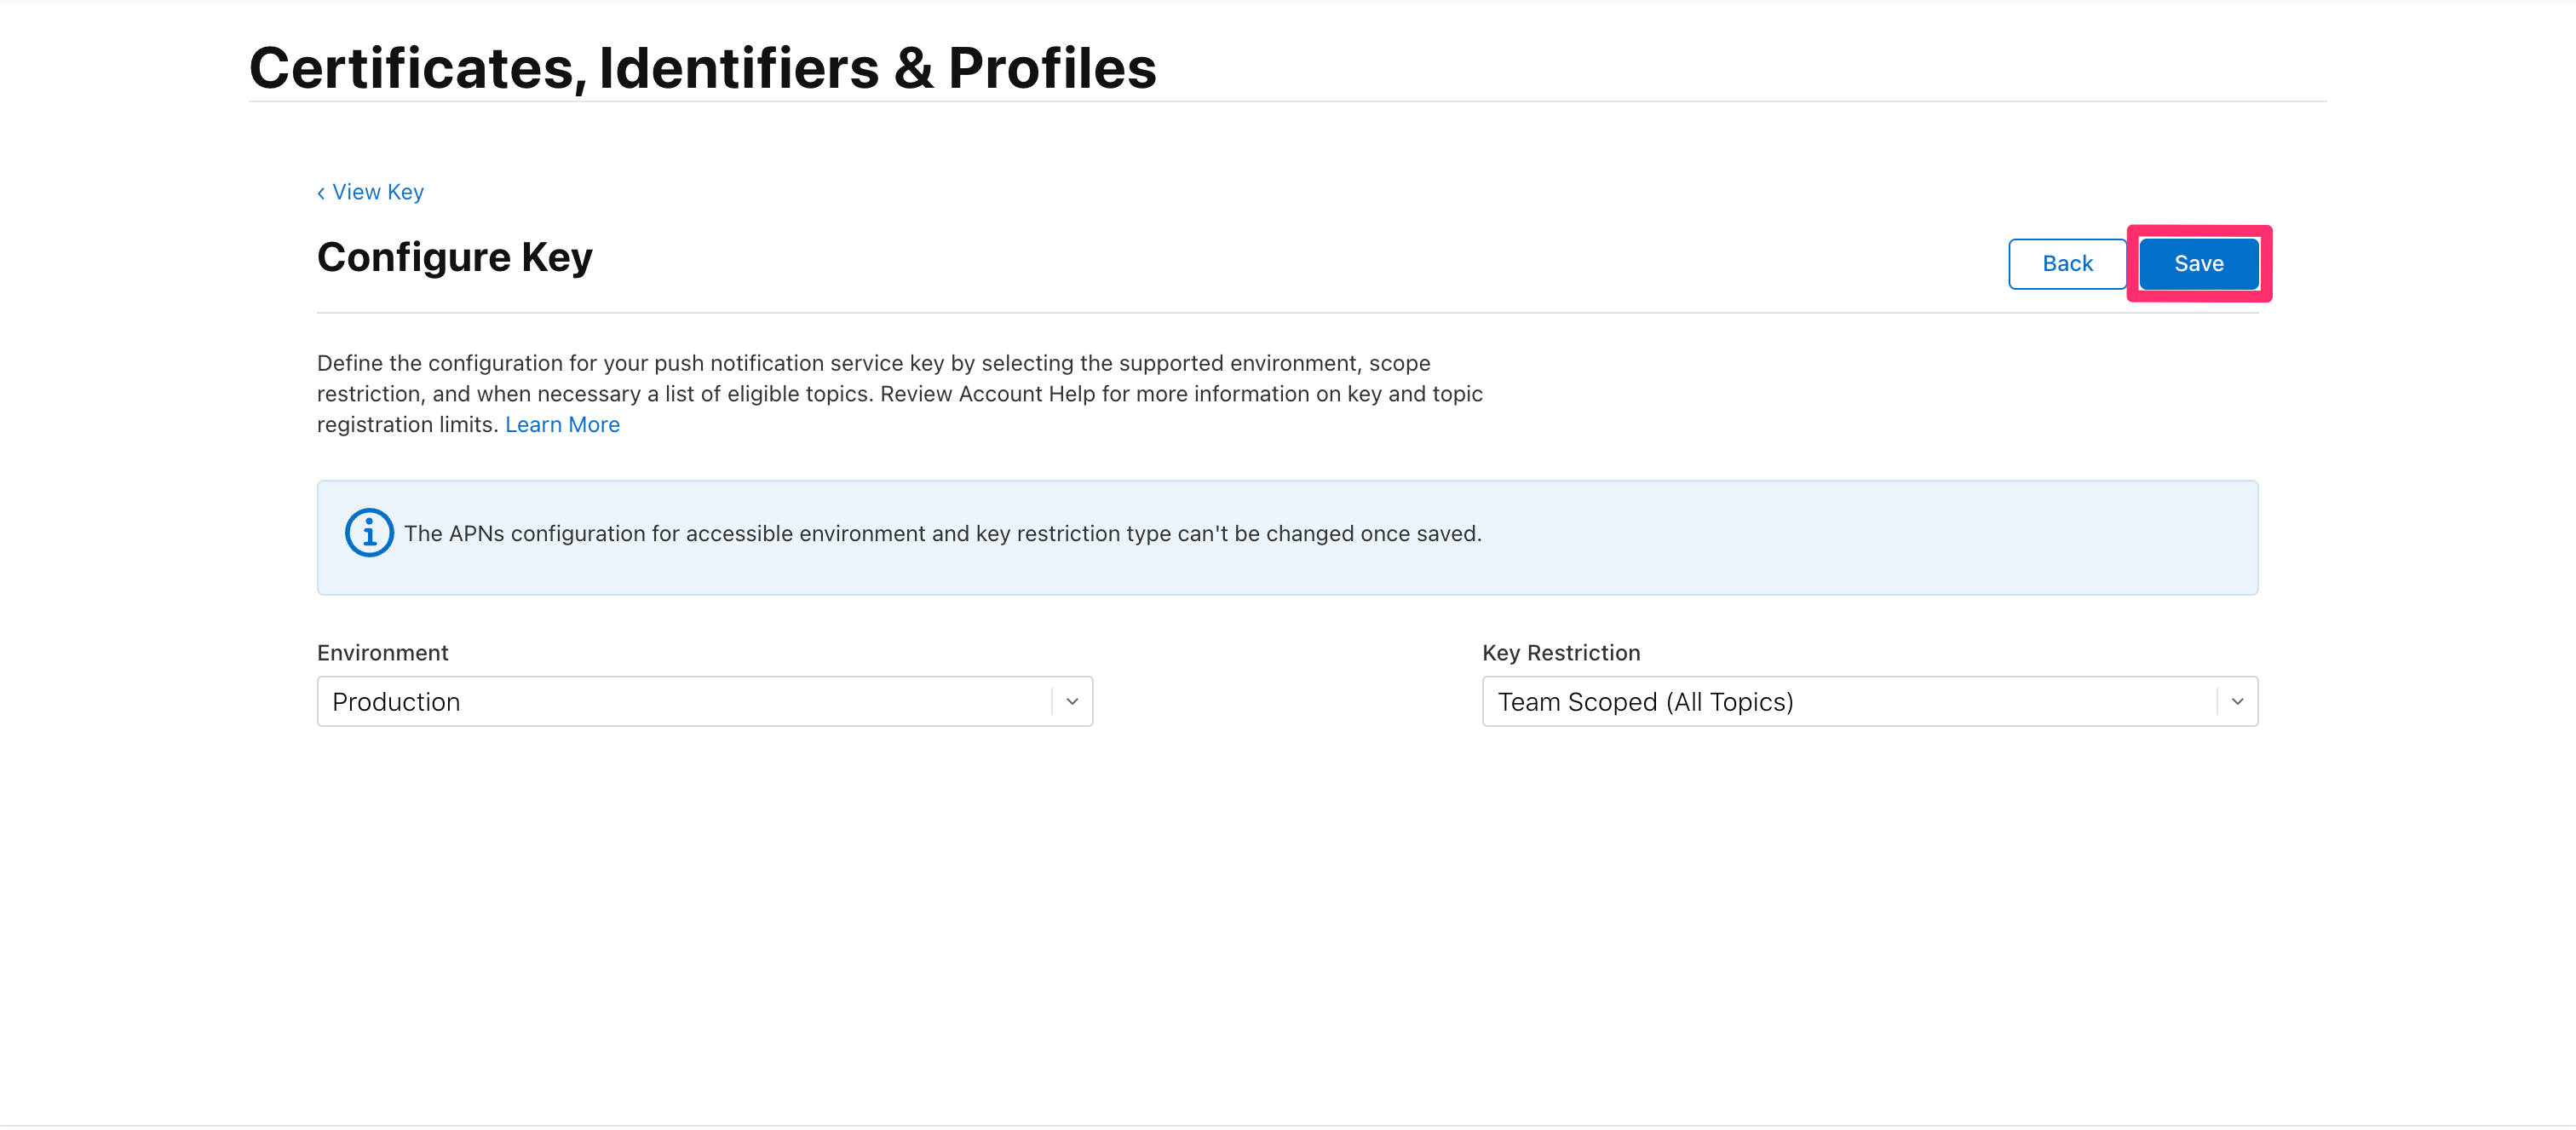
After selecting the environment and key restriction, click Save to return to the previous screen, then click “Continue”.

Then the screen down below will show up. If there is no problem, click “Register” and generate the p8 format auth key.
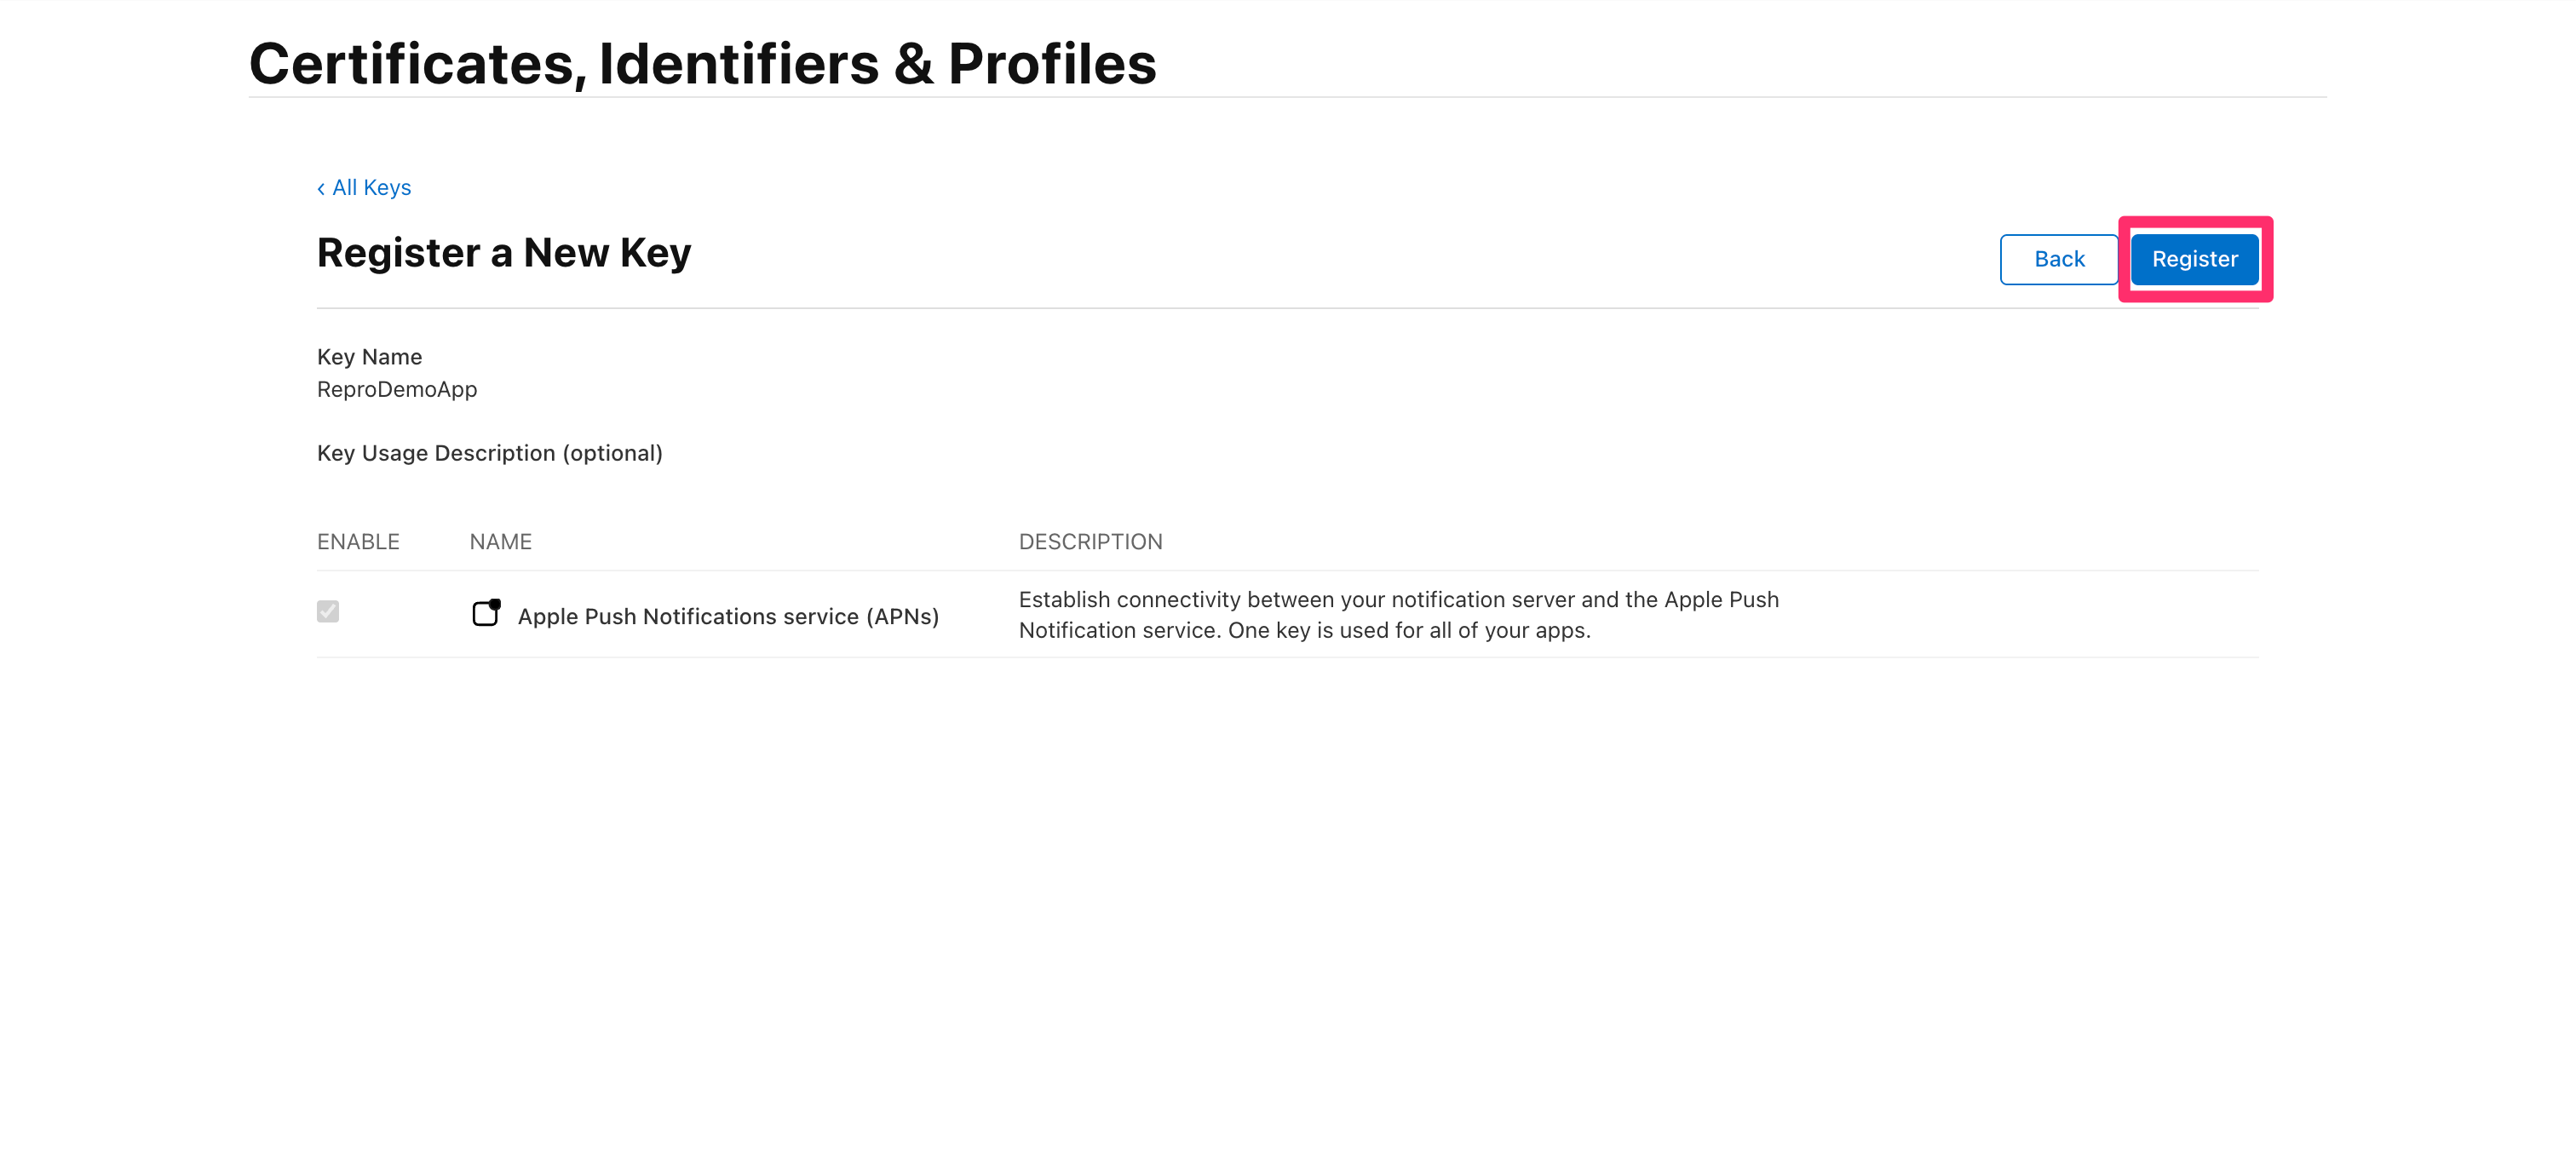
Now you can download the p8 auth key.
Please write your KEY ID down since it is required in later process.

Upload p8 format auth key to Repro

Open Repro Dashboard and open Settings > Push Notification Settings. Click Choose P8 file and select the p8 file which you just created.
Fill in KEY ID
Fill in KEY ID which you obtained in the previous step.
Fill in Team ID
Move to page Membership within iOS Developer Center and you can check Team ID illustrated down below.

Bundle ID
Fill in the app’s Bundle ID. You can confirm it on the Xcode.
Setting of the environment
Select the environment depending on the build setting of the application linked to the SDK token you are using.
Note
For the setting of the environment described above, please make sure to select “Production” if your build settings is production environment and “Sandbox” if it is development environment.
- Definitions of Production and development environment is down below:
Production environment: In the case of an application downloaded from the App Store or an application distributed using a test application distribution tool such as TestFlight.
Development environment: For applications built directly from IDE (integrated development environment).
Using p12 format certificates
Generate CSR
Generate CSR (Certificate Signing Request) to create a certificate. CSR can be generated with your Mac’s keychain access.
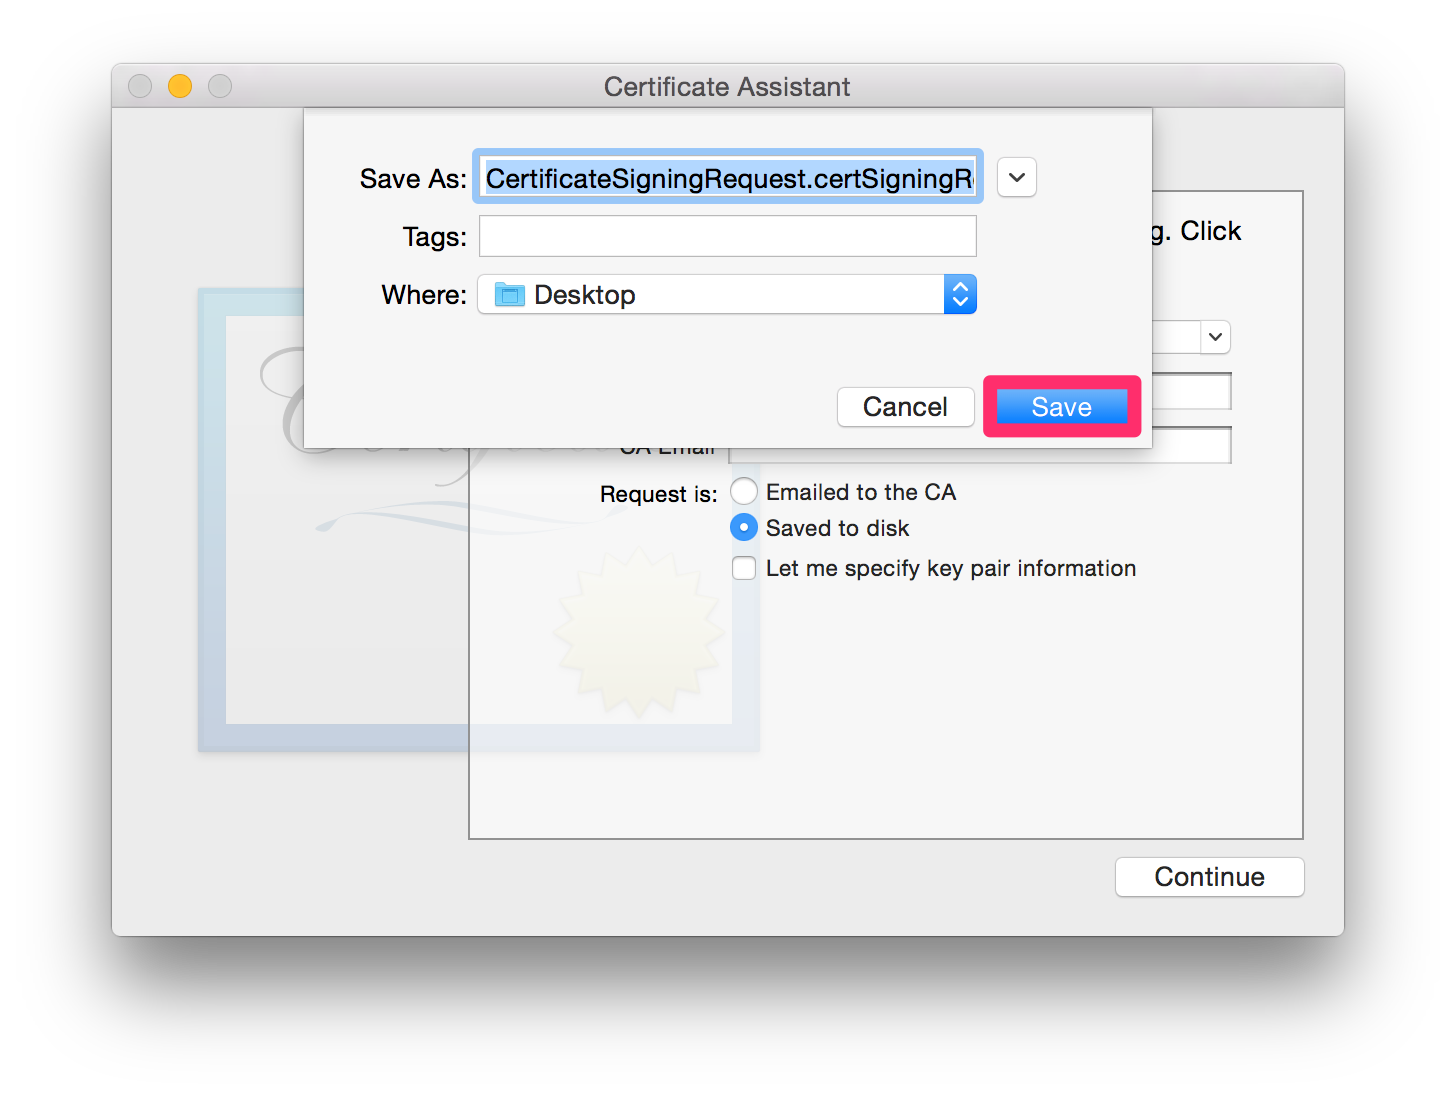
Choose Keychain Access -> Certificate Assistant -> Request a Certificate For a Certificate Authority.

Fill out User Email Address and Common Name and choose Saved to disk and click Continue.

Save your CSR file on your local machine.
Upload CSR
Move to page Certificates, Identifiers & Profiles within iOS Developer Center.
Click the row where you created the App ID.

Click Configure on the Push Notifications column.

After you click, a pop-up will appear to create the certificate.
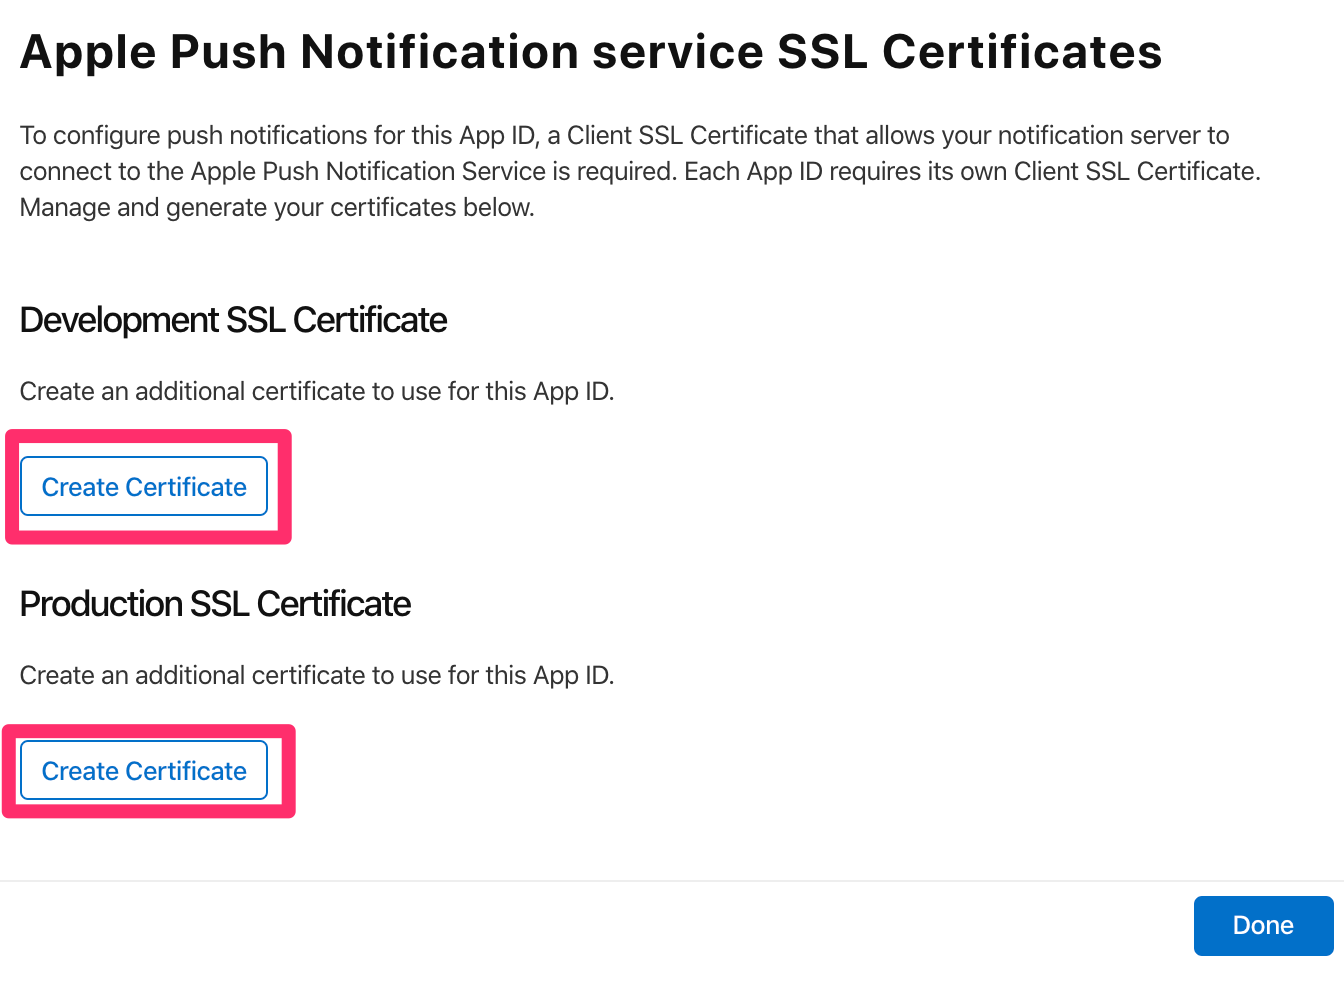
APN’s have Development and Production, and both need separate certifications, depending on how the app was built. For more information, please refer to the below.
Here were are creating one for Development.
Note
Push notification certificates must be registered by separating the types of certificates by the distribution method (Ad hoc or In-House) of the application to be distributed.
Development SSL Certificate: For applications built directly from IDE (integrated development environment).
Production SSL Certificate: In the case of an application downloaded from the App Store or an application distributed using a test application distribution tool such as TestFlight.
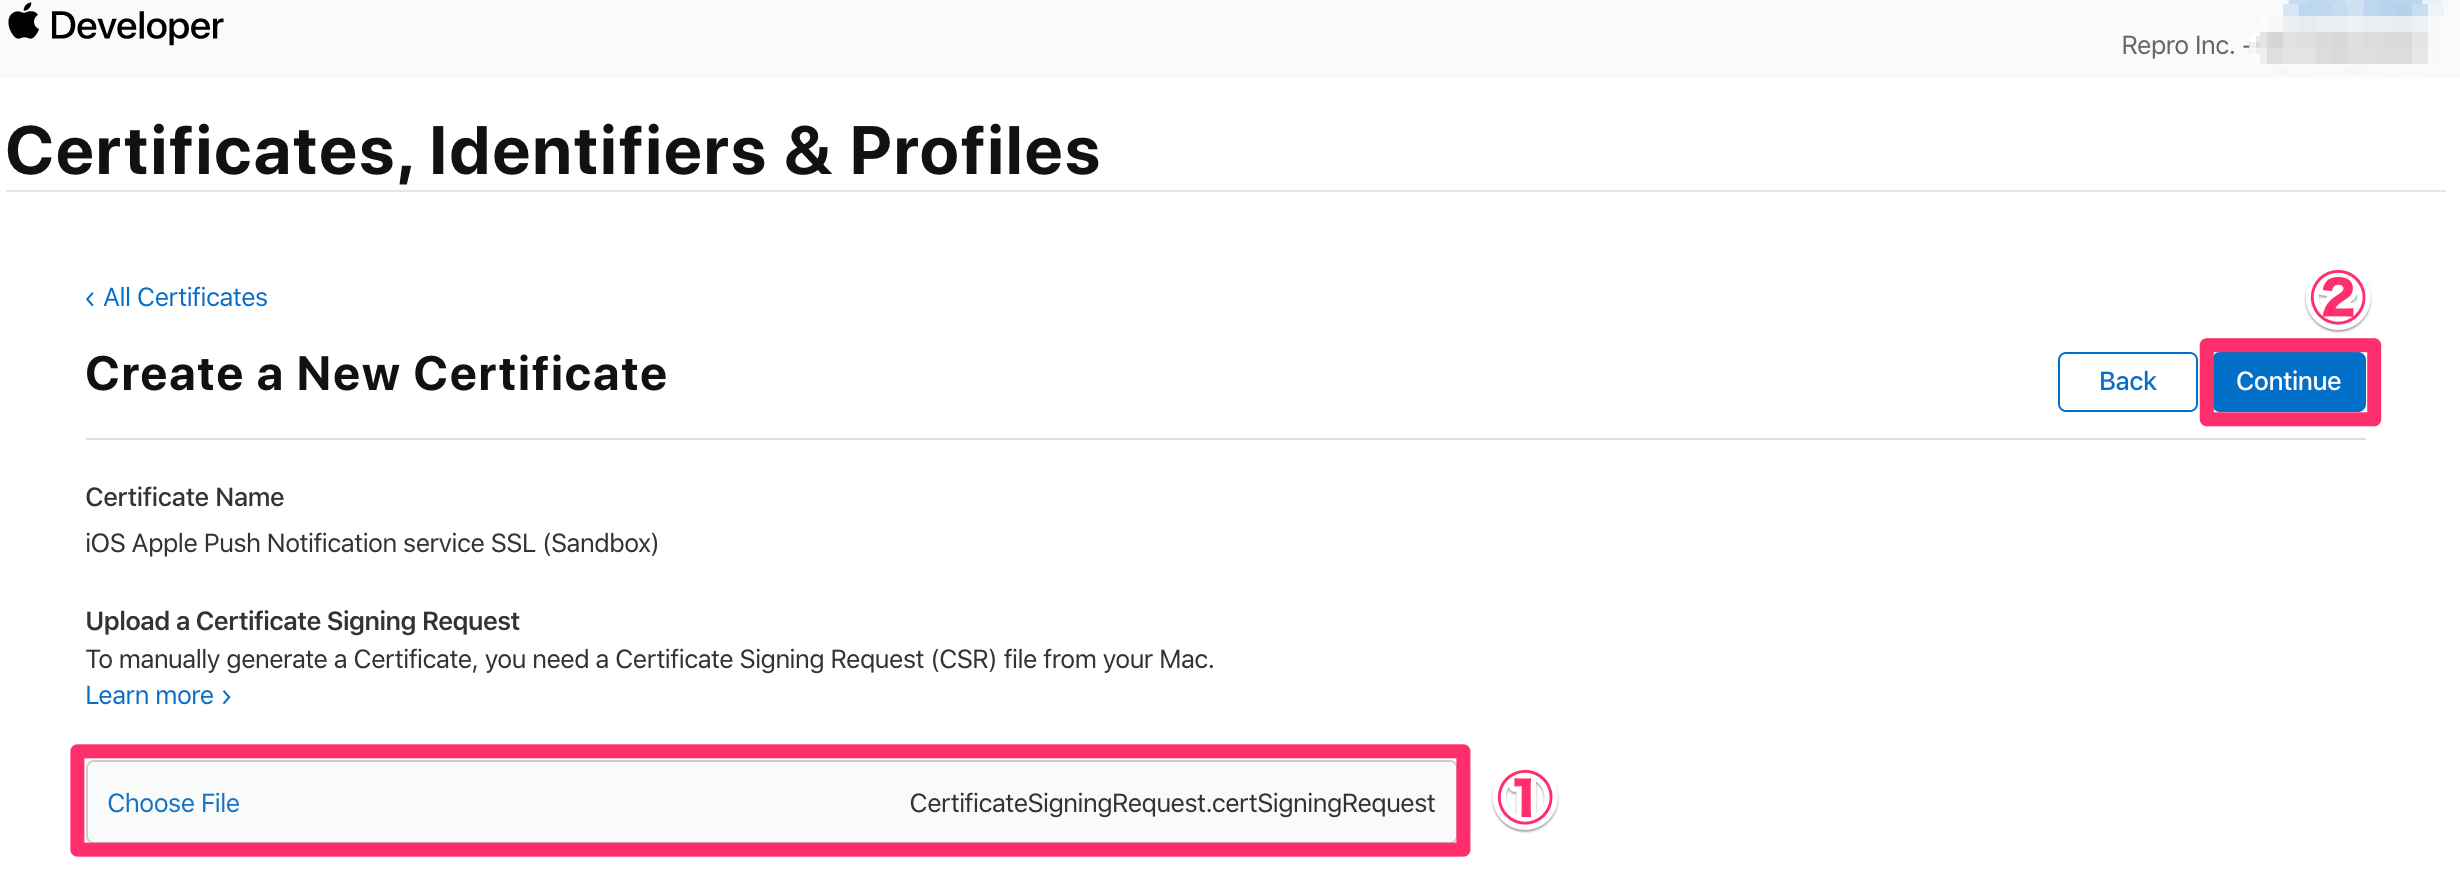
A form for uploading, along with an explanation stating the need of CSR when creating a certificate, will be displayed.
Click Choose File and select the CSR file you just created, and click Continue.
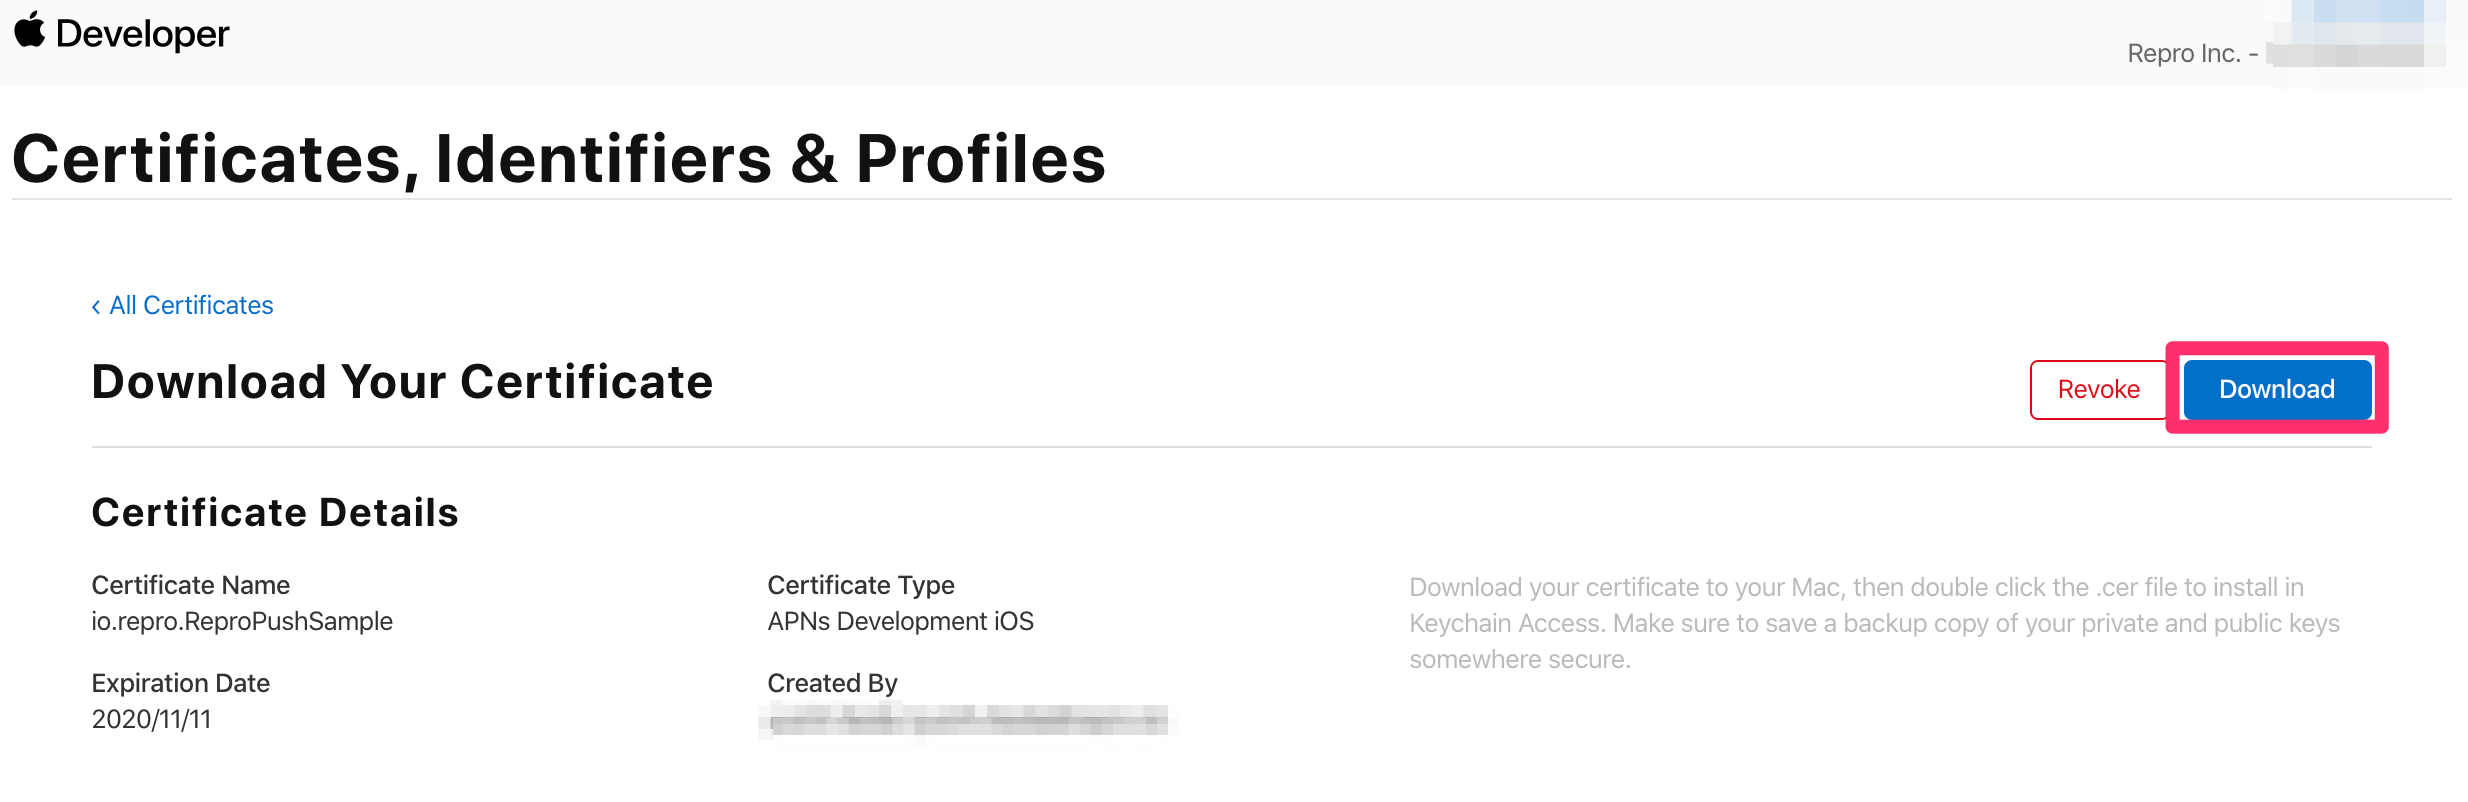
Certificate generation has completed. Click Download and save the certificate file.
Convert certificates to p12 format
Double-click the downloaded certificate file (.cer) and launch Keychain Access. The certificates are saved in the keychain with its name as Apple [Development/Production] iOS Push Services: [Bundle ID] or Apple Push Services: [Bundle ID], so you can type the part of the Bundle ID and the search from the search form.

Click the triangle icon on the left and you will see Certificate and Private keys, and check only Certificate and click while pressing control key.

Select ‘Export [Certification Name]’ from the dialog.

Check the format is Personal Information Exchange (.p12) and save to your local machine.

A dialog saying Enter a password which will be used to protect the exported items will be displayed. The password that you enter here will be necessary in the next chapter Upload p12 certificate to Repro so please remember it. It is also ok to not set a password as well.

Type the password of your Mac to let Keychain Access export the certificate file.

Upload p12 certificate to Repro
Open Repro Dashboard and open Settings > Push Notification Settings. Click Choose P12 file and select the p12 file which you just created. If you set a password when creating the p12 file, enter in the password into the column “Certificate Passphrase”.

Note
If you upload both p12’s certificate and p8’s Key, p8’s Key takes precedence. However, if a p8’s Key is revoked on the AppleDeveloper side, a p12’s certificate may be used.
Configure Provisioning Profile
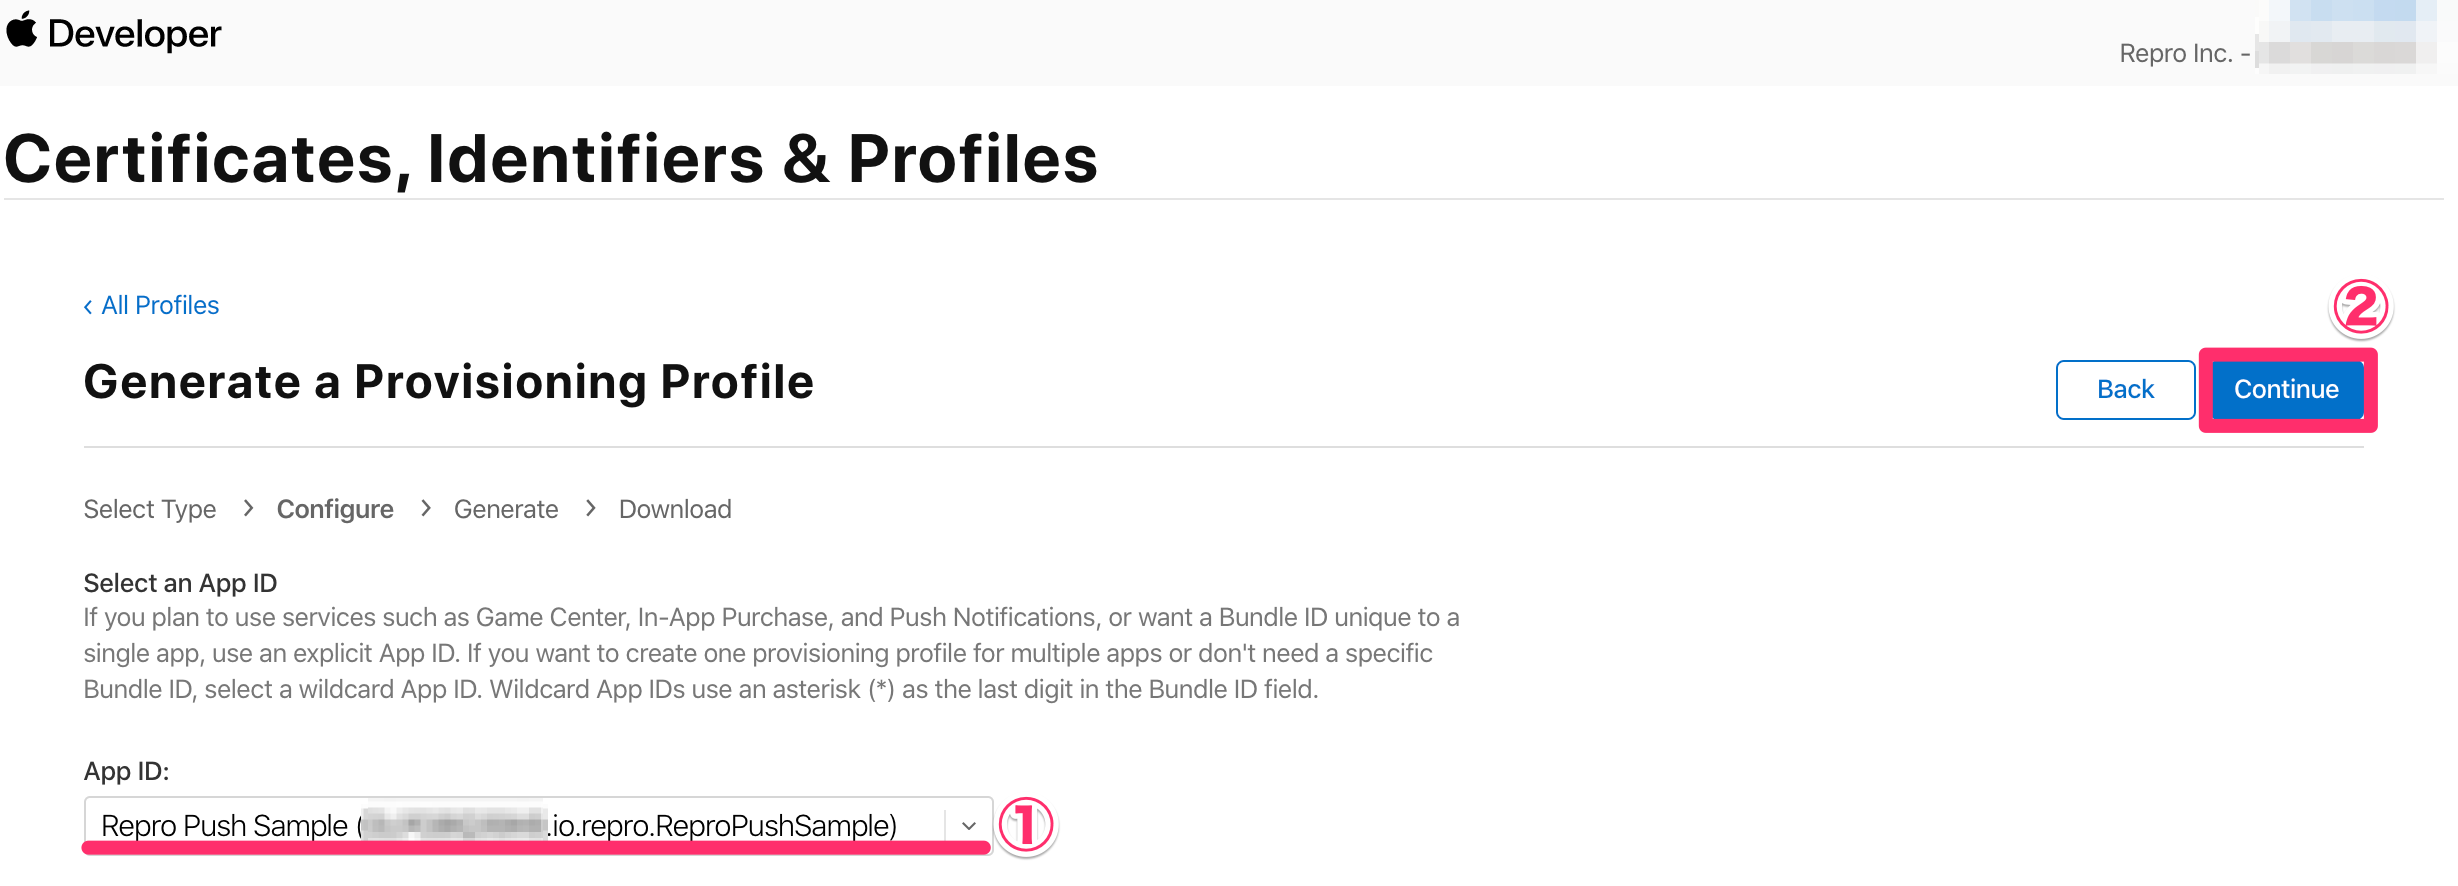
Open Certificate, IDs, and Profiles in Profiles of iOS Dev Center, and click + button to add Provisioning Profile.

Choose the type of the Provisioning Profile from iOS App Development, App Store or Ad Hoc and click Continue.

Choose the APP ID to send the push notifications and click Continue.
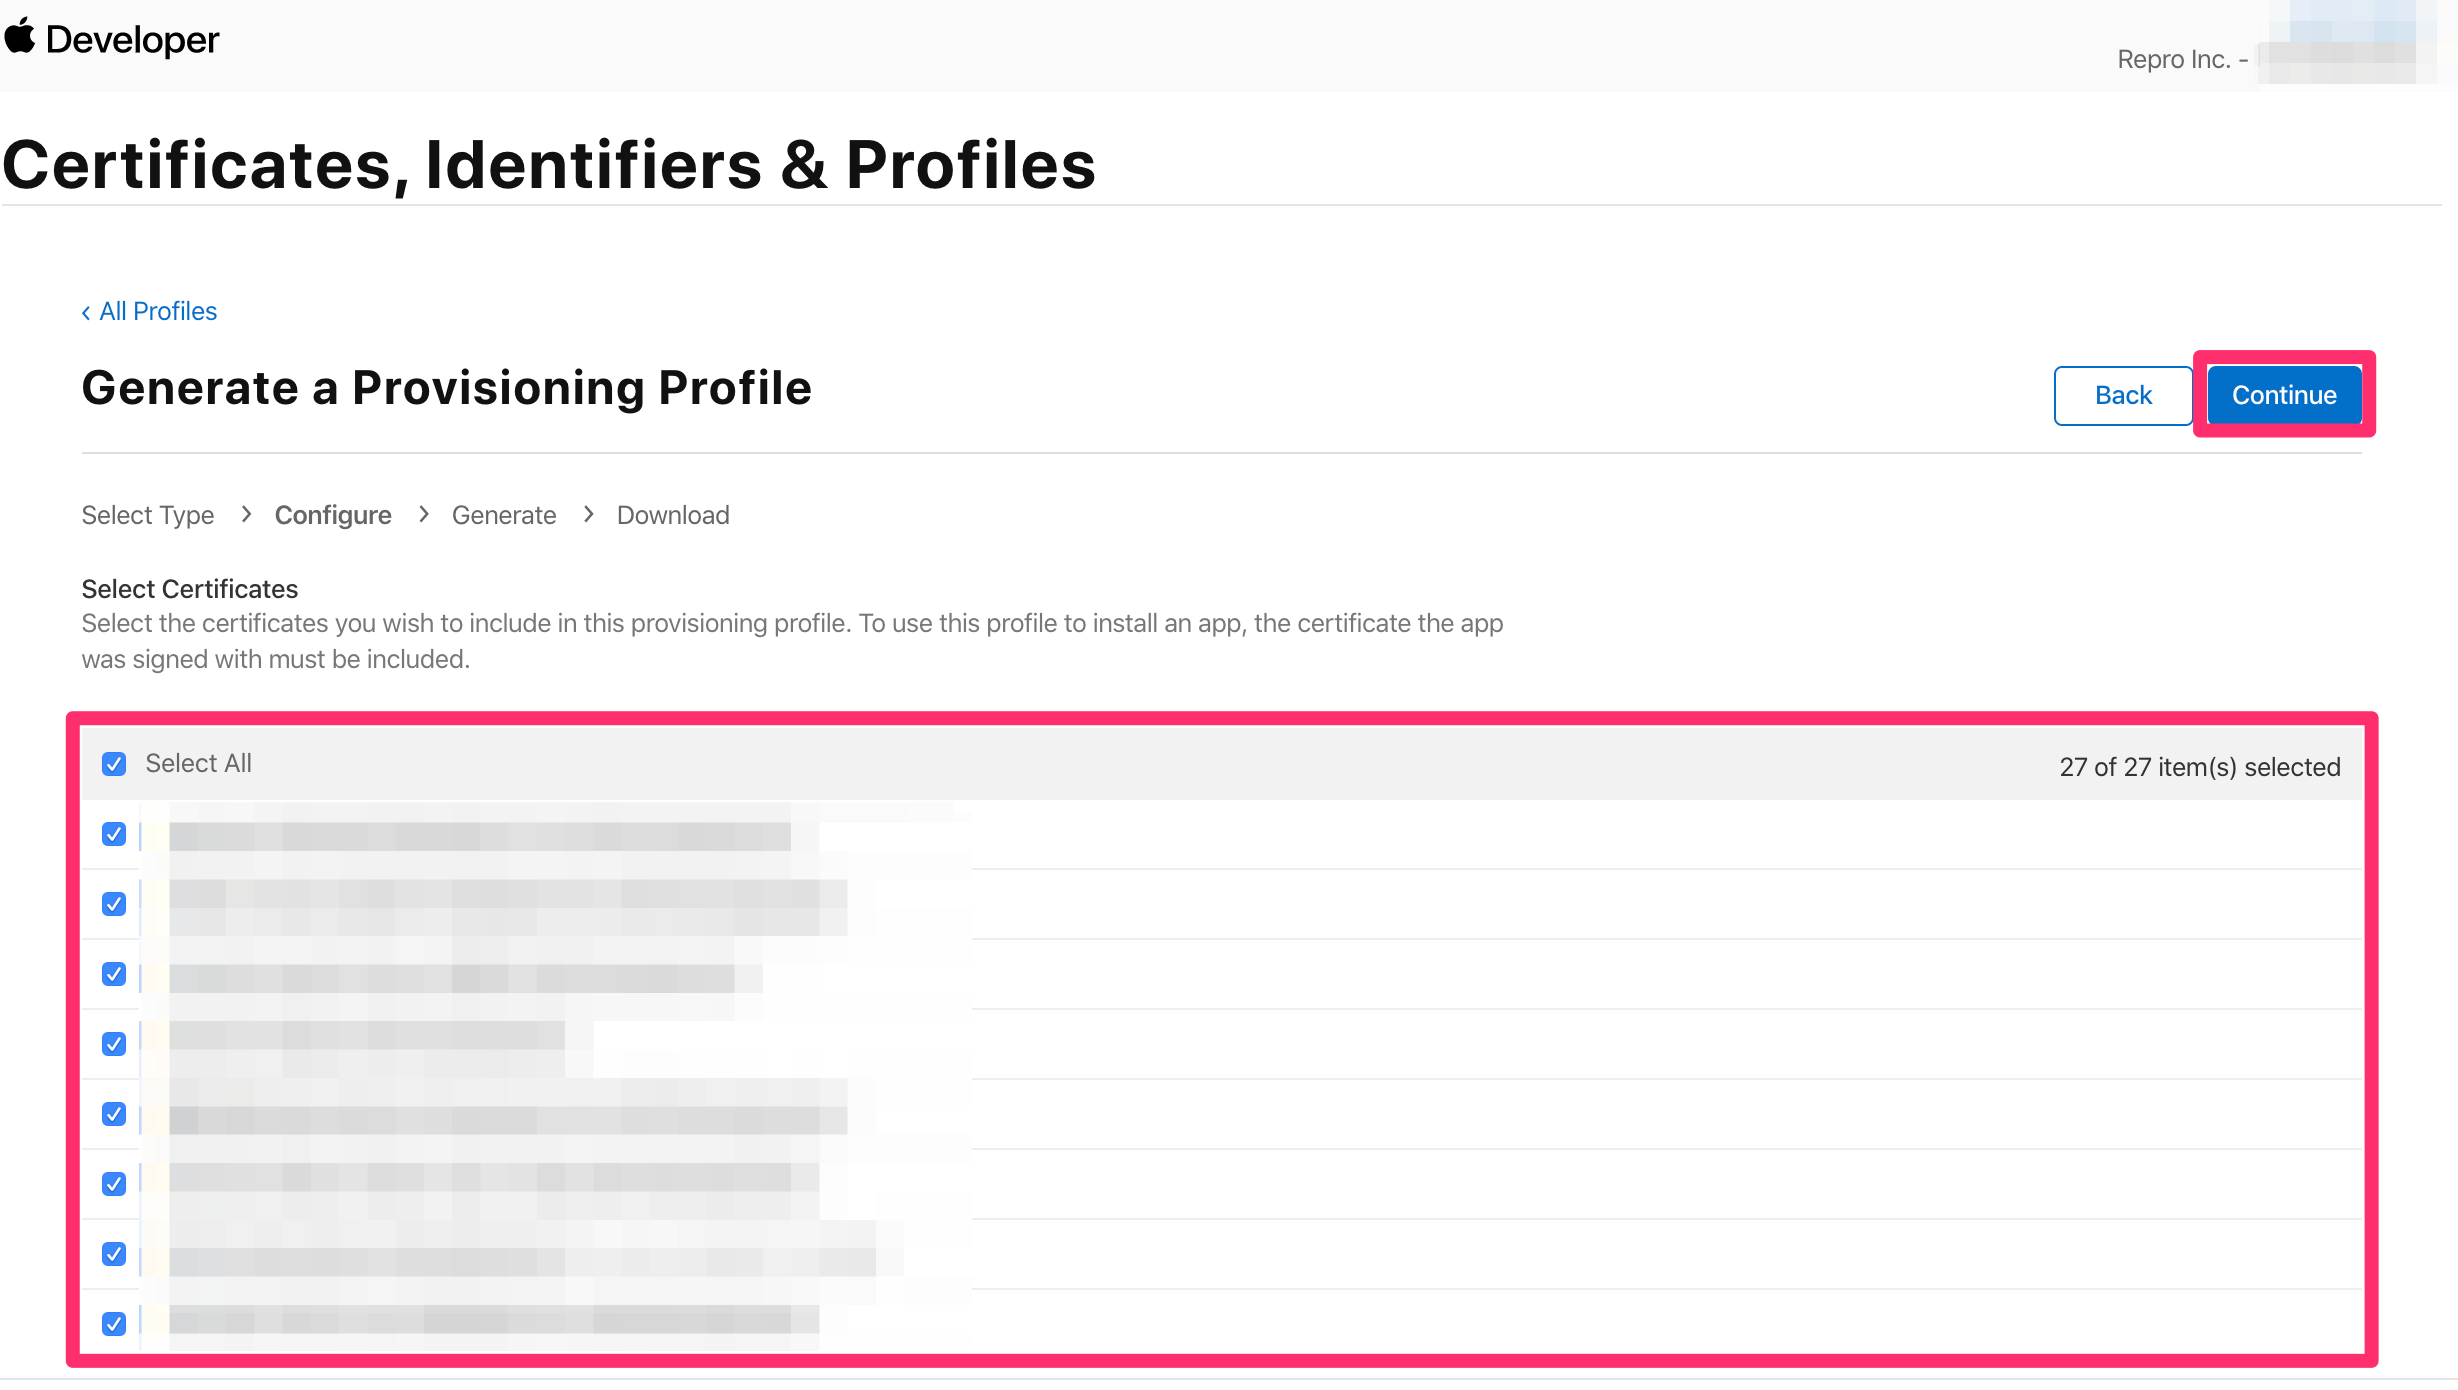
Choose the certificate and click Continue.
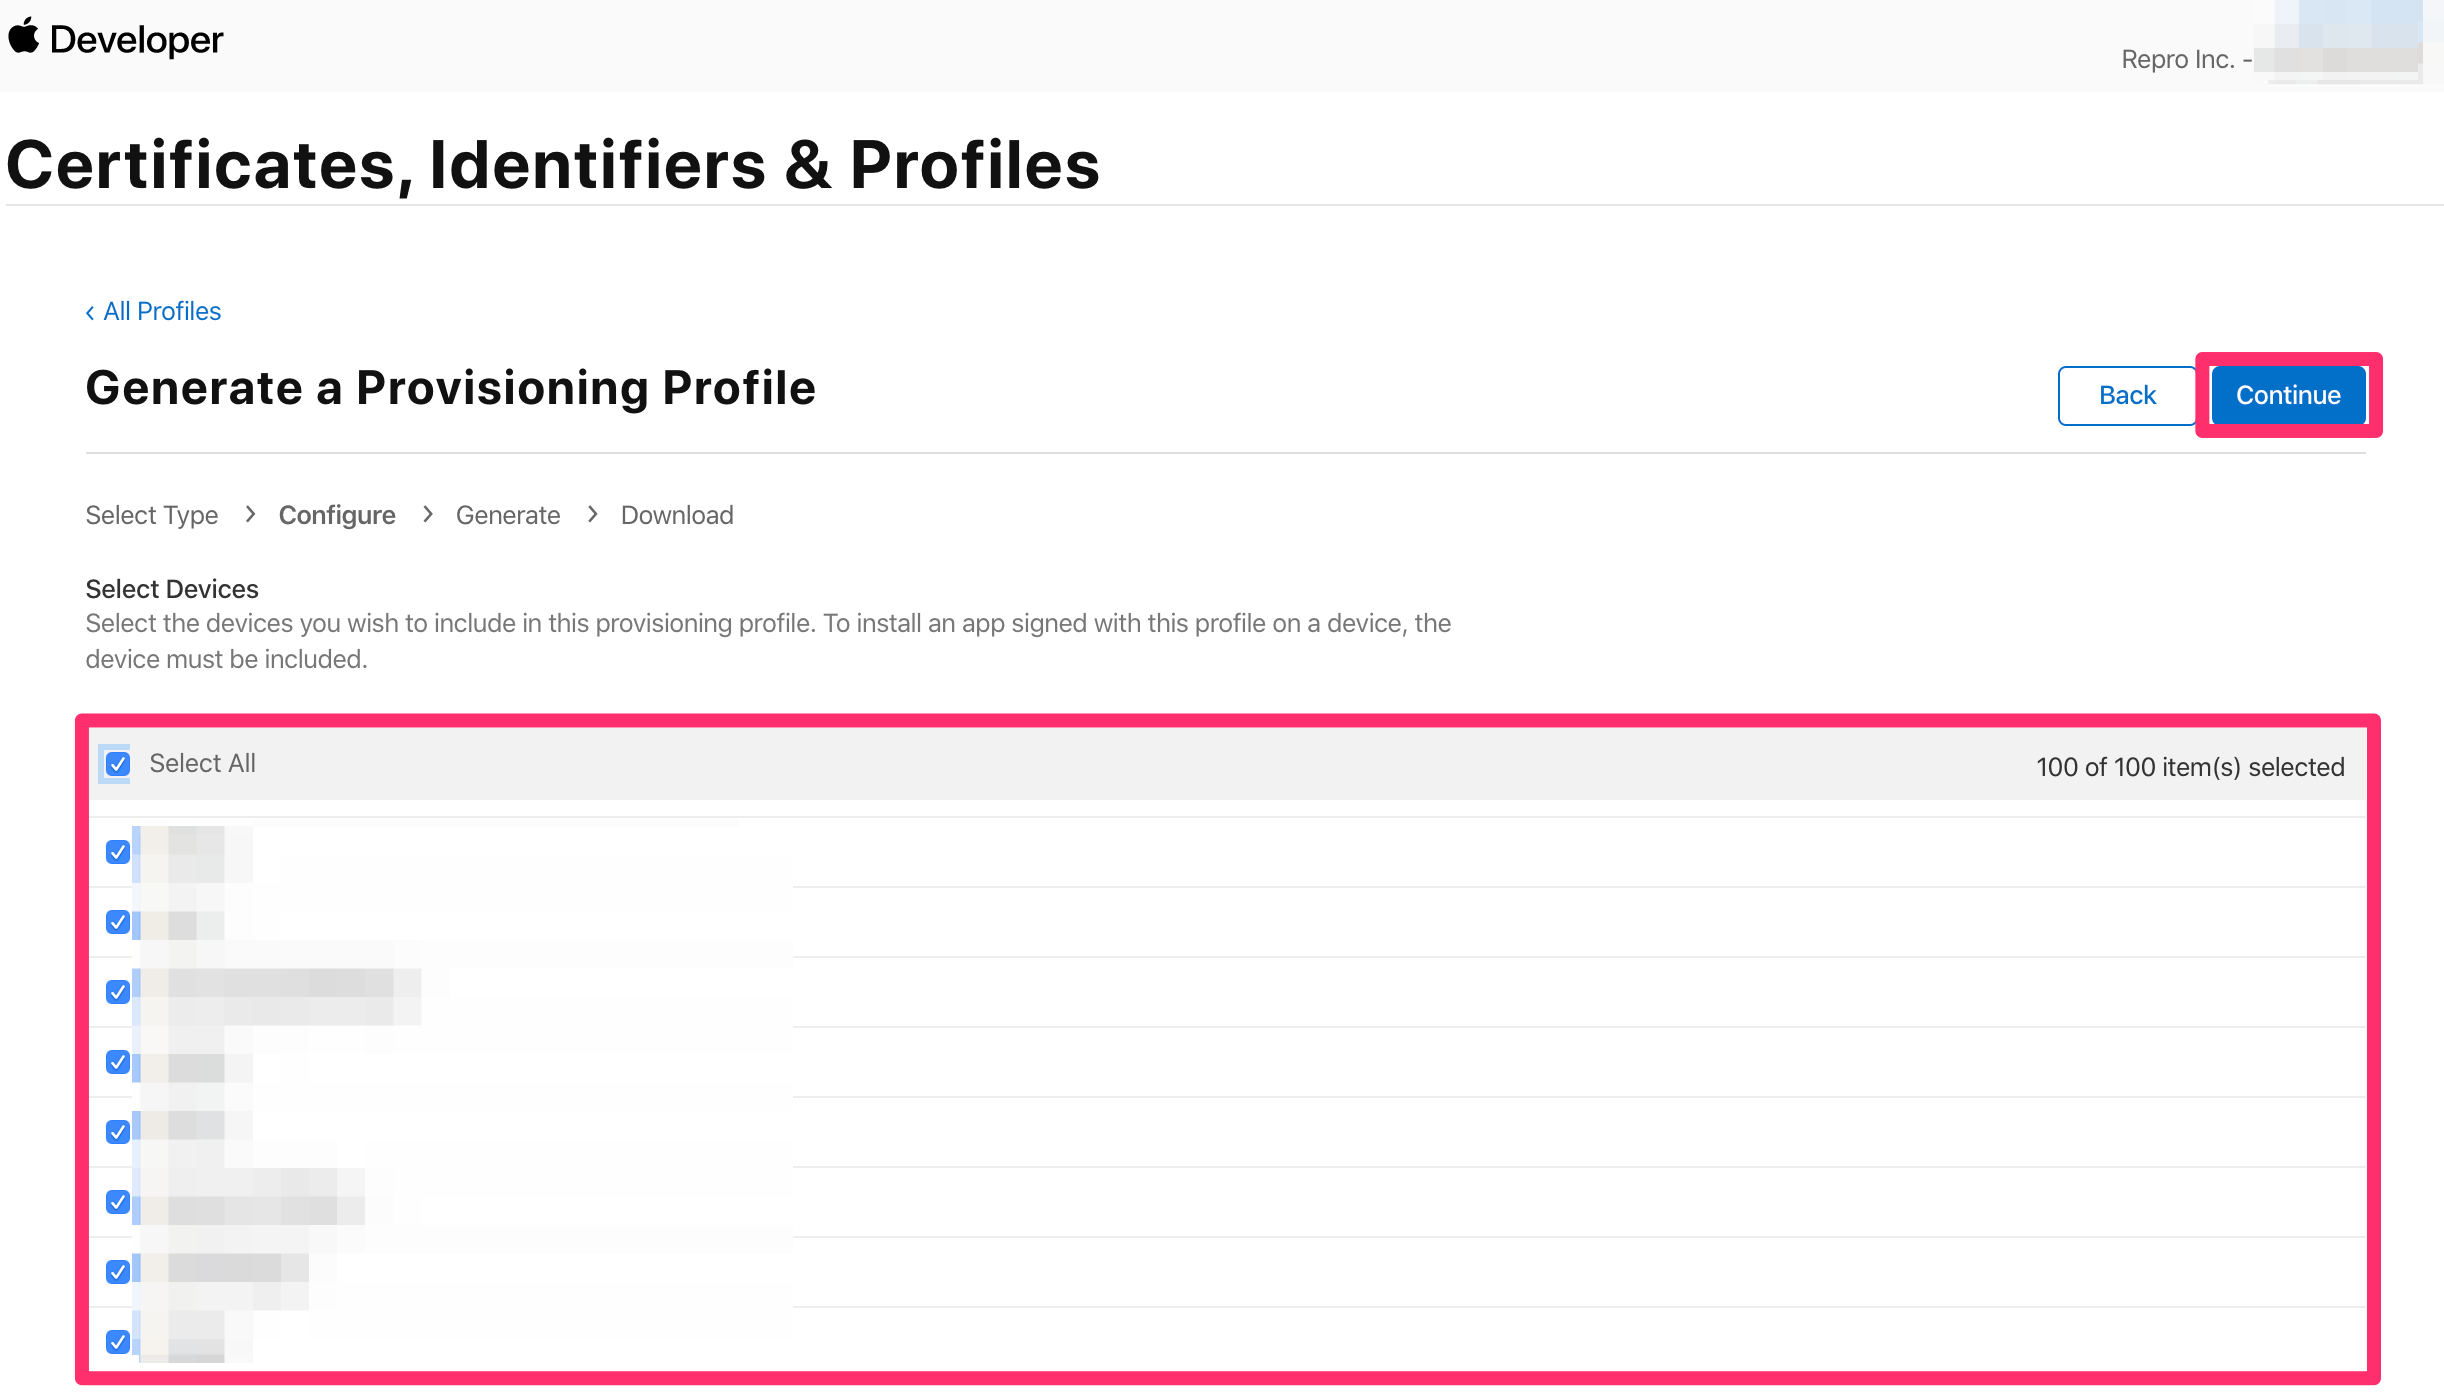
(Only for Development or Ad Hoc) Choose the devices to install and click Continue.
Type the name of the Provisioning Profile and click Generate.
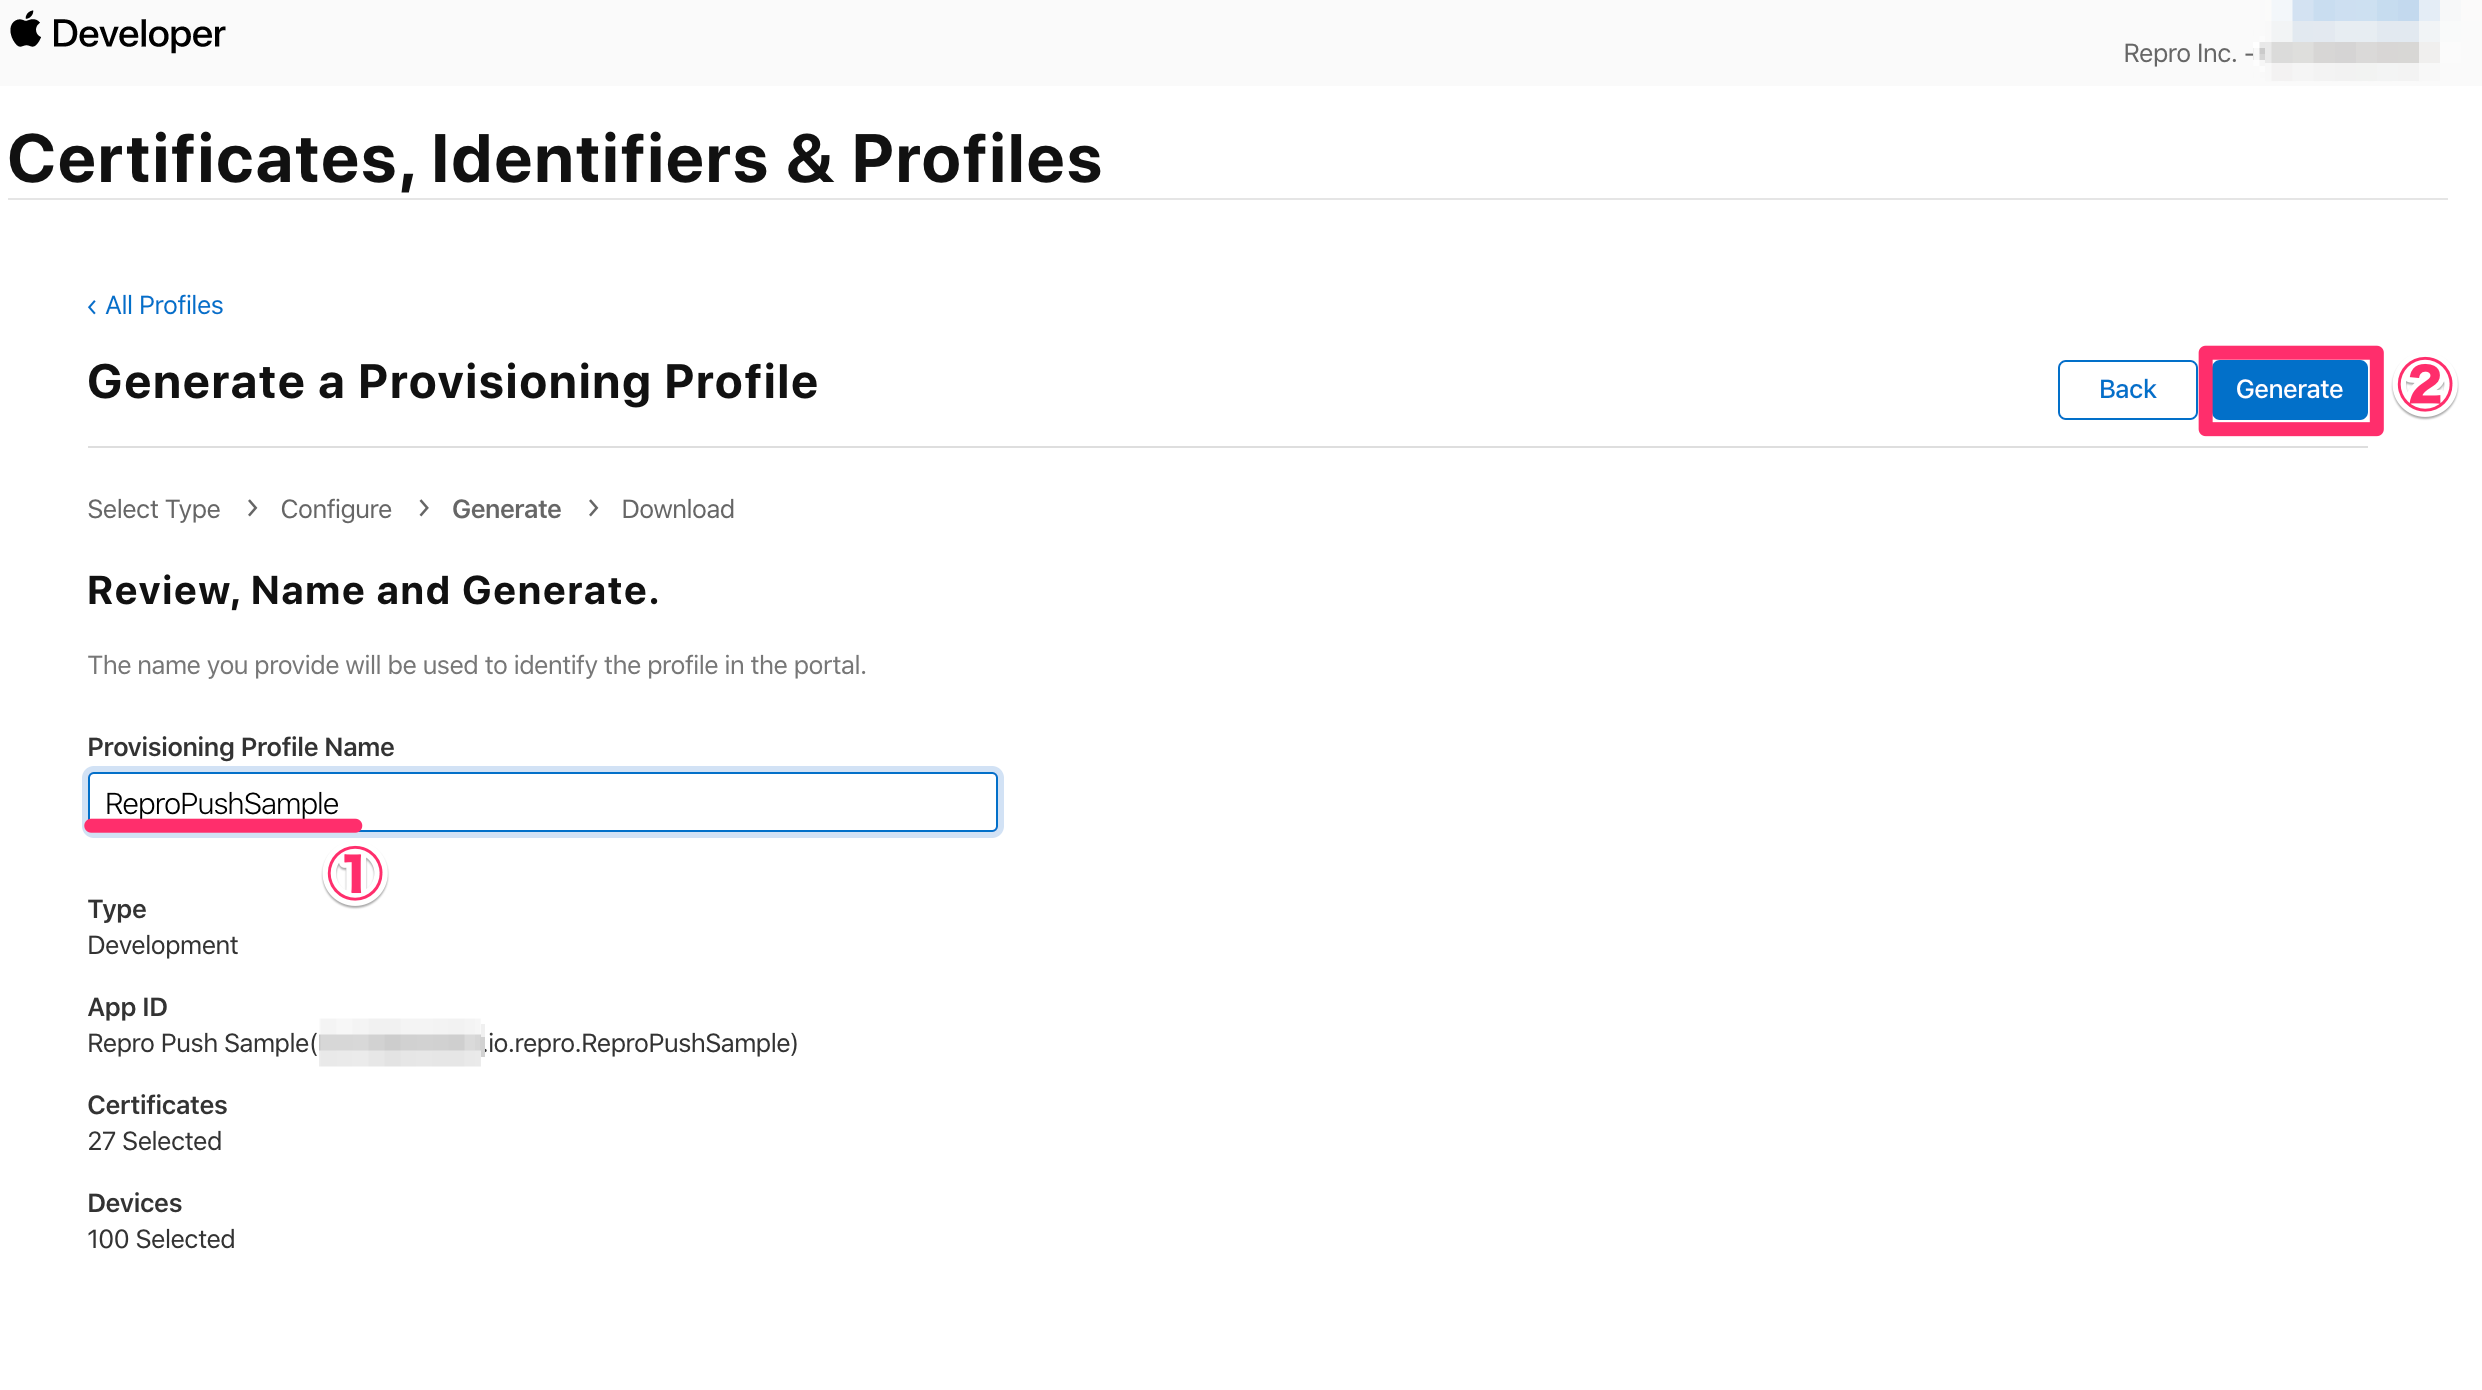
Download the Provisioning Profile.

Double-click the downloaded Provisioning Profile and Xcode will import it.
If the import was properly completed, Xcode will automatically select the Provisioning Profile within the project.

If the Provisioning Profile that was automatically selected is different to the one that you created, it is possible to manually set it as well.
Set the Provisioning Profile that was created in Singing & Capabilities of Xcode.
Take the check off from Automatic manage signing and select the Provisioning Profile which you created from the dropdown menu of Provisioning Profile.
