Custom Message
Warning
When using custom messages, make sure someone with extensive knowledge and experience with HTML/CSS/JavaScript is handling and editing.
To prevent undesired dynamic scripts from occurring, malicious elements and attributes may be deleted from the message, or sanitized and invalidated. Please refer Available HTML tags and attributes for custom messages for a list of available tags.
Unless using the template as is, CSS necessary for Responsive Web Design or CSS animation is not prepared on the custom message editing page. Please prepare accordingly.
Creating a Custom Message
There are two ways to create a Custom Message.
Use standard templates
Select a message you wish to use from the template list. Select a custom type from the web message editing screen.

By clicking the custom button, the text editor will appear on the left of the screen. Your choice of HTML and CSS templates will be set in the editor. Please edit appropriately.

Note
All text and images created in the standard version will be passed onto the custom version.
Anything edited on the custom version will not be transferred to the standard version. Also, when transferring from custom to standard while in the process of editing, all content will be deleted.
Use the Original template
Select the Original template from the list of templates.
Edit Custom Message
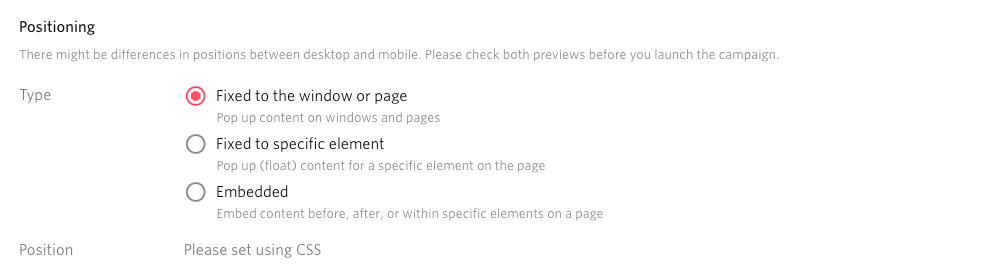
Settings for where to locate Custom Message
When using the Original template, select the display type. See Display Position for more details.
Copy the pattern
Click copy pattern under ADD.

A copied pattern will appear, and the message is ready to be edited. If you duplicated the Custom Message pattern, you will not be able to change it to the standard version.
Duplicate a Custom Message
Select the Custom Message and click duplicate. You will not be able to change to a standard message if the original copied message is from the custom version.

Open the message editor and edit your message.
Edit the contents
Editing the contents. Please follow the below rules for HTML when editing.
State it so that the top level element will be singular.
<!-- Good -->
<div>
  <div>message1</div>
  <div>message2</div>
</div>

<!-- Bad -->
<div> message1</div>
<div> message2</div>
State it so that the top level element will be surrounded by a tag.
<!-- Good -->
<p>message</p>

<!-- Bad -->
message
Set the element which closes the message
Set the: code: data-repro–wrapper attribute on the outermost element of the message.
<div class="container" data-repro--wrapper> message </div>
Add the
data-repro--closeattribute to the target element.
<div class="btn" data-repro--close> ☓ </div>
Setting the action button for campaign measurement
By setting attributes for action buttons, it is possible to count clicks on any element as Button 1 Clicks and Button 2 Clicks displayed in the distribution result of effect measurement.
Set the: code: data-repro–wrapper attribute on the outermost element of the message.
<div class="container" data-repro--wrapper> message </div>
Add attributes
data-repro--primary-btnanddata-repro--secondary-btnto each element.
<div class="btn" data-repro--primary-btn>button_1</div>
<div class="btn" data-repro--secondary-btn>button_2</div>
Note
If you use an action button in your custom message, Please be careful not to delete the data-repro–primary-btn or data-repro–secondary-btn attribute by mistake. It will not measure the effect correctly.
Note
By adding the data-repro–no-close attribute to the action button, it is possible to change the behavior so that the message is not closed when the button is pressed.
Note
Please note that due to the WebSDK specification, even if you set target=”_blank” to the action button, the transition to the link destination will be overwritten by the following behavior
When a link from the same domain as the website in question is set as the transition destination
Transition to the link destination on the same tab.
When a link of a different domain from the website in question is set as the transition destination
Transition to the link destination on a different tab.
Animation setting
By changing the opacity property to 0 and 1 , it allows the Custom Message to either appear or disappear within the Web SDK targeted element.
Setting the images for Custom Messages
To insert an image in a message, bring the cursor to the desired place in the HTML, and click the “add image” button in the text editor below.

When you upload an image from a folder saved onto the computer,the following tag
img src=and a URL for the image will appear where the cursor is, and you will be able to see the image in the preview.

Note
The maximum image size allowed to upload using the “add image” button is 1MB. There is no limit to the file size if you wish to not use the “add image” button, however our recommended image size will still be 1MB.
Please verify the actual image since the preview function is only within the operating screen.
To use the preview function within the actual screen, please check How to use preview function within Web Message and utilize the service.
Script tag is not applicable.
Setting the scope of CSS in the Custom Message
By default,the scope of CSS created in the Custom Message is only valid limited to be in the Custom Message, as the checkbox in the bottom of content indicates.

If you want to change the scope of CSS from local scope to global scope, please uncheck the box.
All other settings
For all other message settings including like delivery setting, please refer to Web Message