Scenario
Scenarios allow communication scenarios to be designed, managed and operated according to different user behaviors. Depending on the theme (e.g., product purchase) and expected user behavior, the delivery timing and content of Web messages, in-app messages, push notifications, and e-mails can be differentiated.
Scenario design across web and apps is also possible, enabling communication according to the customer journey.
Before starting a scenario
You must have administrator or operator privileges to create scenarios. To change privileges, see support site.
Create a scenario
Now let’s create a scenario. The procedure for creating a scenario is to first create a scenario and then use the Scenario Builder to place the campaign as a step in the scenario.
Create a new scenario
Select [MARKETING] > [SCENARIO] from the side menu.

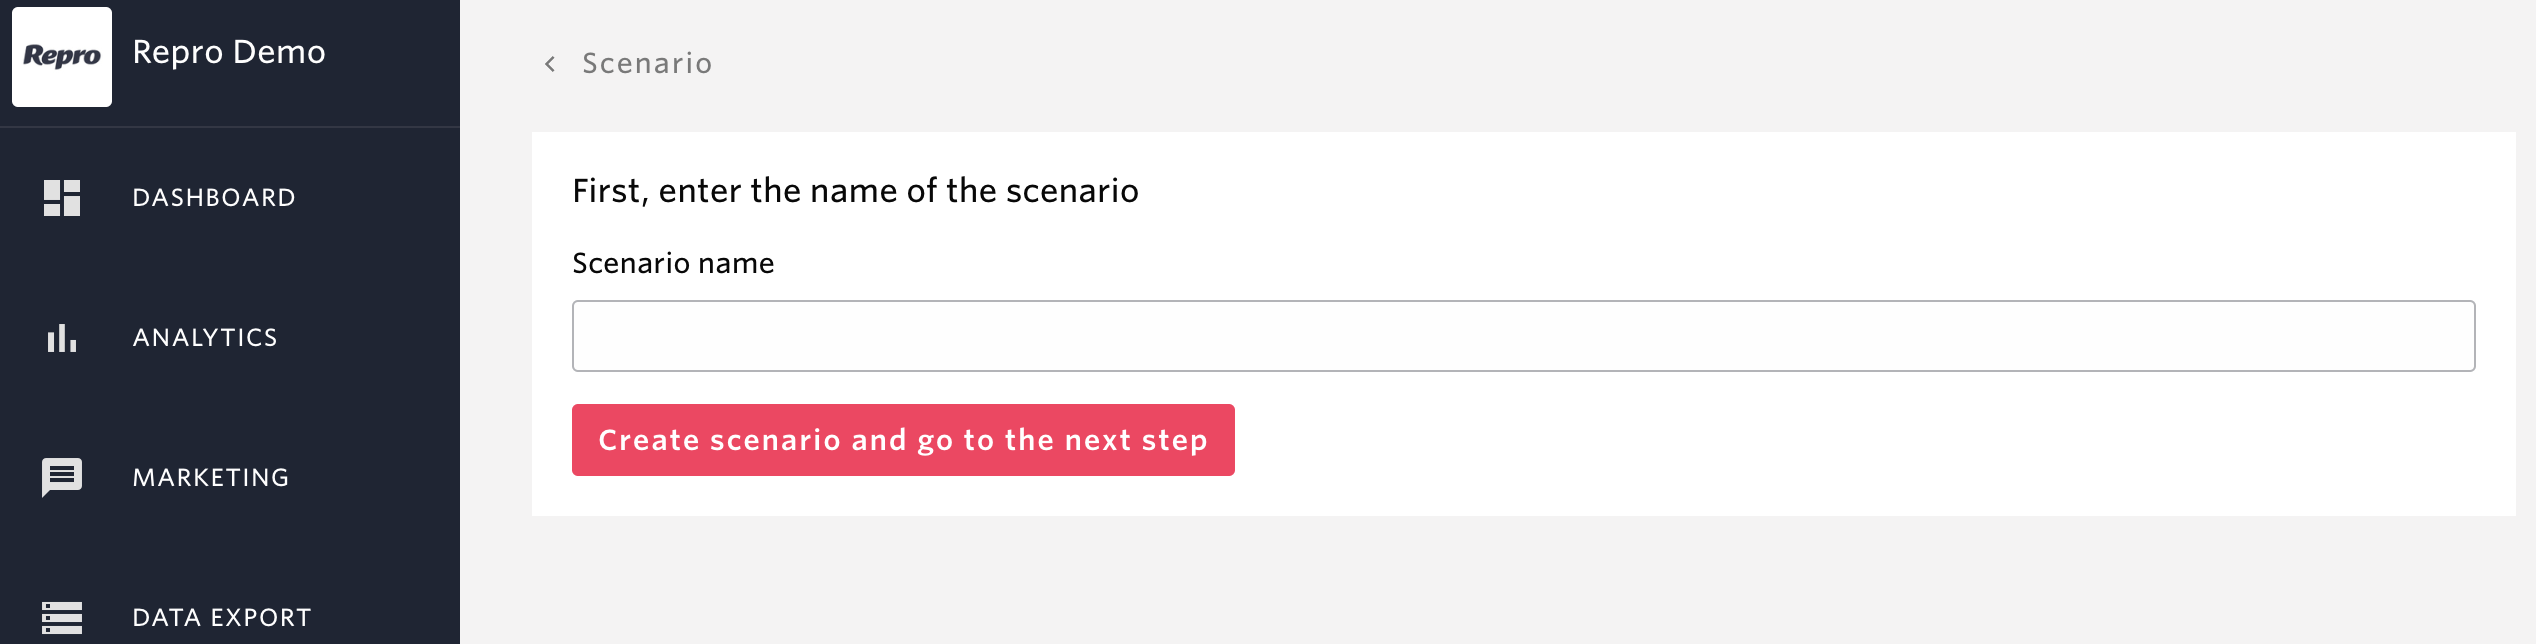
From the Scenario List page, click on [New Scenario].

The Scenario Creation screen will appear.
items |
Description |
|---|---|
Scenario name |
Enter the name of the scenario, up to 255 characters. |
Enter a Scenario Name and click Create Scenario and go to the next step and Next.

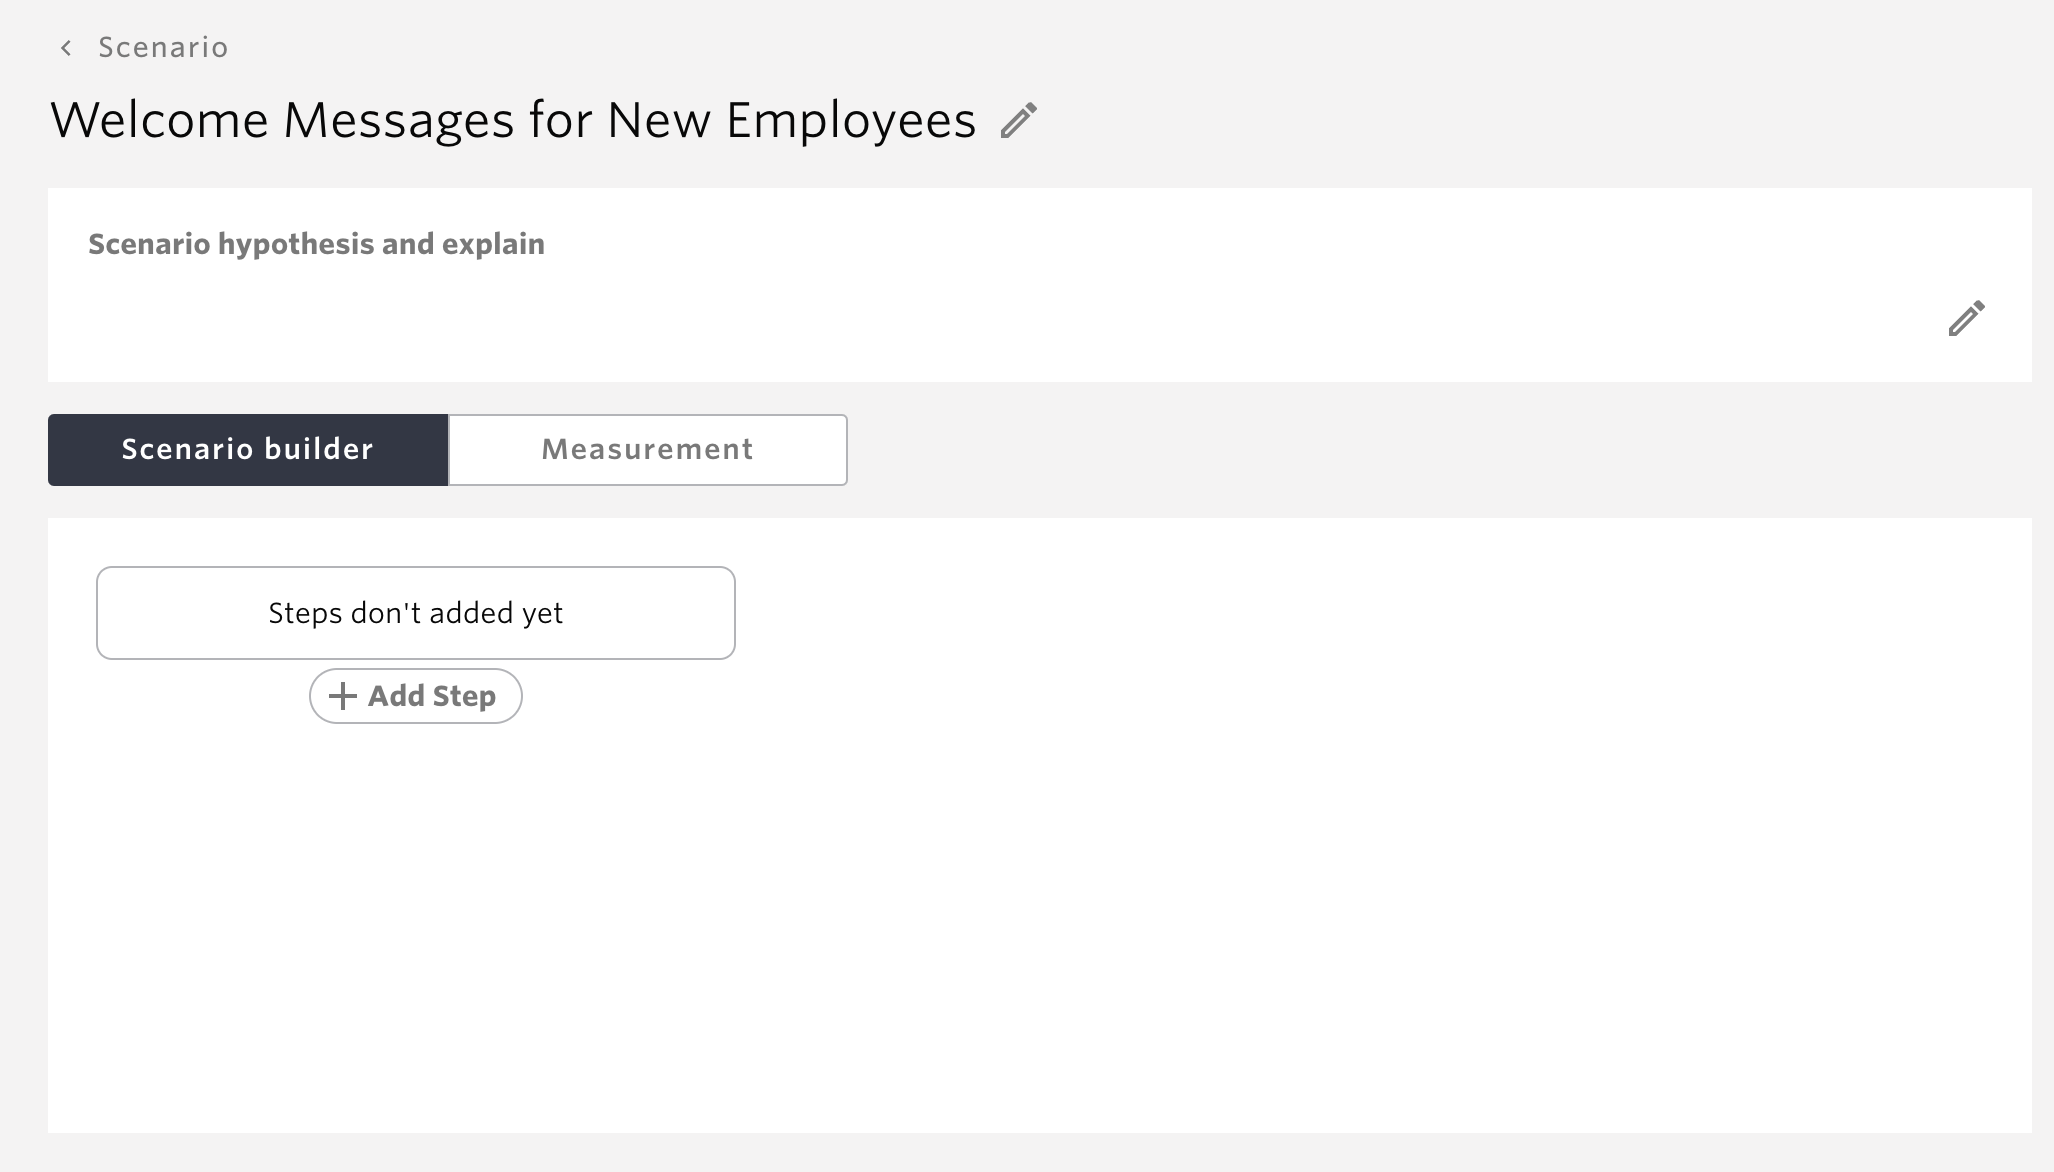
A scenario is created.
items |
Description |
|---|---|
Scenario hypothesis and explain |
Enter the aim and description of the scenario you have created. 5000 characters or less. |
Scenario builder/Measurement switching tabs |
Scenario builder
Select to create a scenario.
Measurement
Displays the results of the scenario delivery.
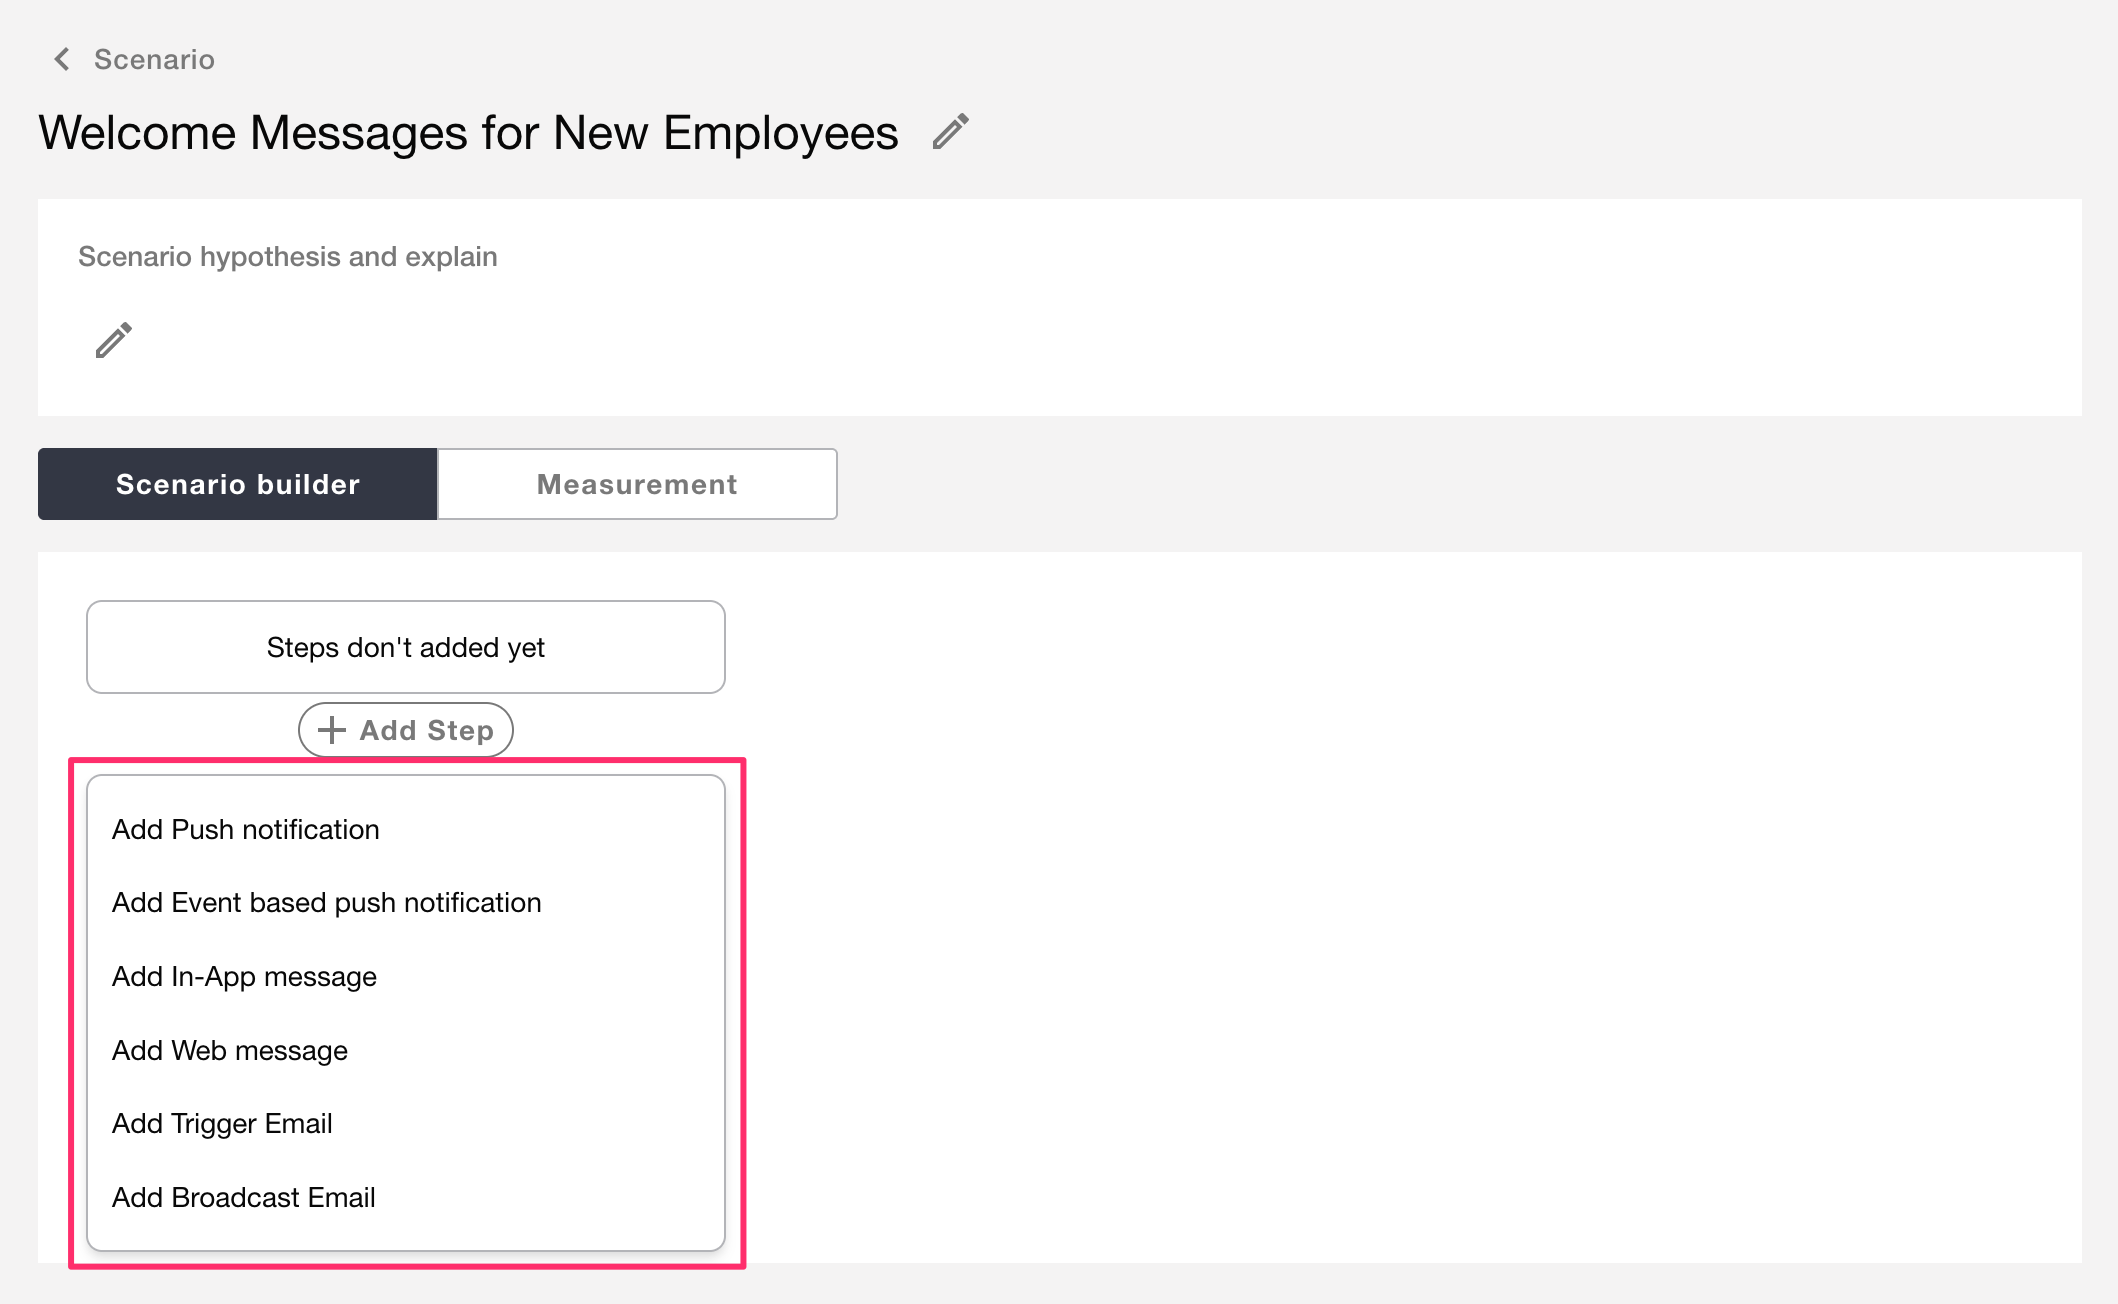
|
Add Step |
Add steps to the scenario. |
A scenario has now been created. Next, add a campaign to the steps using the Scenario Builder.
Add a campaign to the steps and build a scenario
Next, add a campaign to the steps and build a scenario.
Assemble a scenario
Now let’s build a scenario.
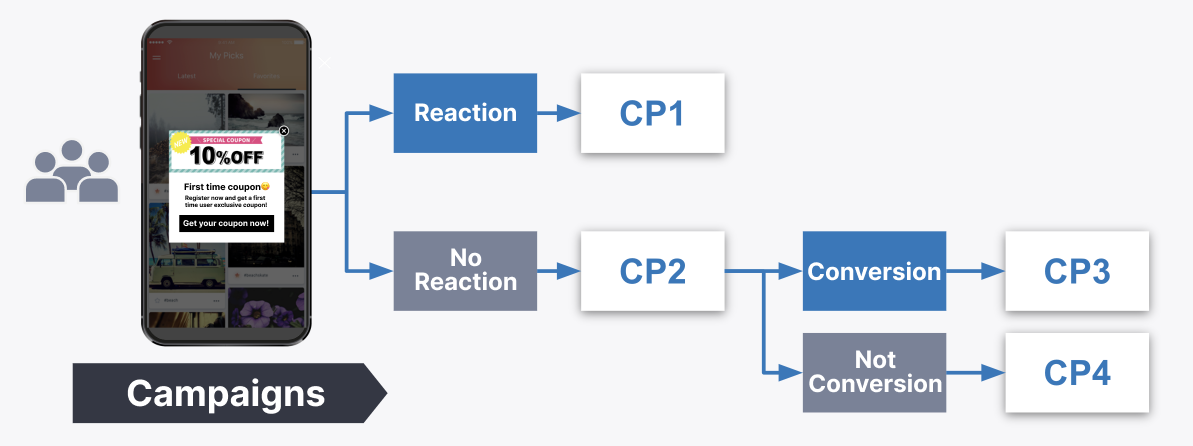
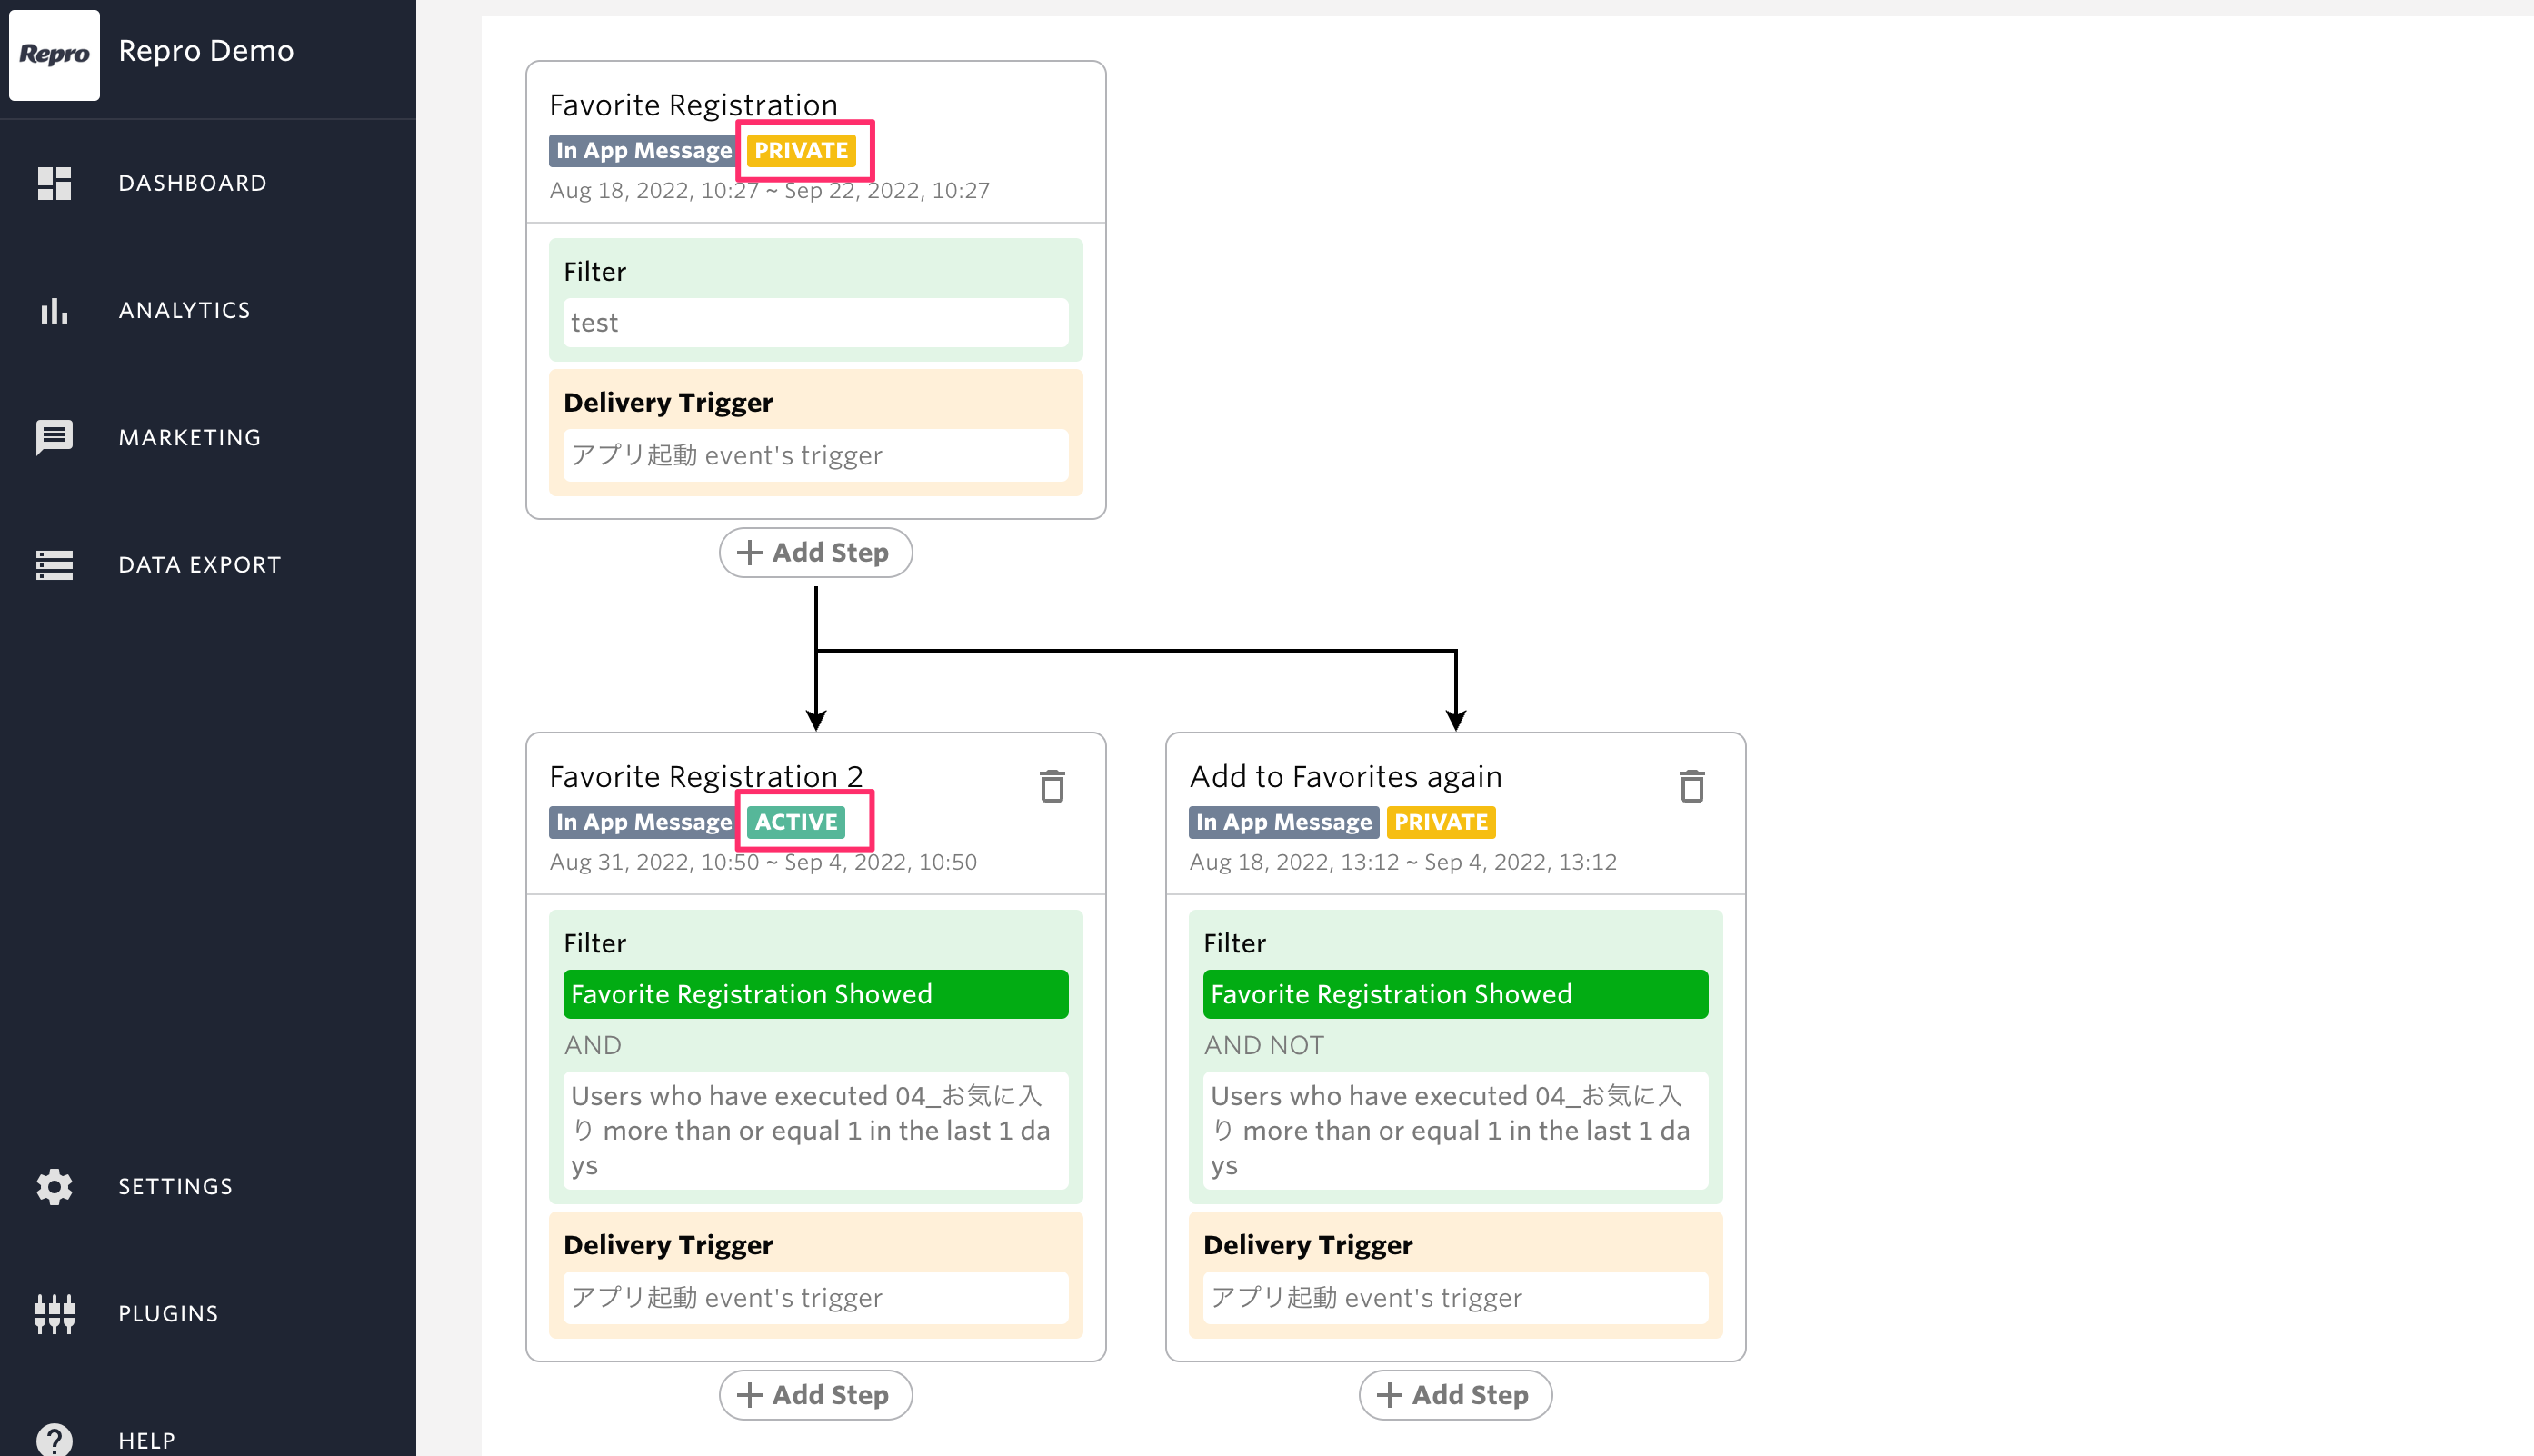
In this case, the initial message will encourage the customer to register as a favorite, after which the customer will receive one of the following two campaigns, depending on the conditions.
If you have added a favorite: Send a message appealing to create a playlist
If you do not subscribe to a favorite: Send an appeal message when you subscribe to a favorite.
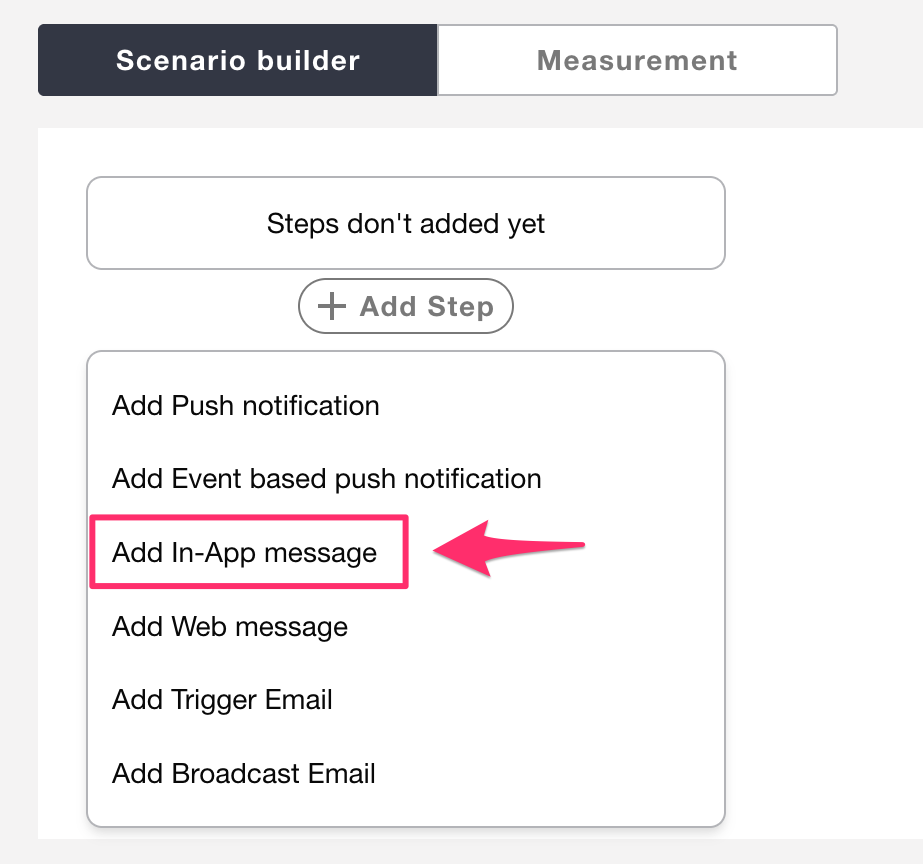
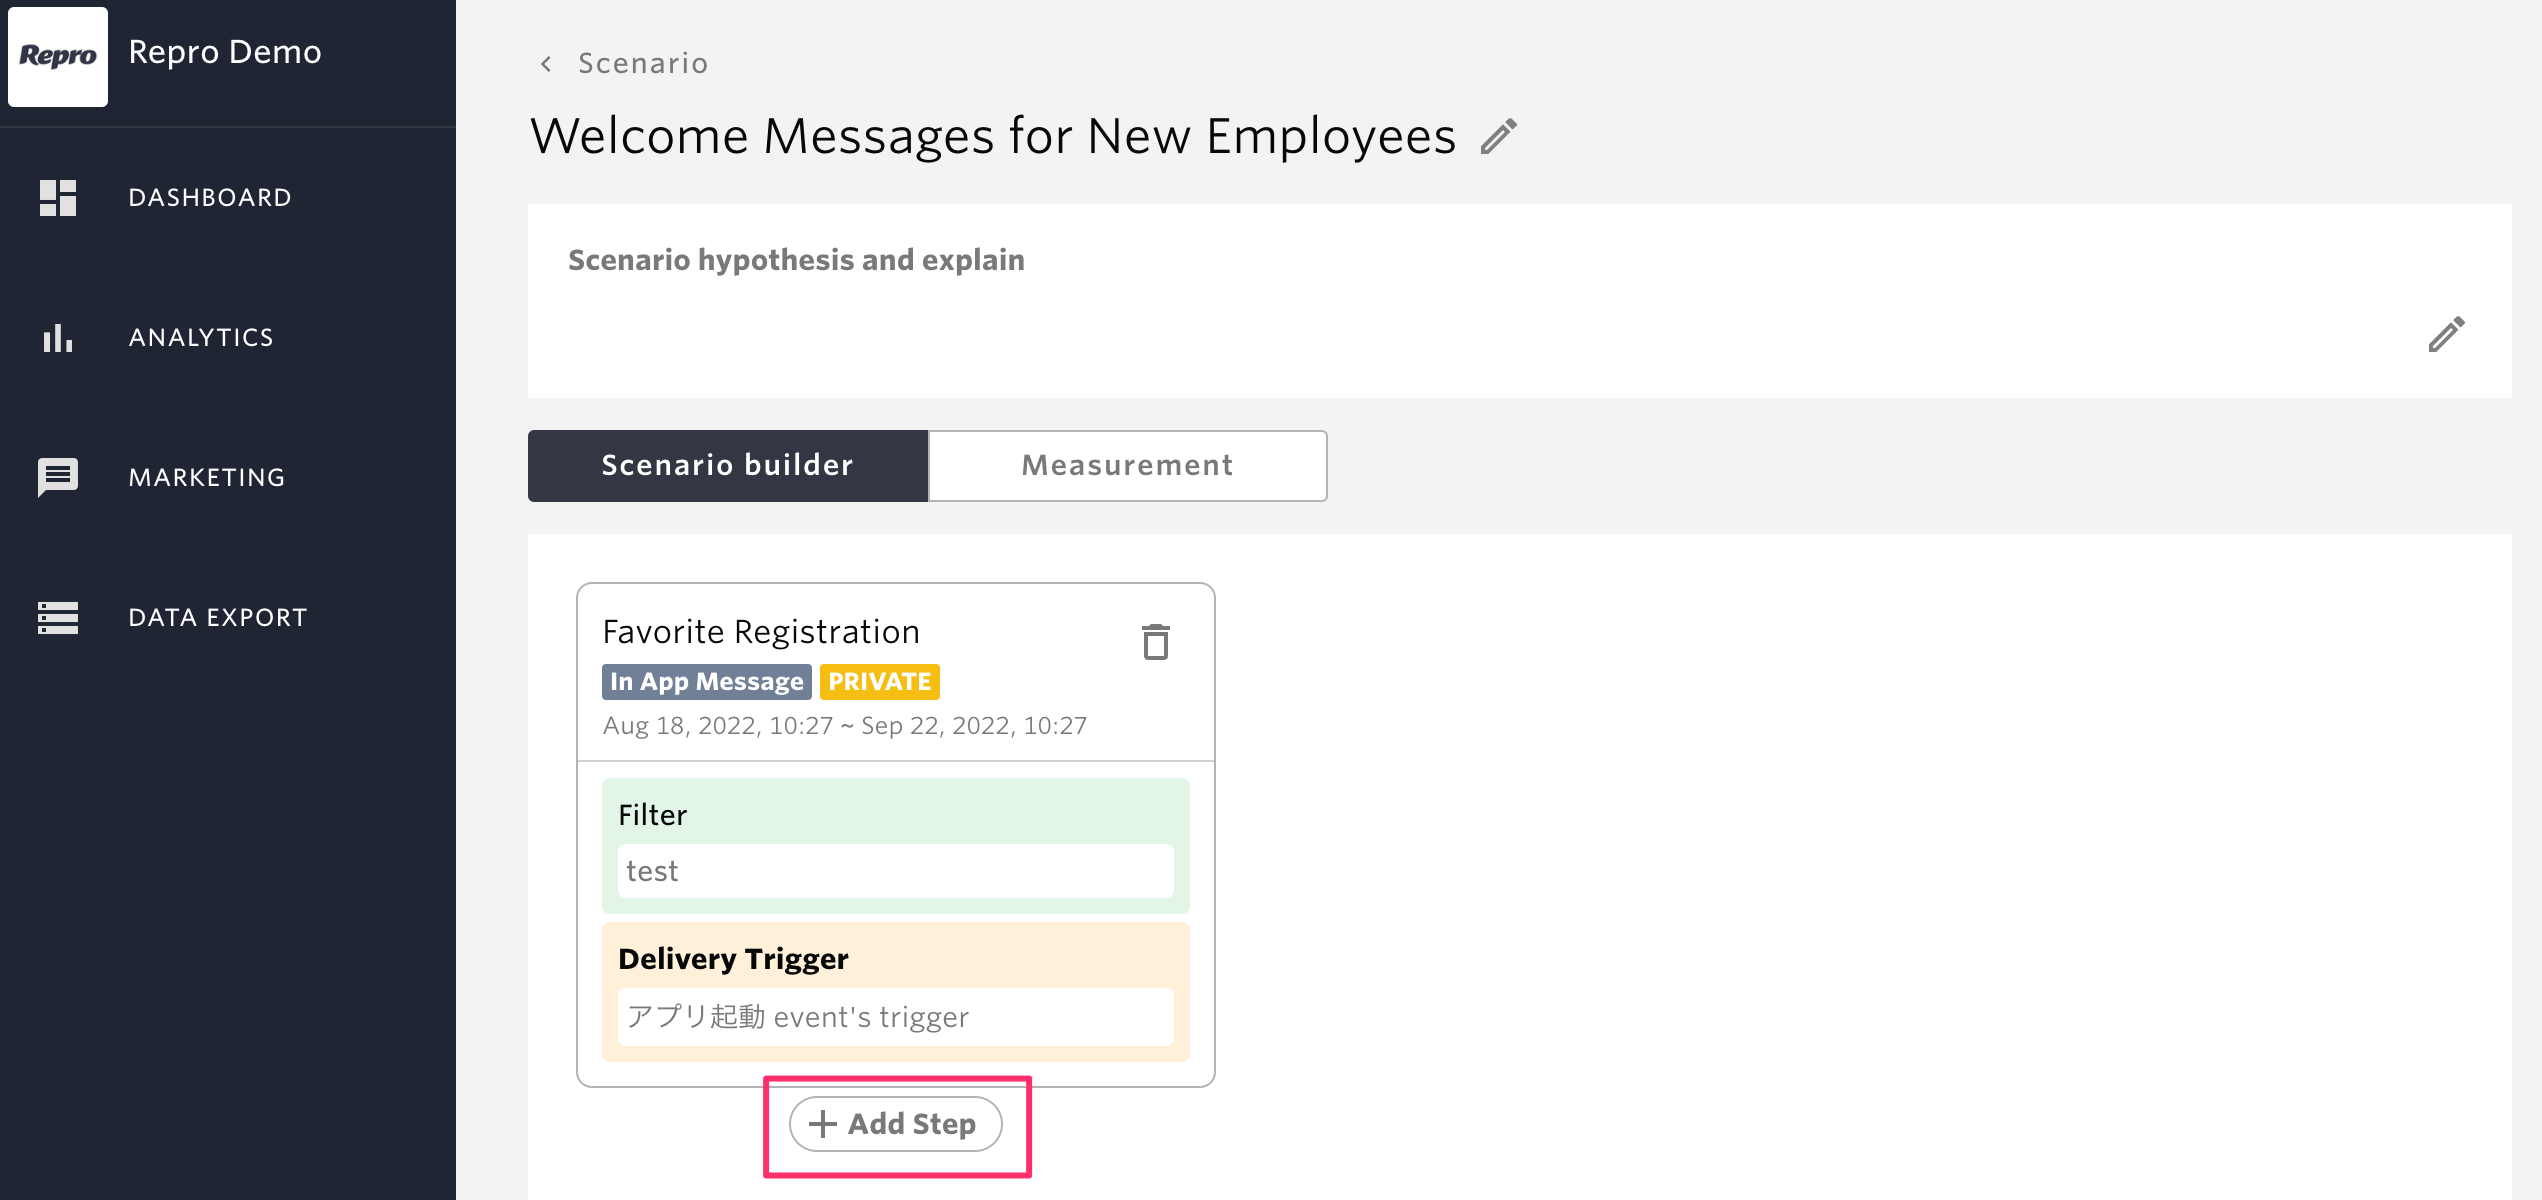
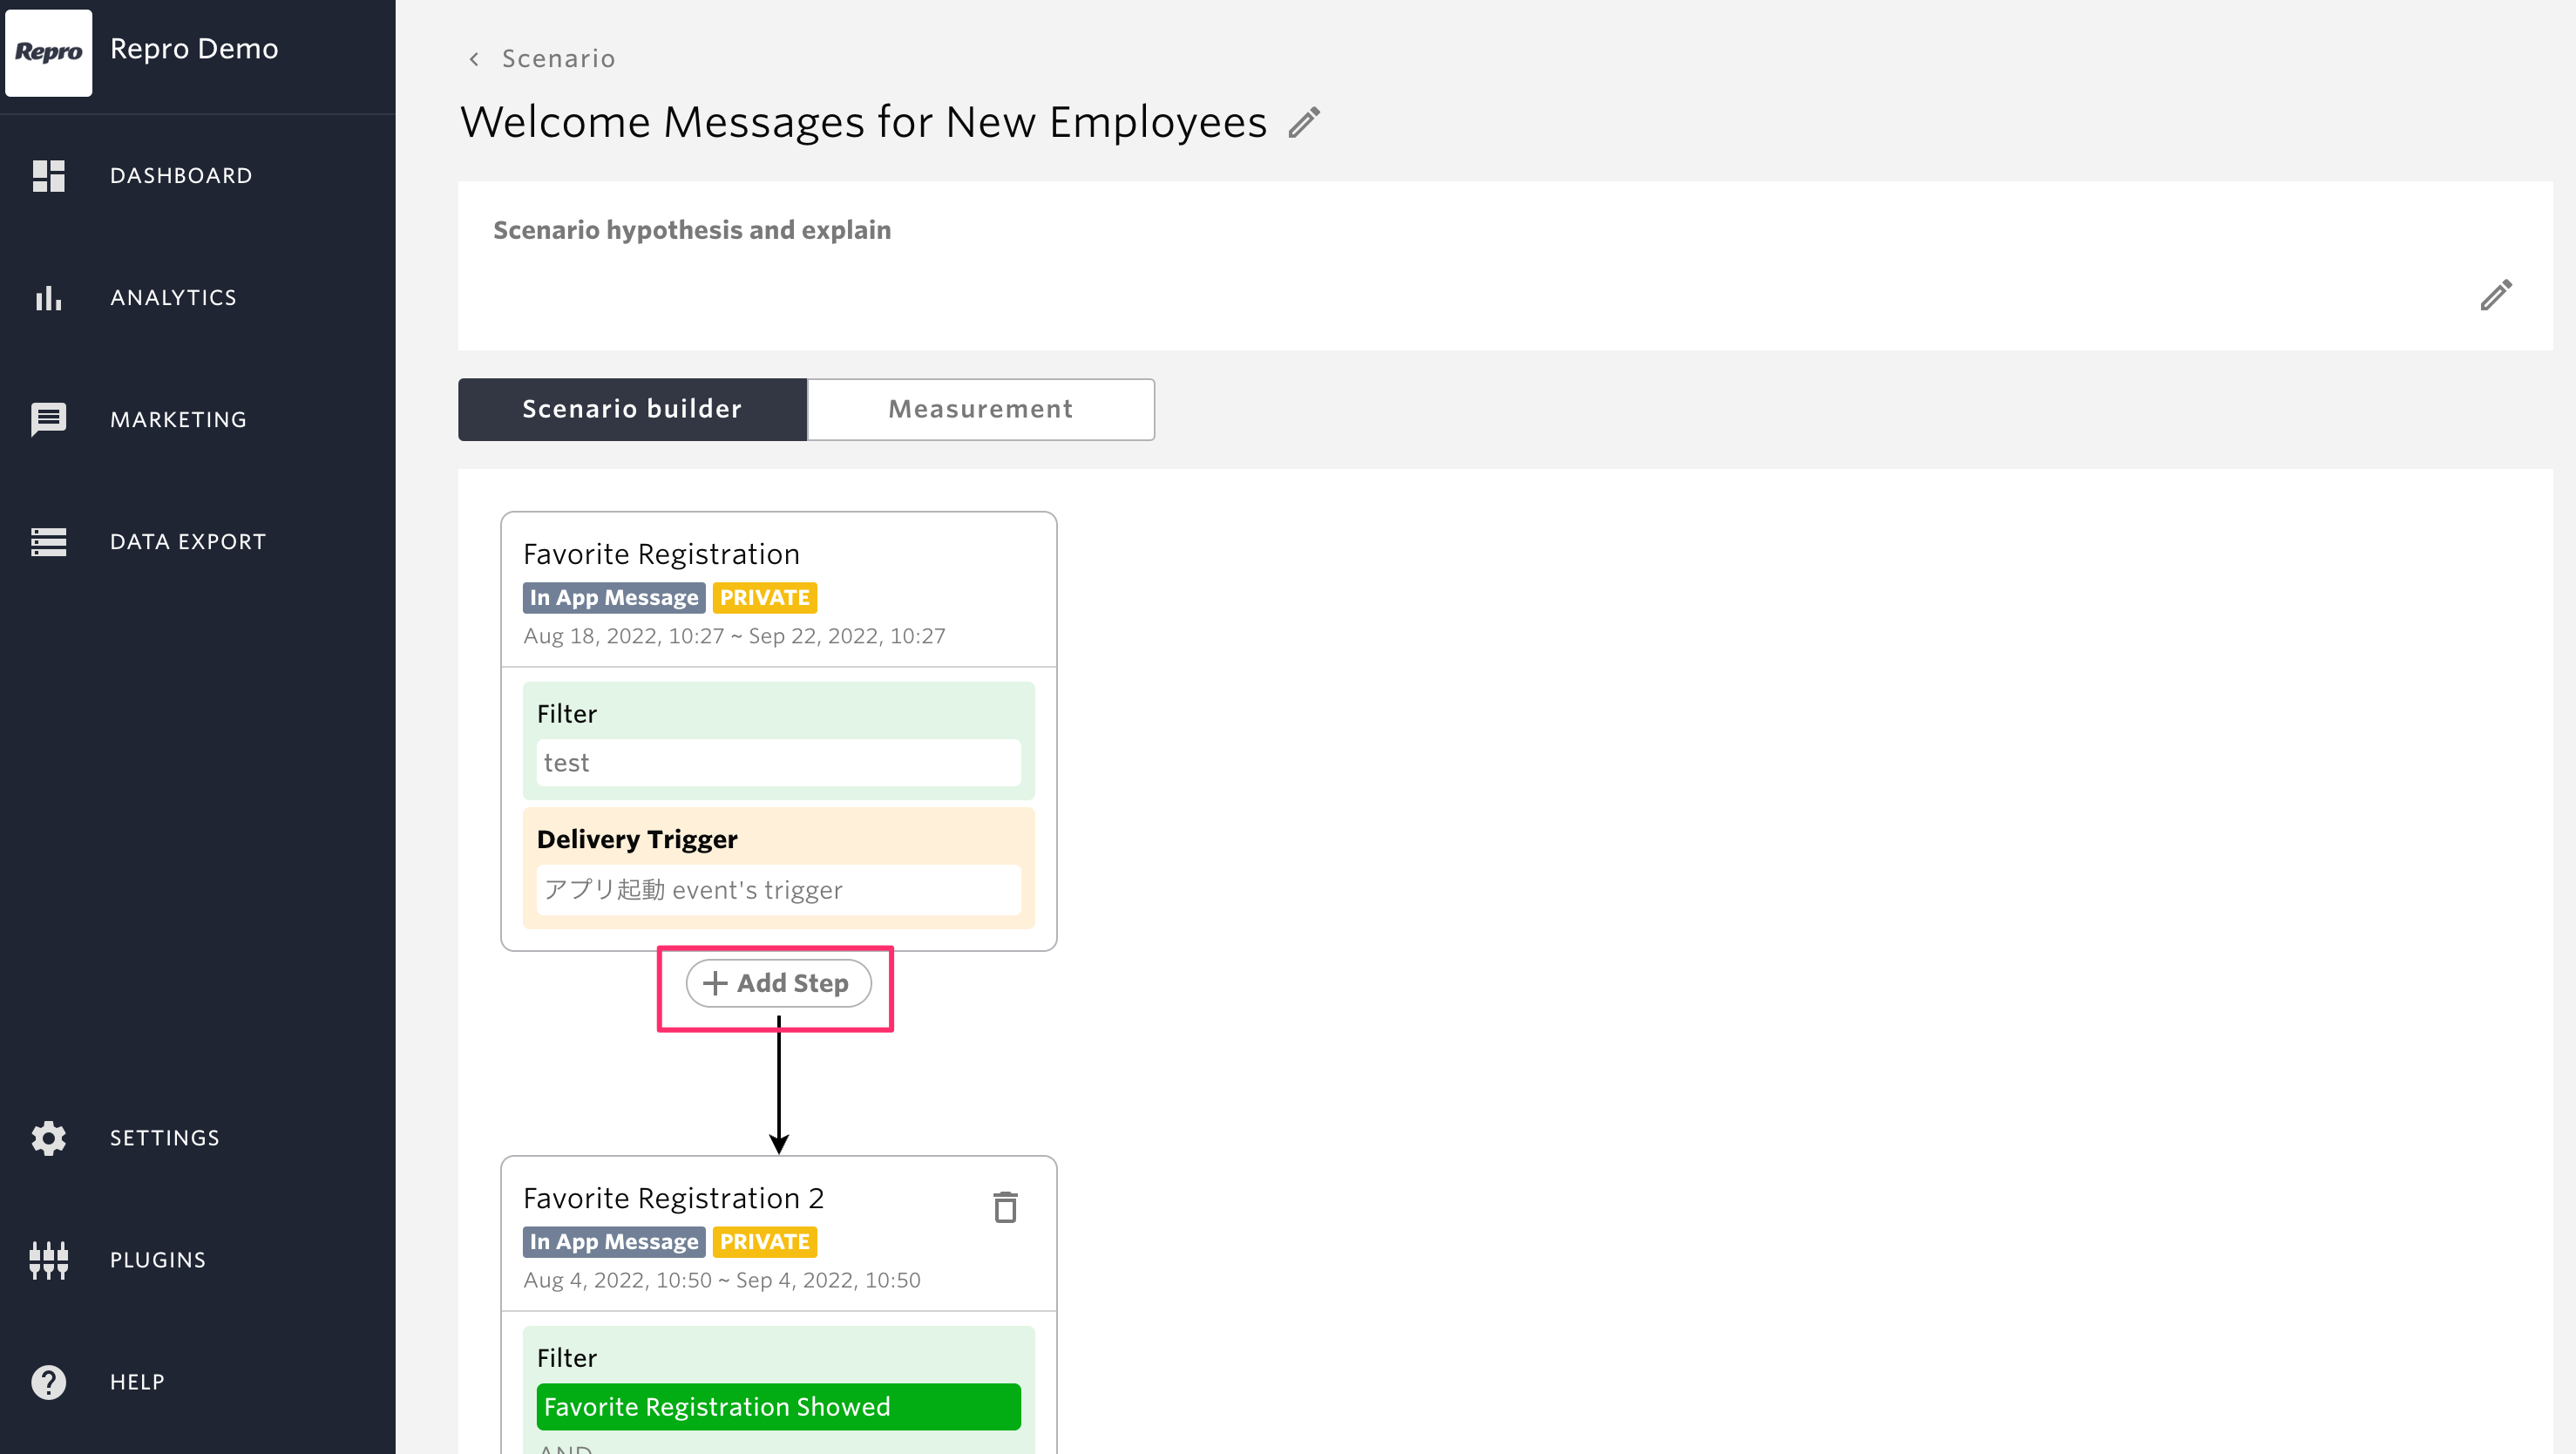
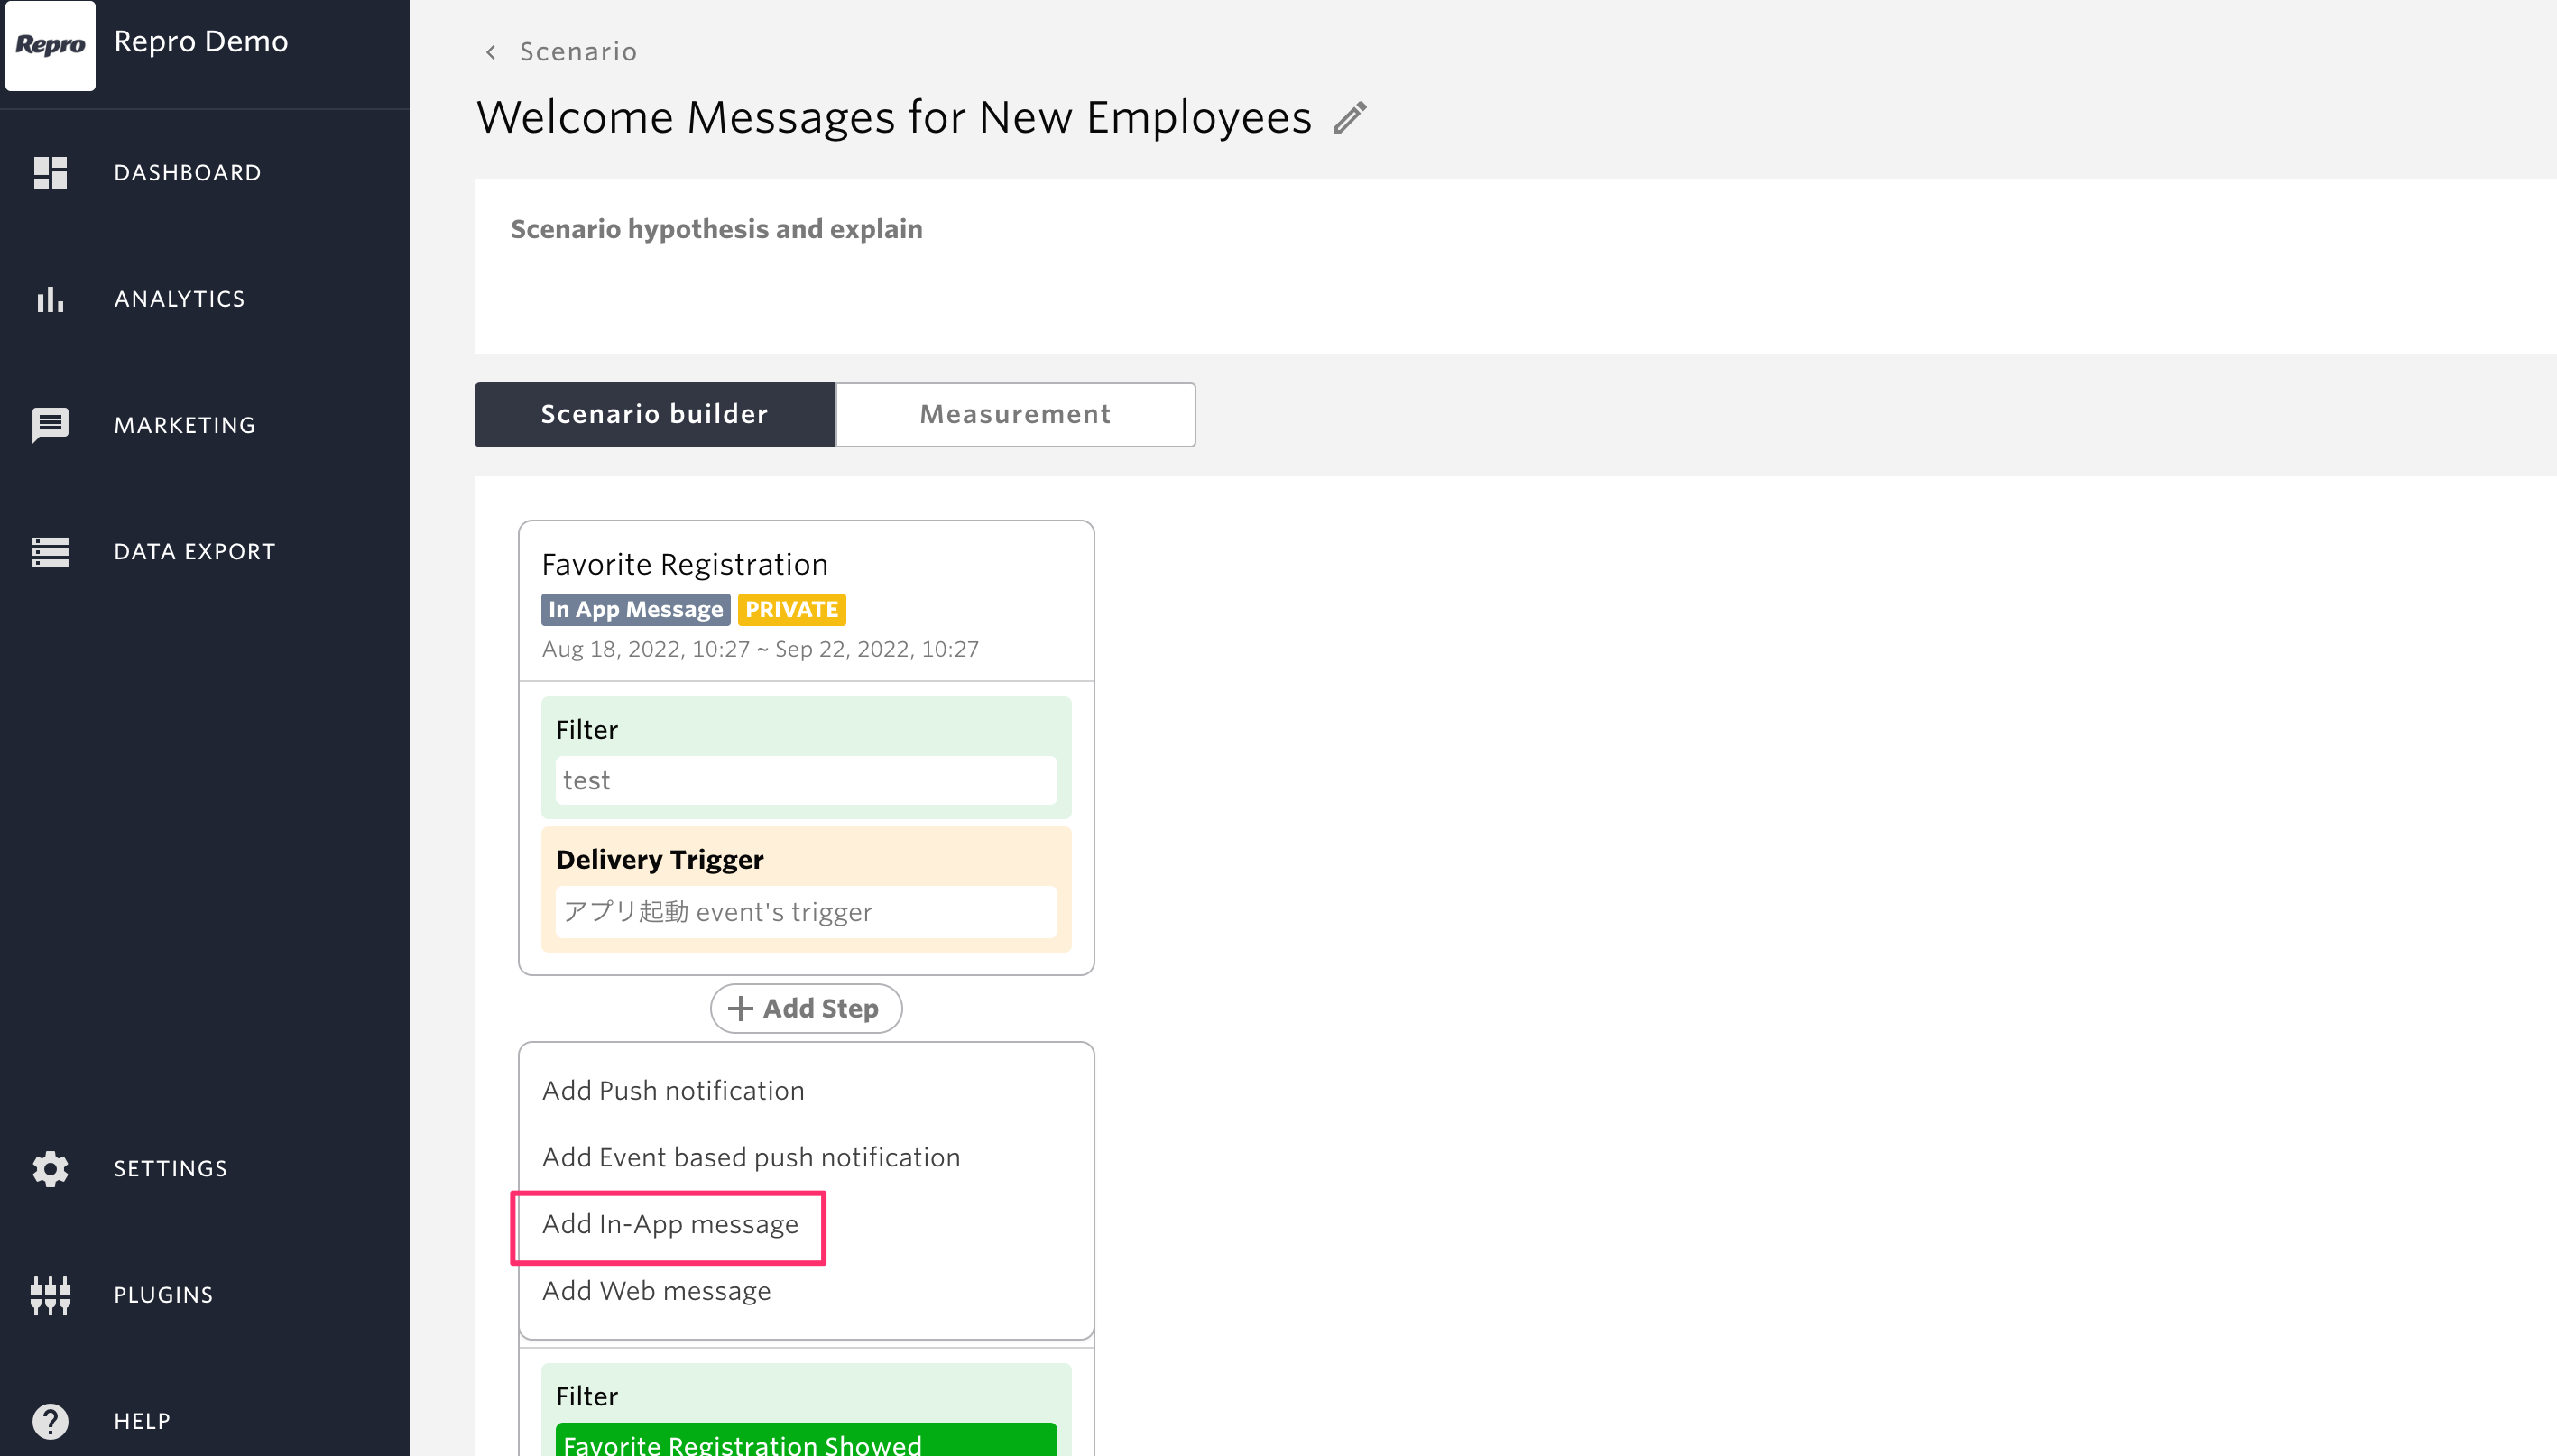
From the Scenario Builder, click [Add Step] to add a campaign.
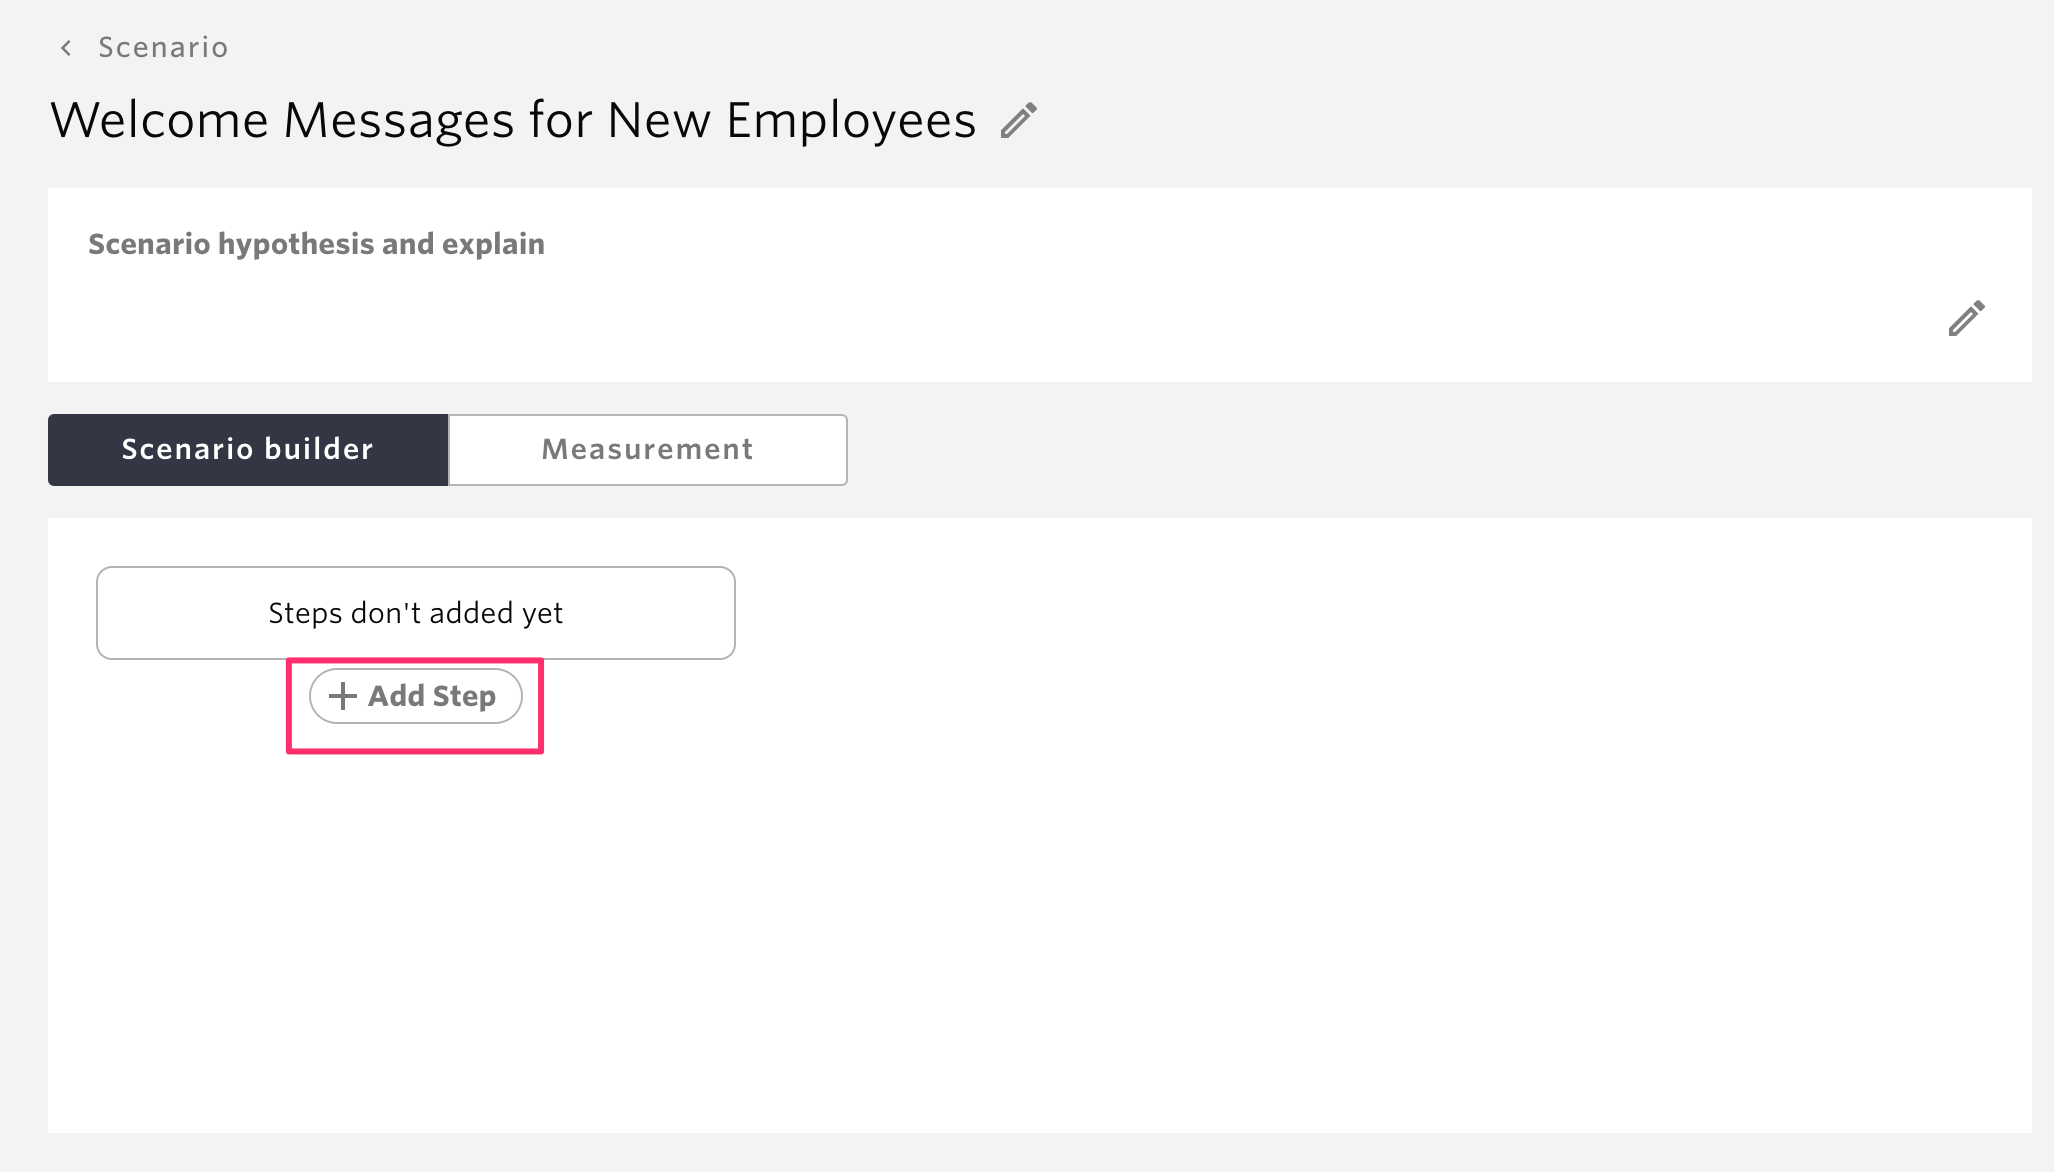
A pop-up campaign will appear, select the campaign you wish to add.
items |
Description |
|---|---|
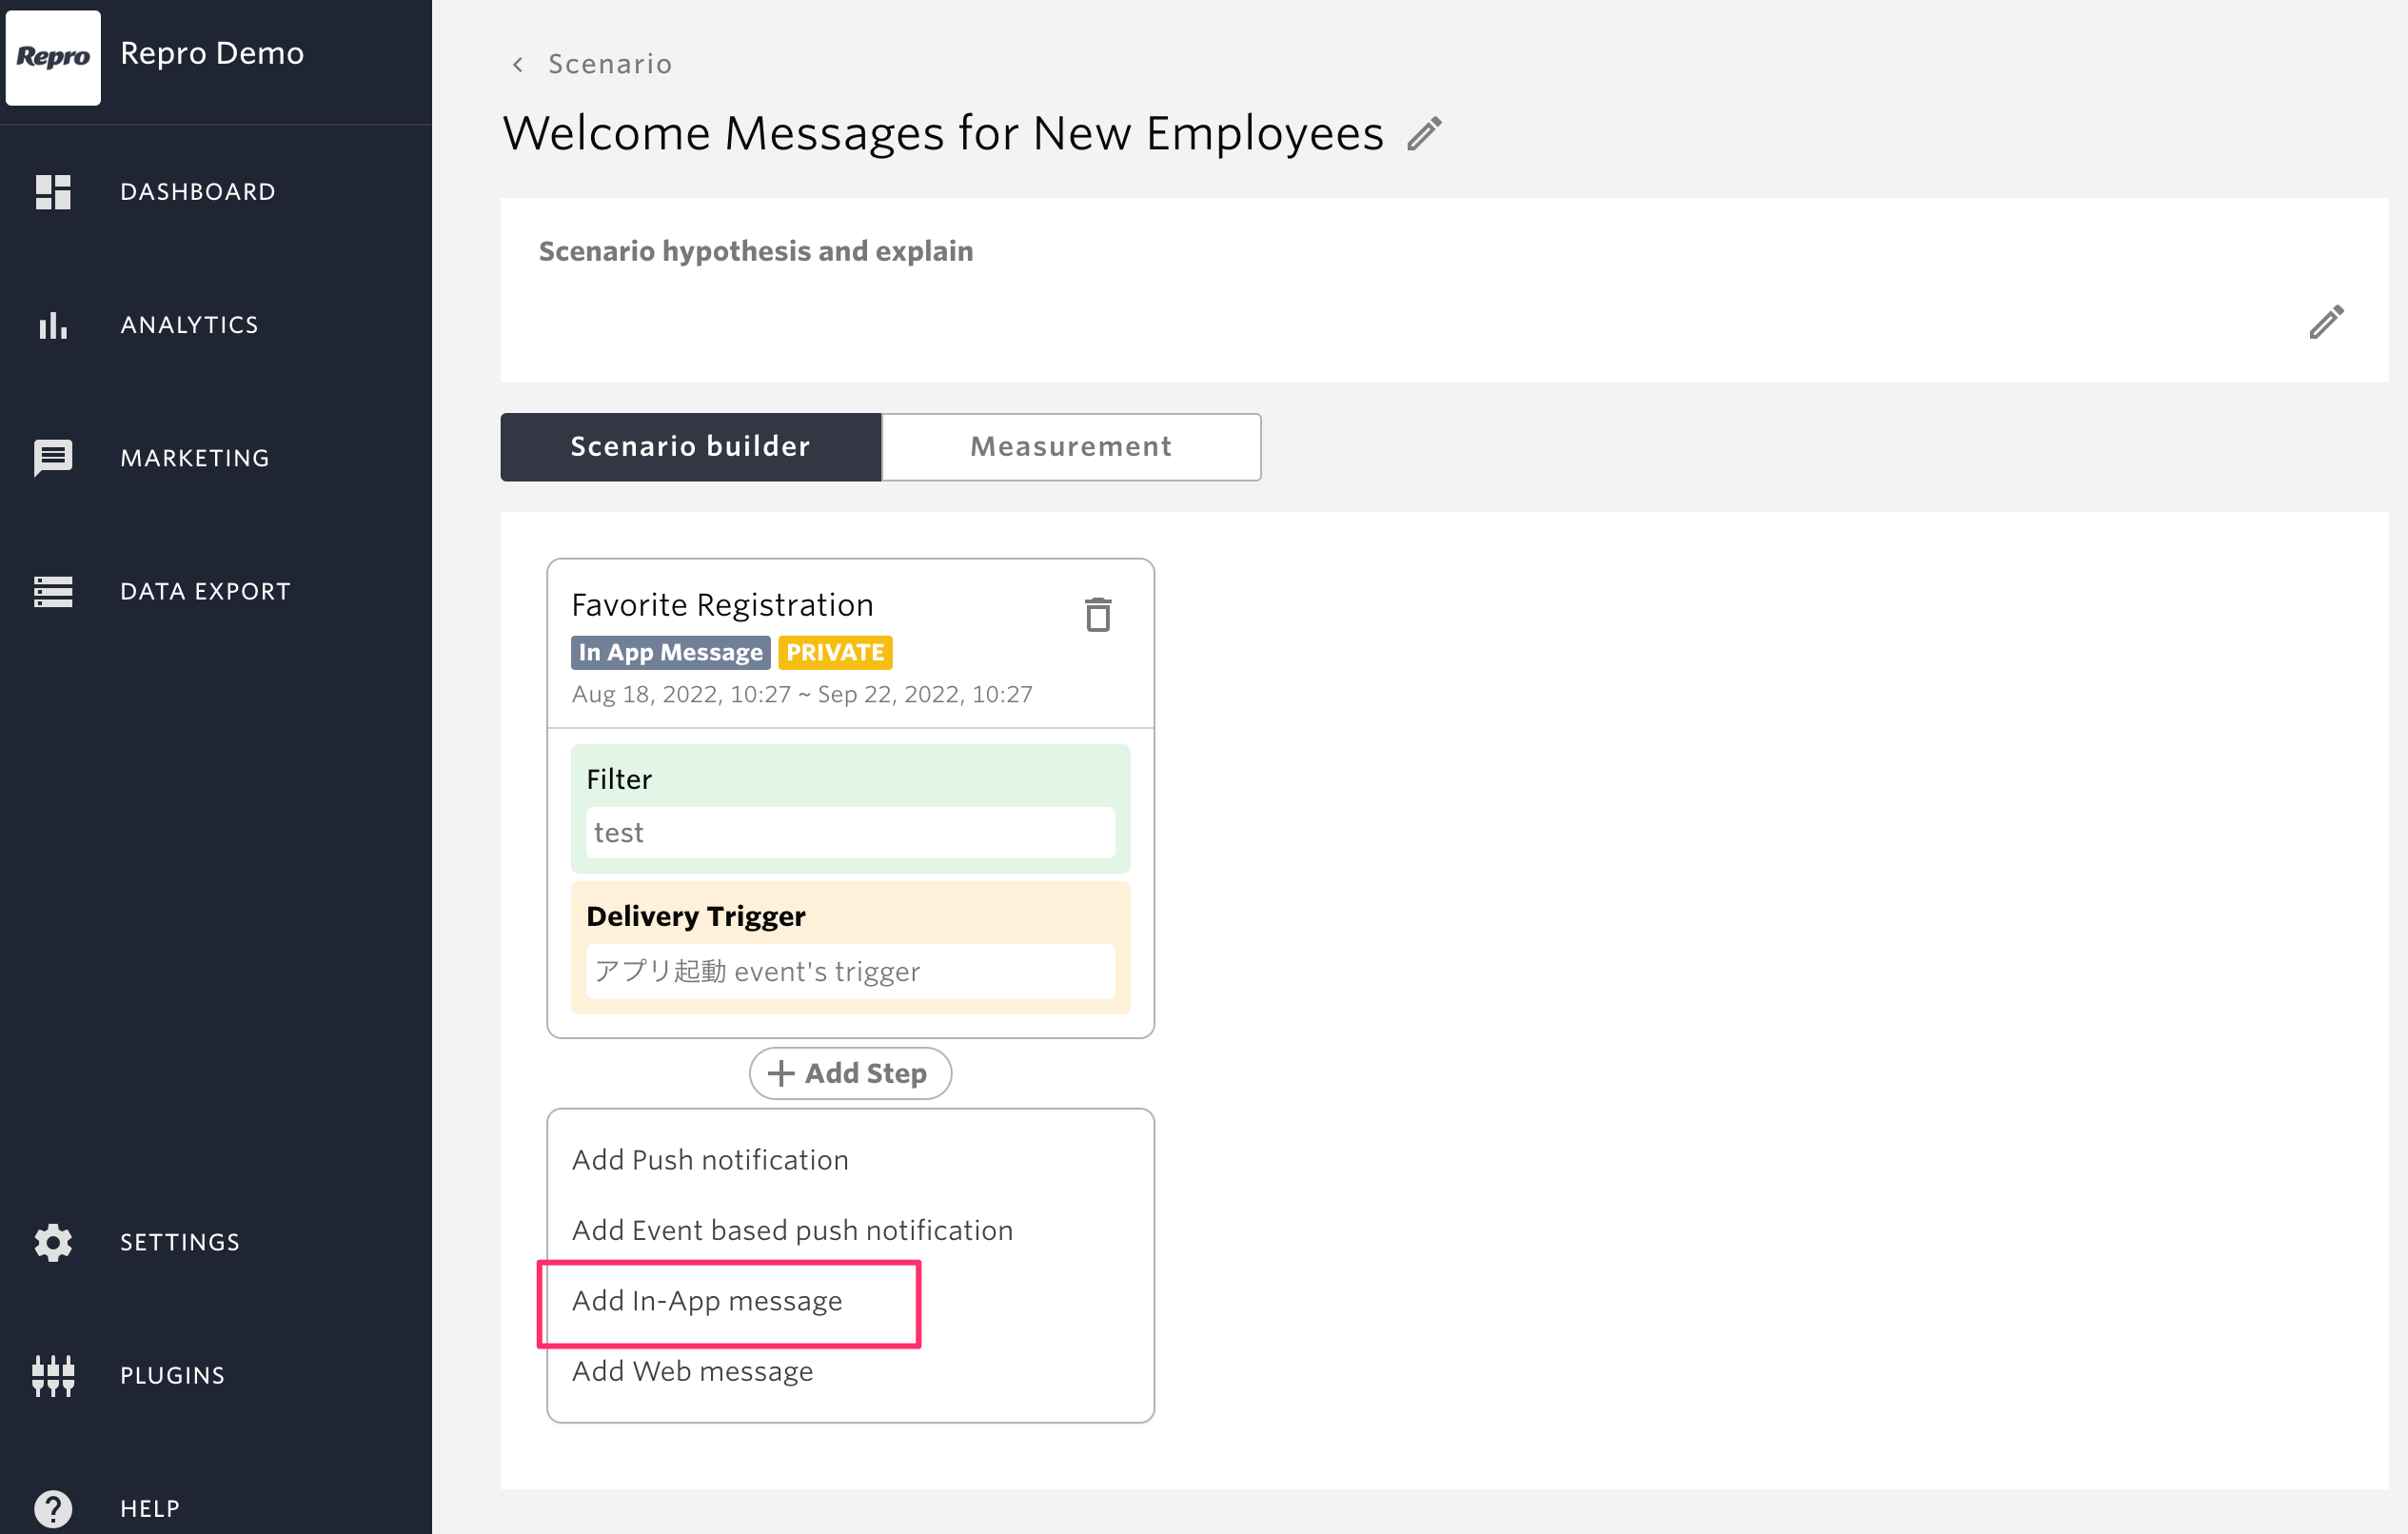
Add Push notification |
The screen will be redirected to the Push Notification |
Add Event based push notification |
The screen will be redirected to the Event Based Push Notification |
Add in-App message |
The screen will be redirected to the In-App Message |
Add Web Message |
The screen will be redirected to the Custom Message |
Add Broadcast mail |
The screen will be redirected to the Broadcast mail |
Add Trigger mail |
The screen will be redirected to the Trigger mail |
The scenario allows for the addition of the above four campaigns.
Note
For information on how to create each campaign, please refer to the respective creation documents.
Clicking on Campaigns will take you to the Create page for each campaign. In this case, click on [Add In-App Messages].
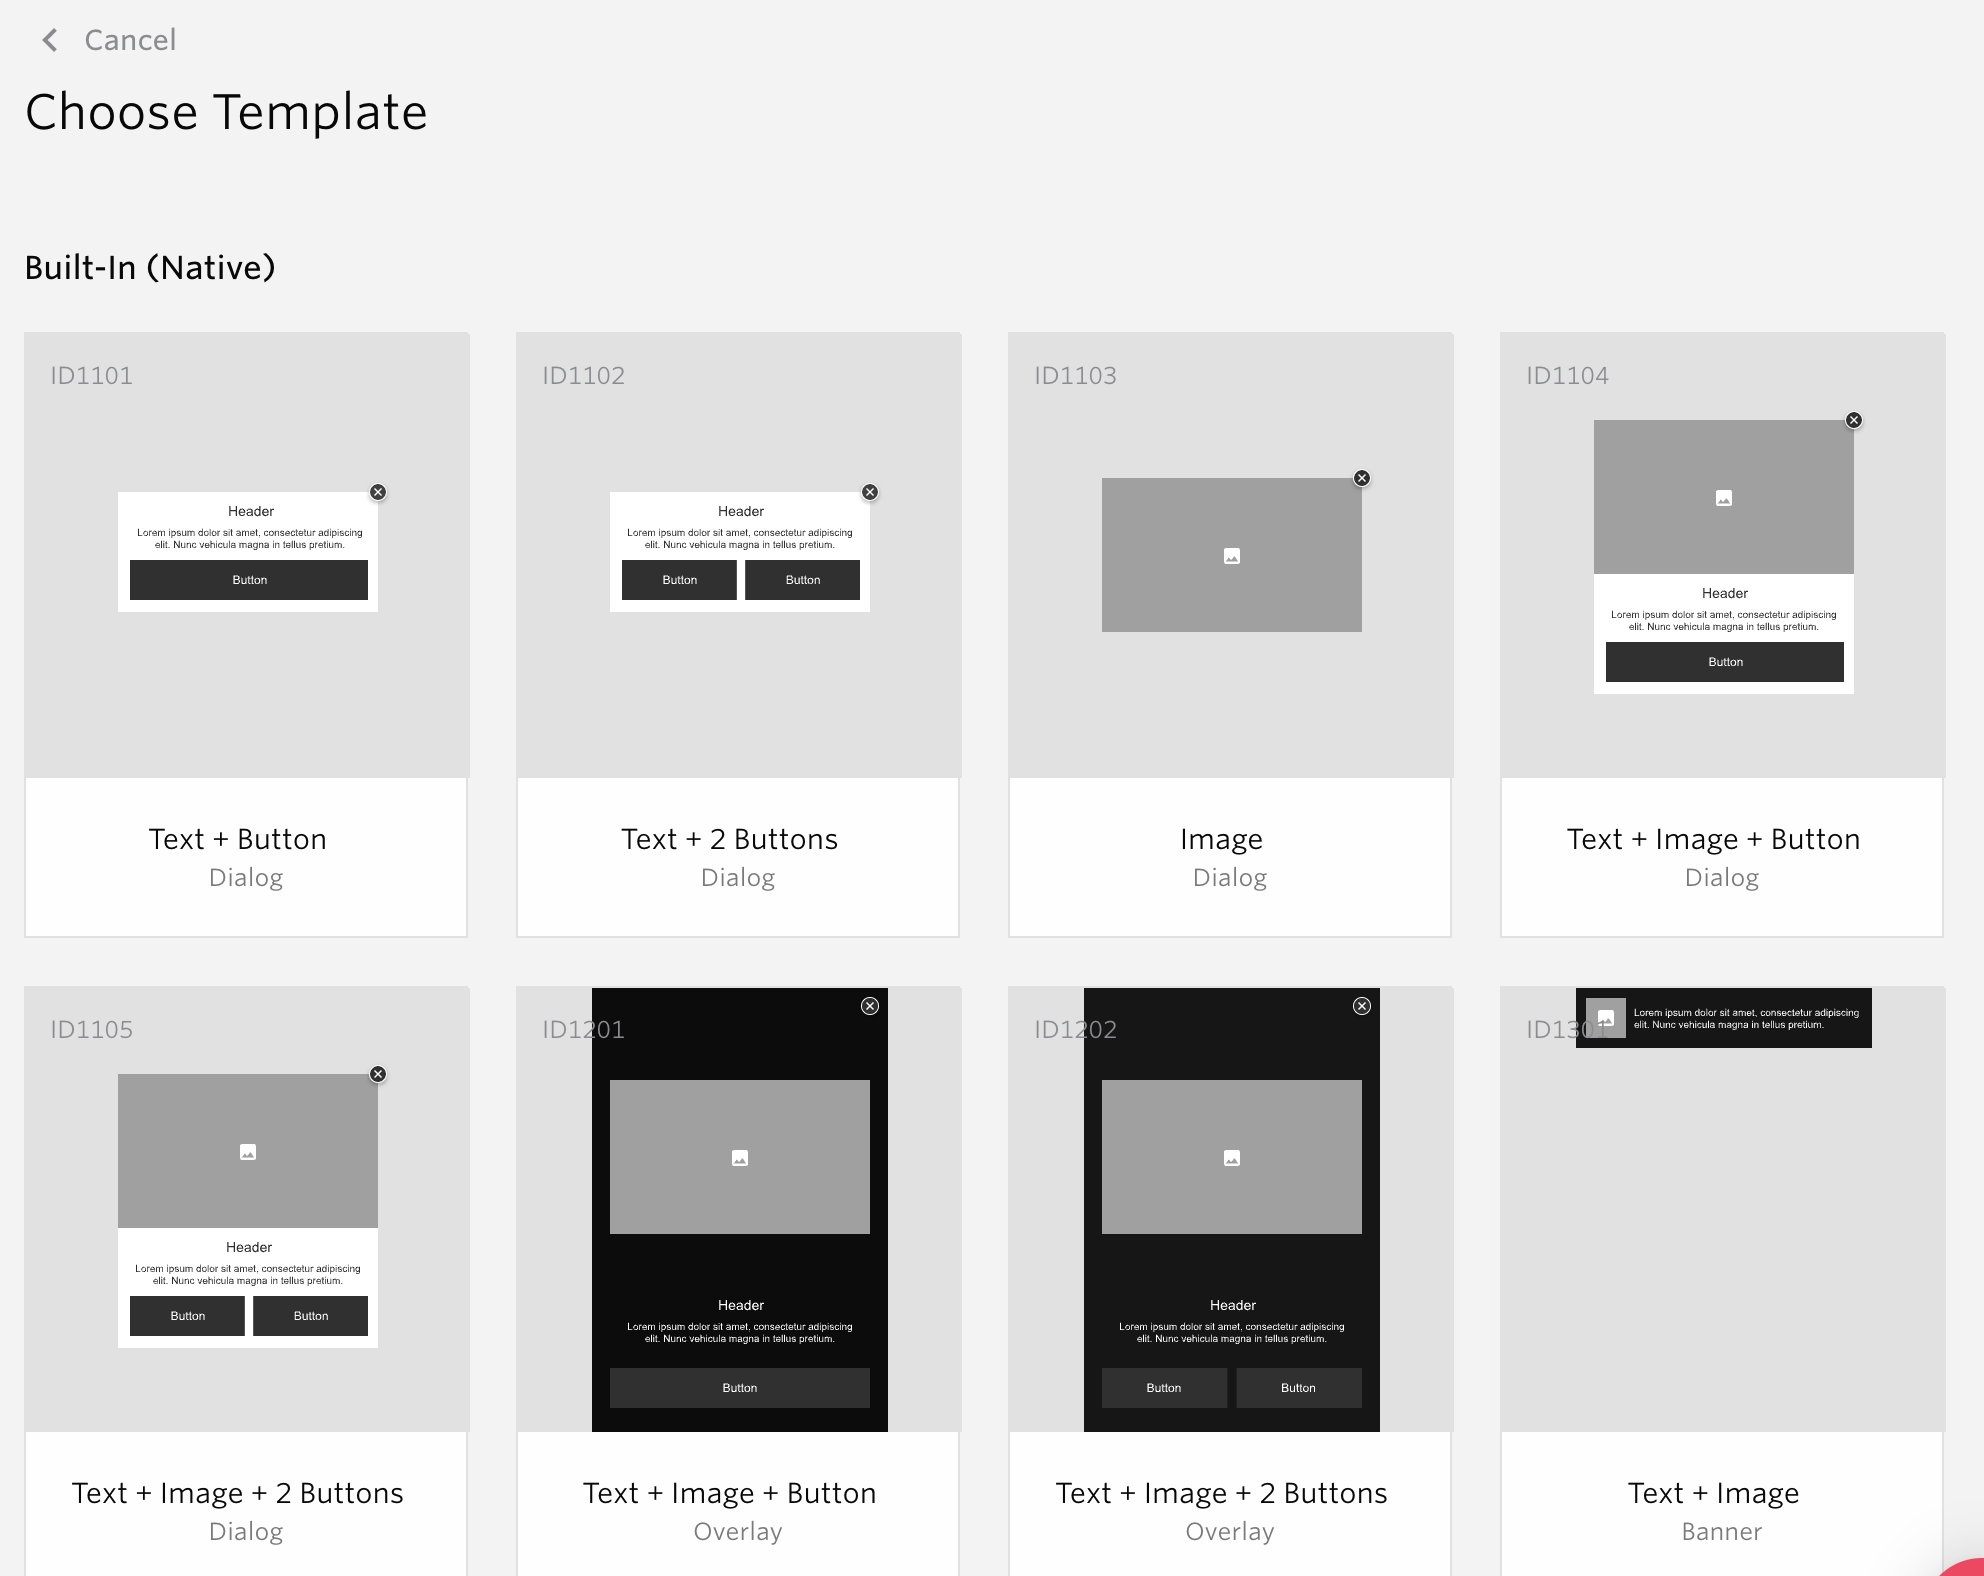
Select a template.
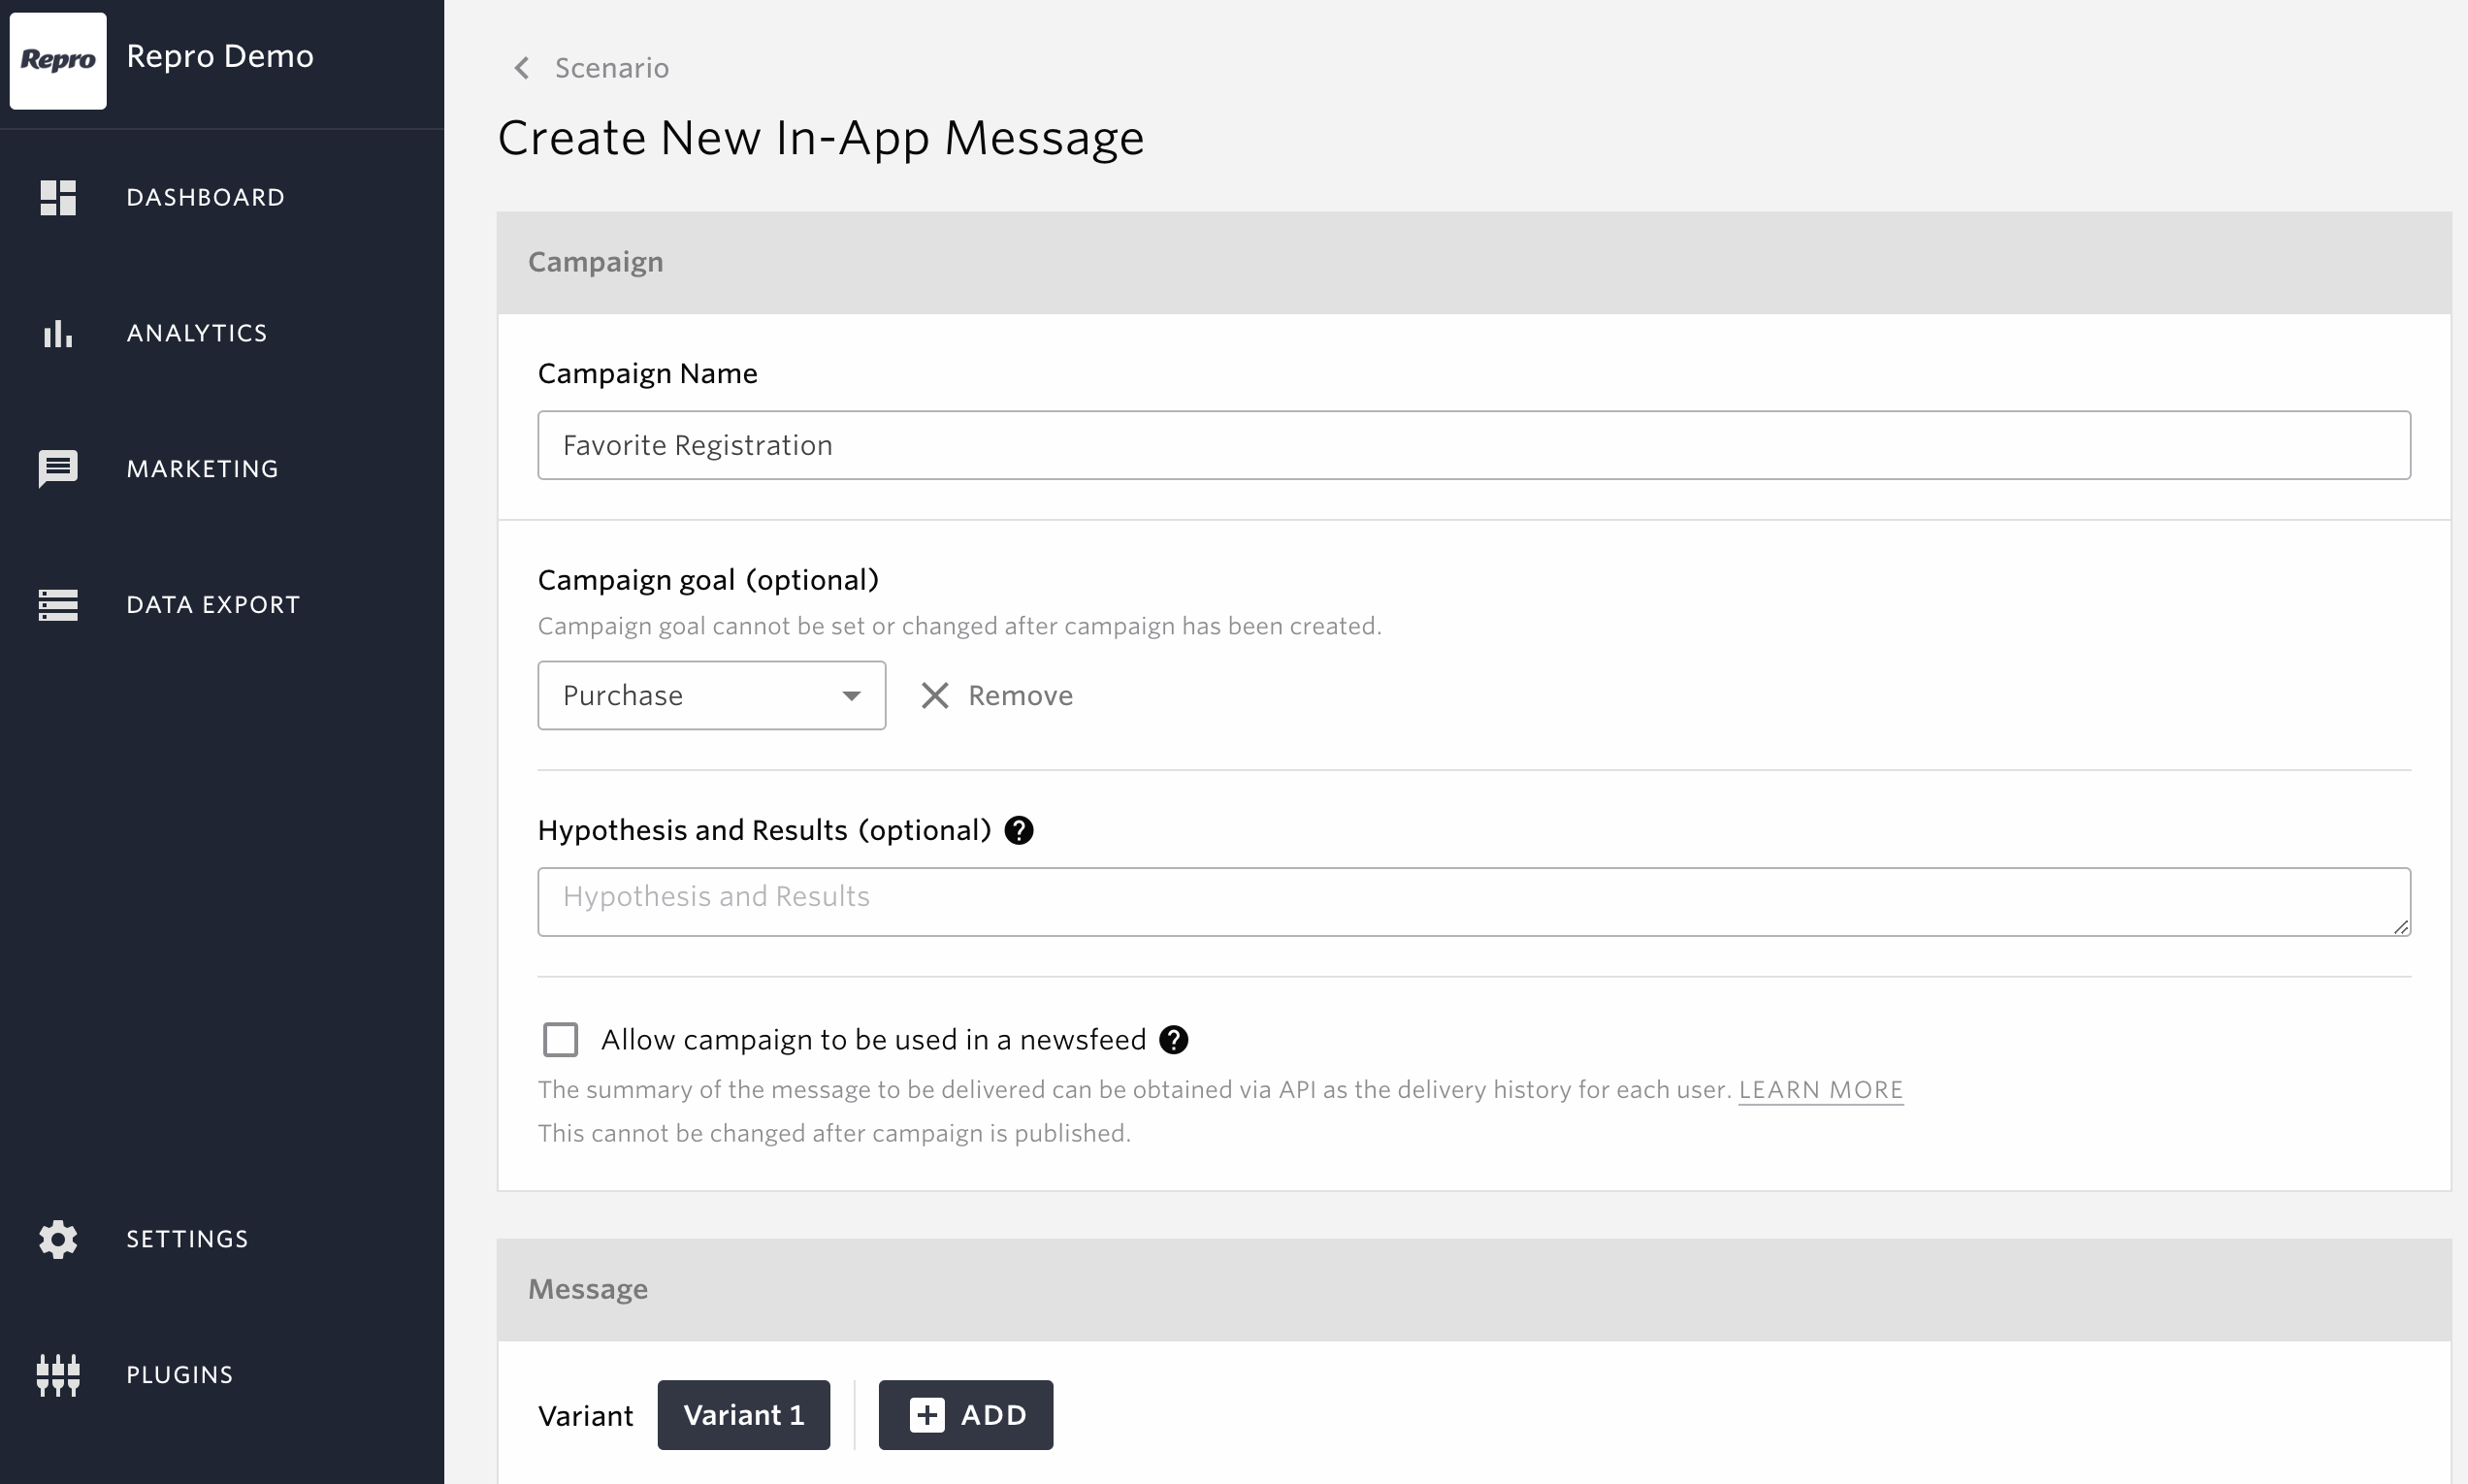
The in-app message creation screen will appear, so enter the necessary items and publish the campaign.
The created campaign will be added to the scenario.
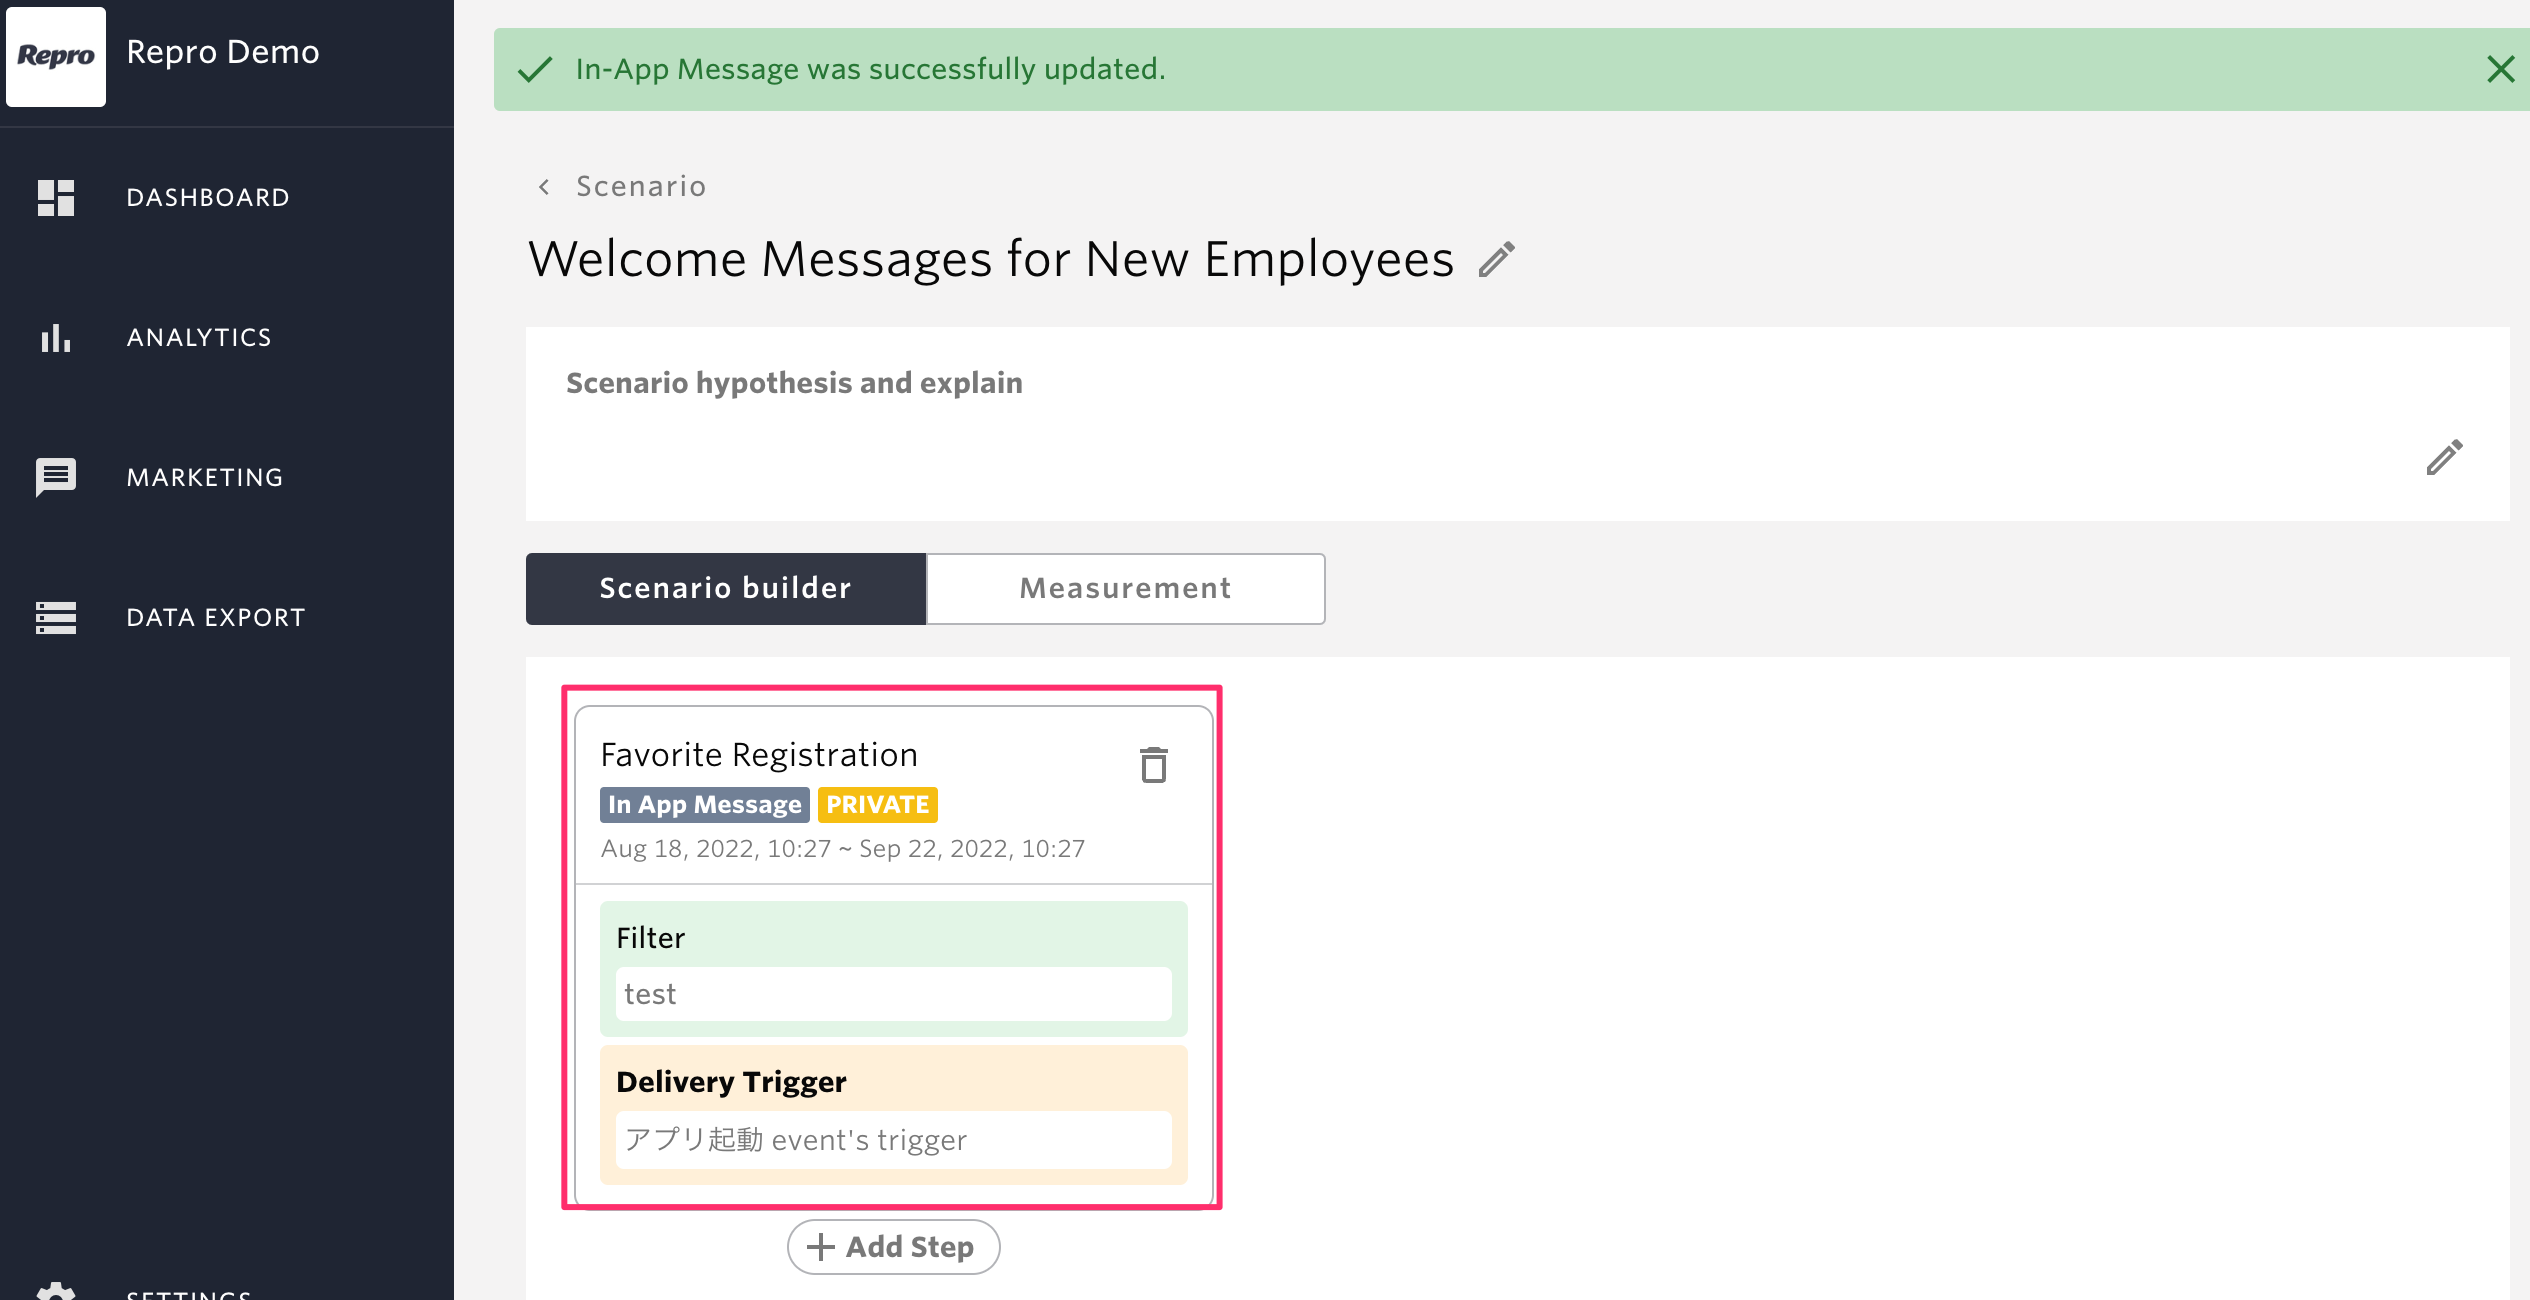
The campaign will appear as follows.
items |
Description |
|---|---|
Title |
The name of the campaign will be displayed. |
Campaign |
The Campaign type is displayed.
(Push Notification/Event Based Push Notification/In-App Message/Web Message/Broadcast Mail/Trigger Mail/LINE)
|
Status |
The status of the campaign will be displayed.
Private / Active / Ended / Draft / Archived
|
Delivery period |
The campaign distribution period will be displayed. |
Filter |
All specified delivery target conditions are displayed. |
Trigger |
Trigger events and conditions are displayed. |
Similarly, click on [Add Step] and add a second campaign to the step.
Click on [Add In-App Messages].
Fill in the required fields and publish the campaign.

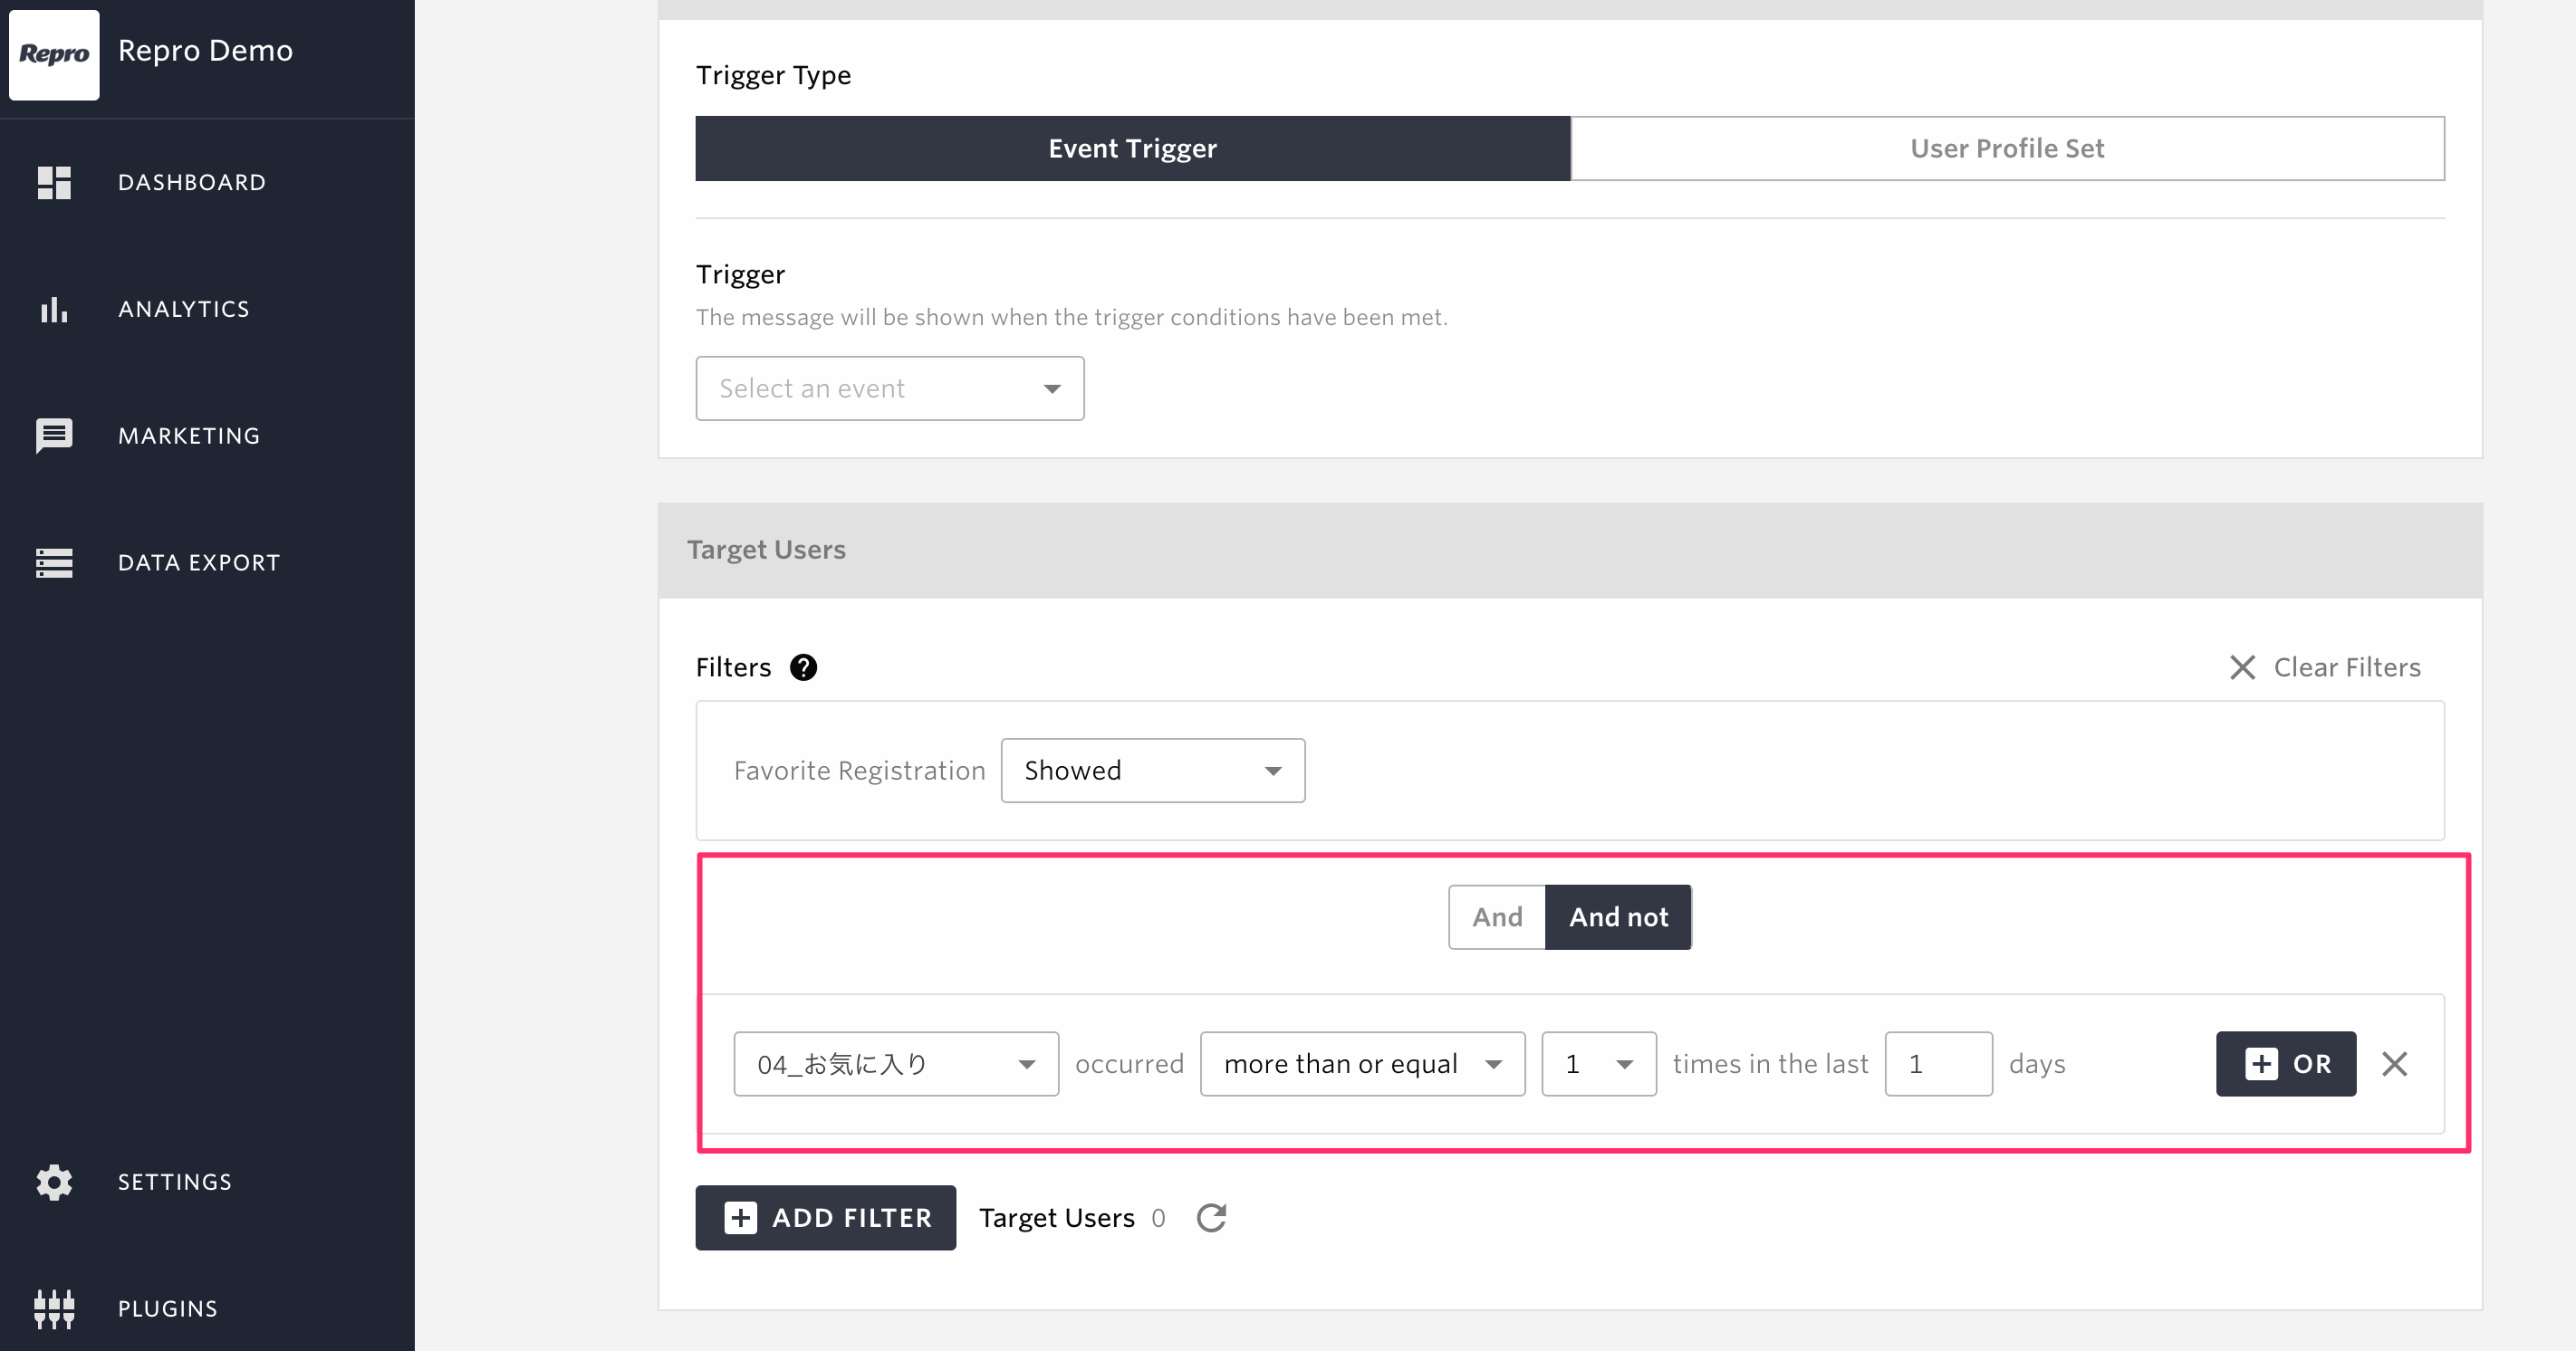
When creating a second or subsequent campaign, The previous campaign was displayed will be automatically added to the filters for delivery.
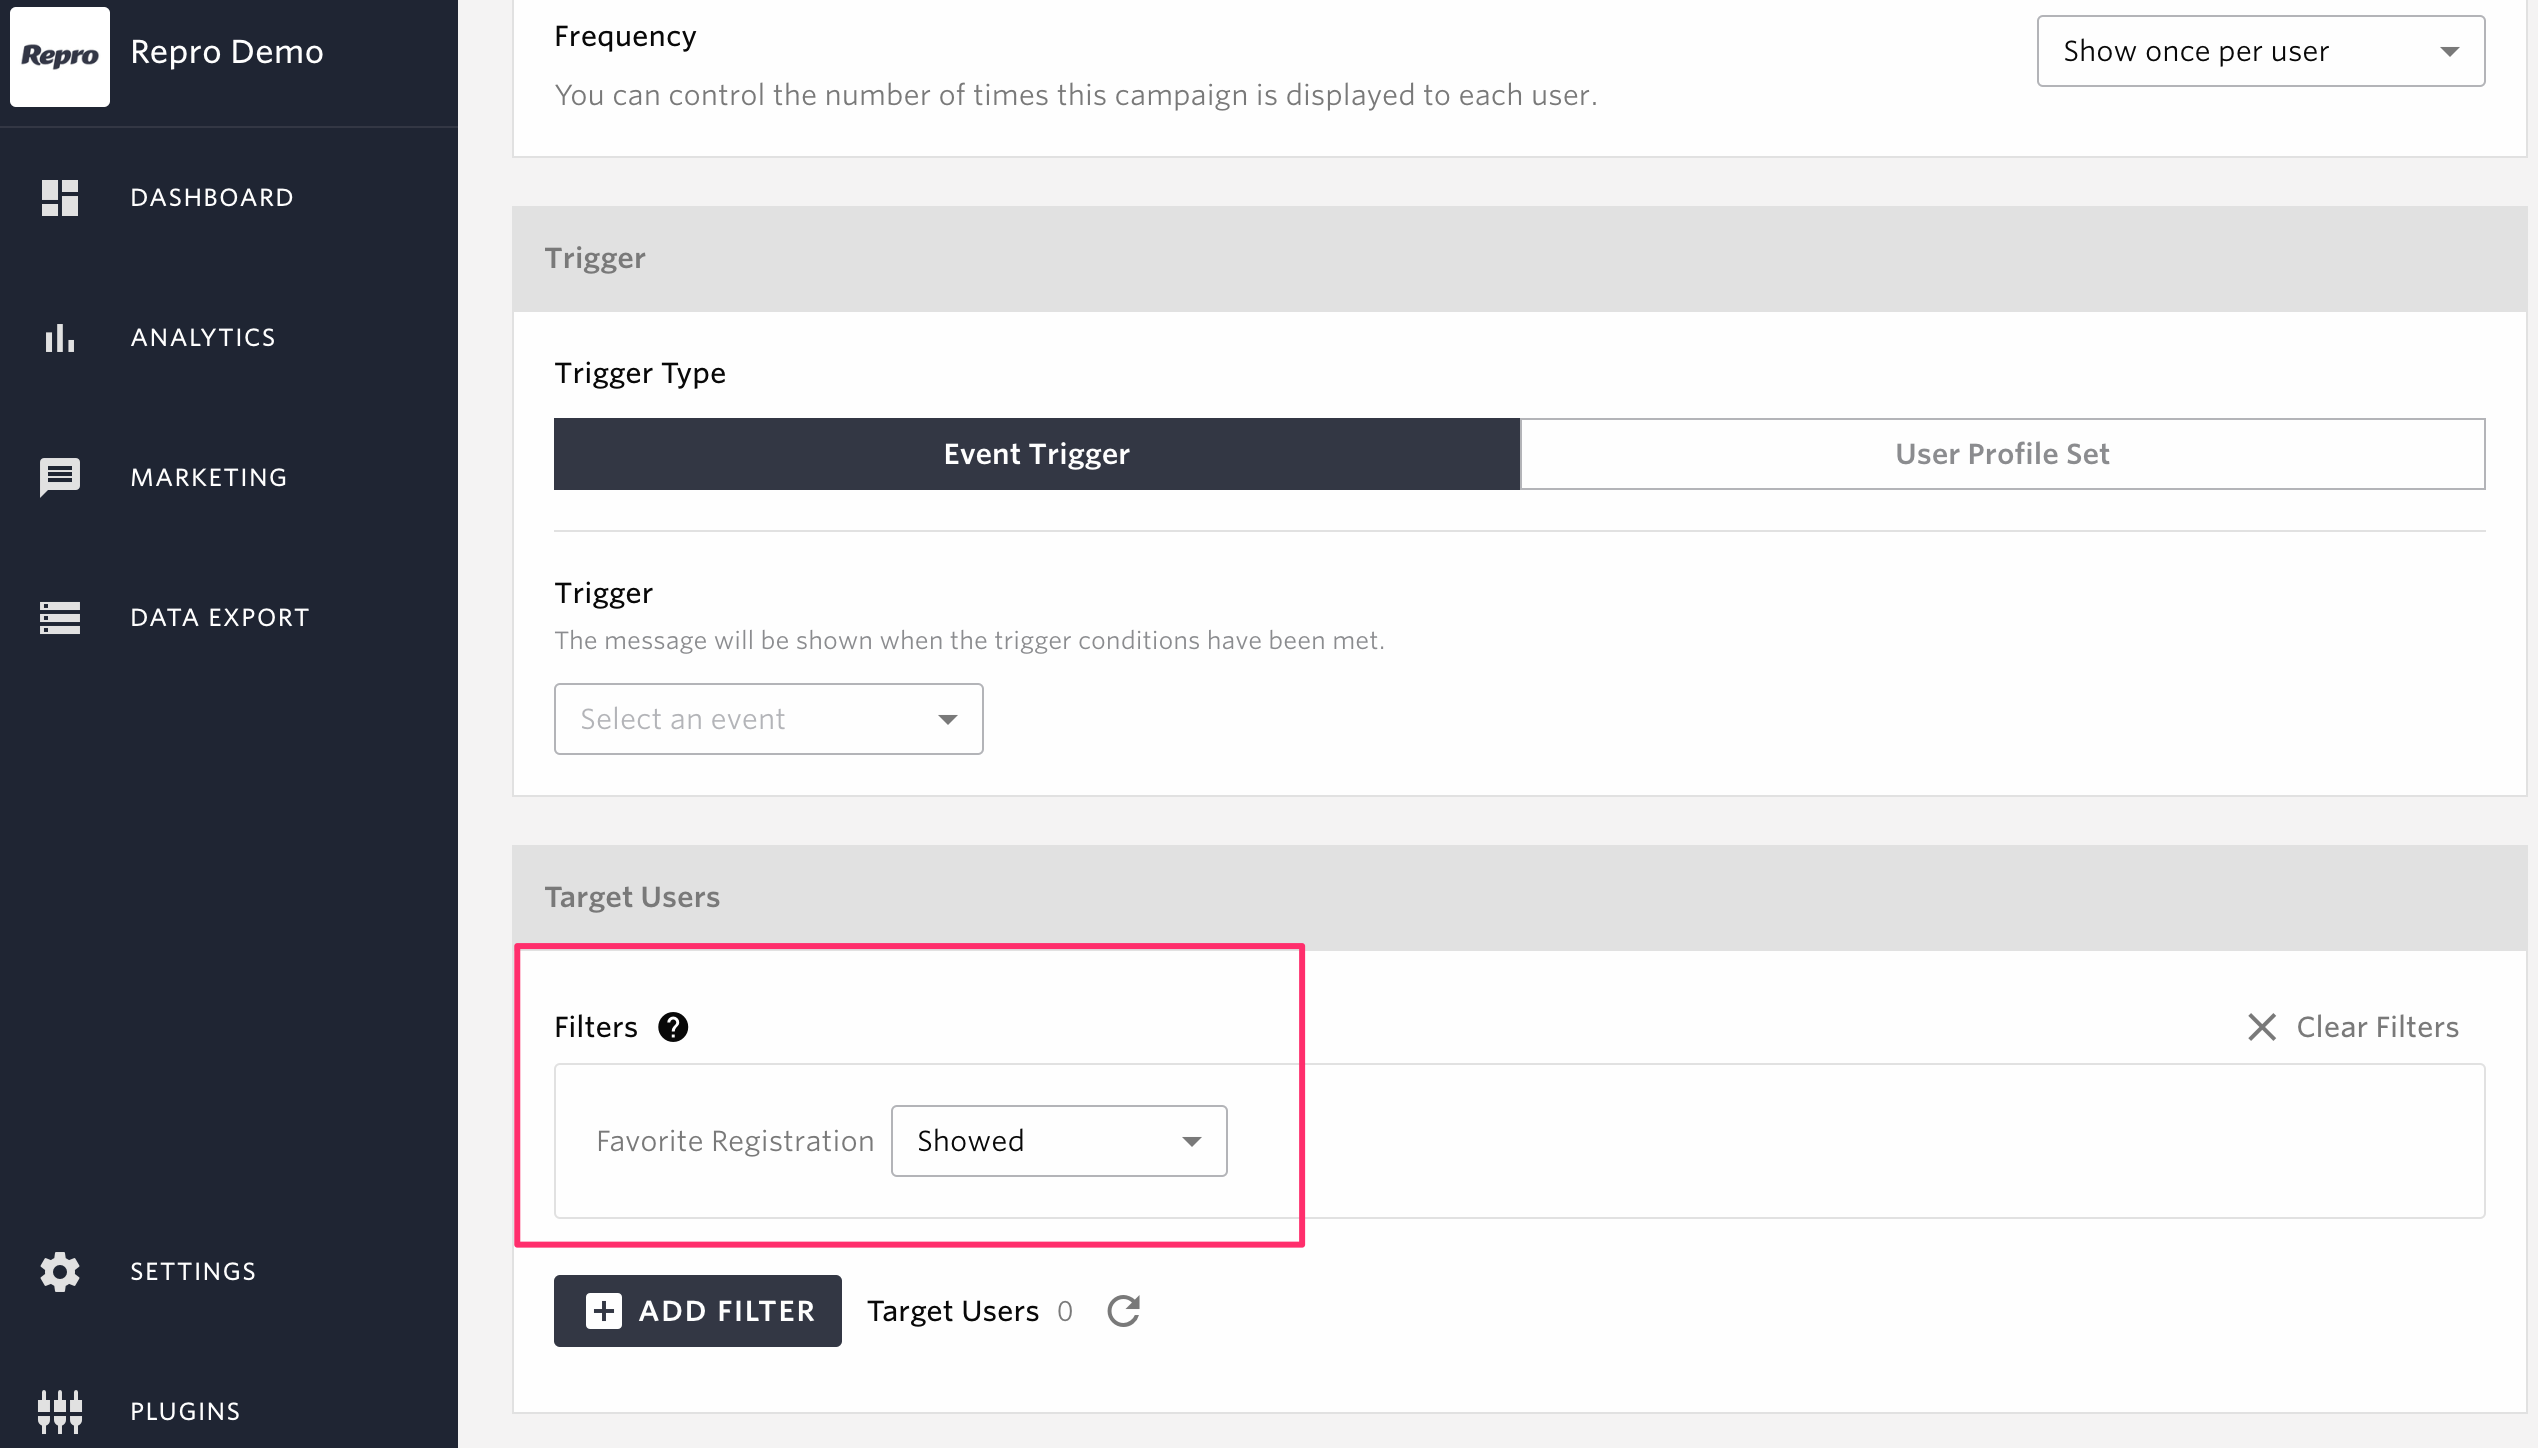
This time, the filter will add must have a favorite registration as an AND condition.
Click on [Add Filter].
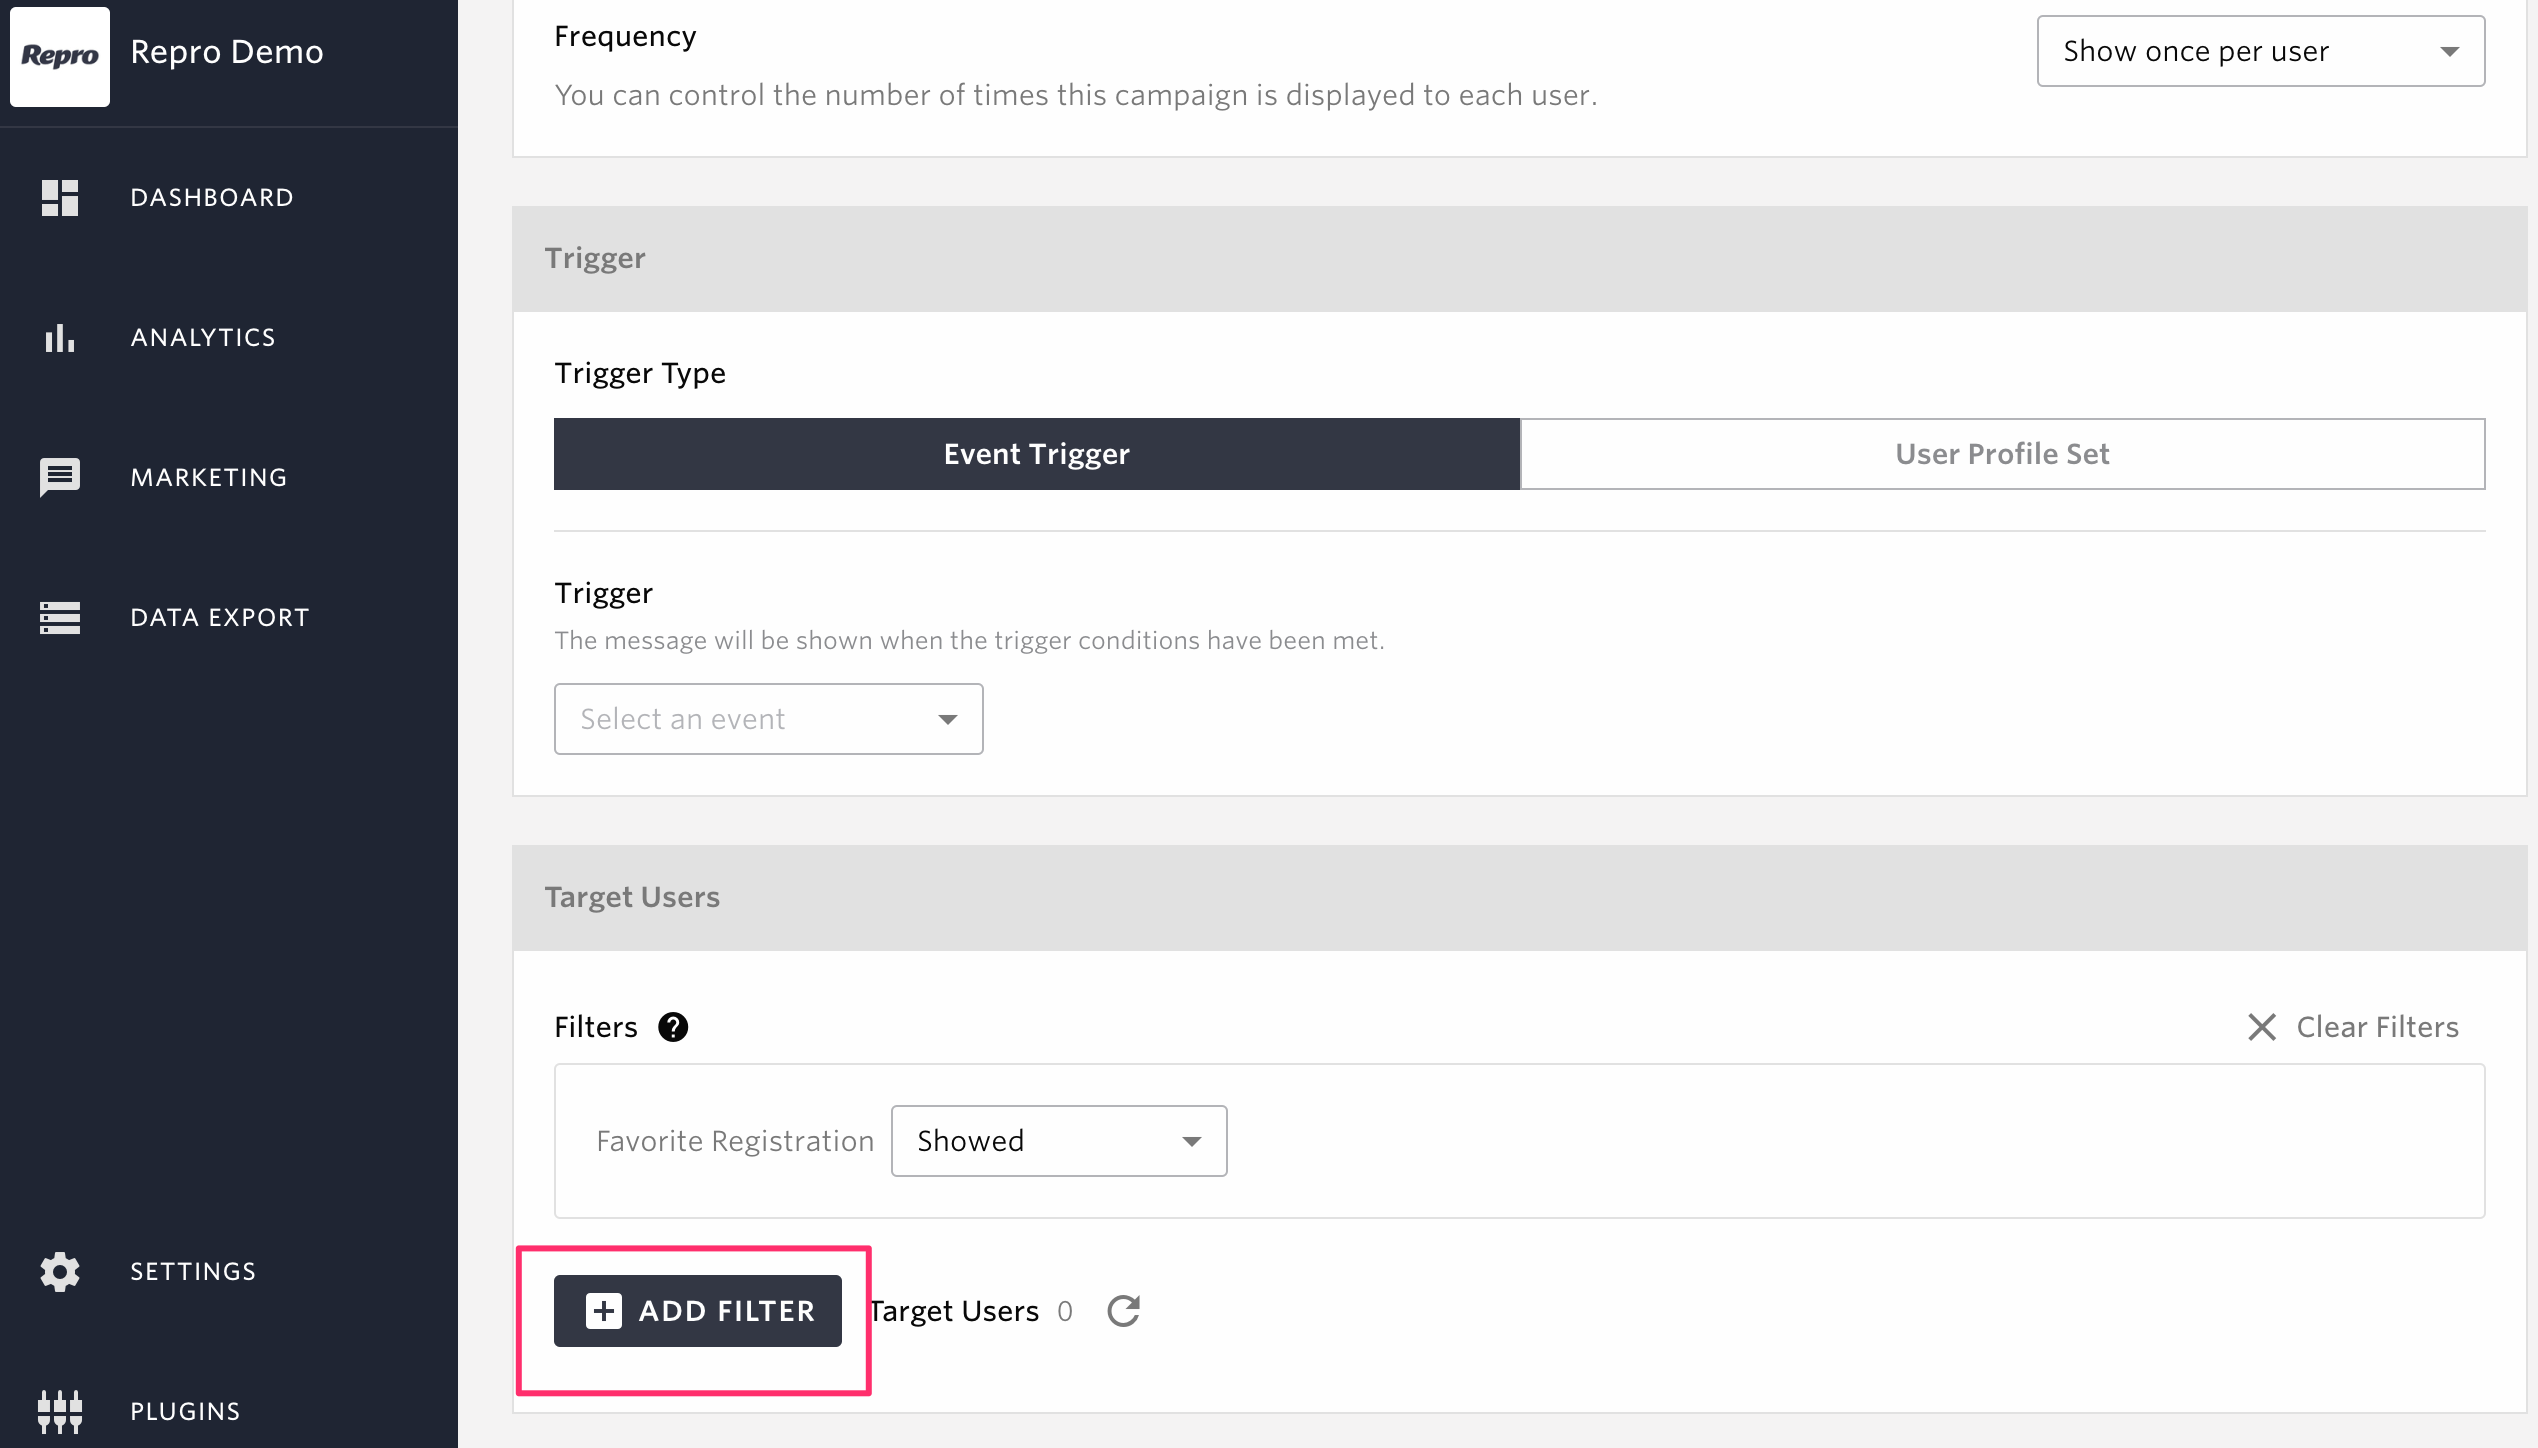
Add to filter.
Click LAUNCH/LAUNCH AS PRIVATE/PRIVATE to add steps.
Note
When adding a step, if the campaign for the parent step meets the following conditions, the campaign will not be saved and the step will not be added even if you choose to make it public/private.
The distribution period for the parent step’s campaign has ended
The campaign distribution period for the step to be added specifies a date that is more than 30 days after the parent step’s campaign ends

You can now display the first campaign and show the second campaign to users who have registered as favorites.
Note
Up to four branching steps can be added in parallel to the parent step.
Finally, the third step is to set the message to be displayed to users who displayed the first message but did not register a favorite.
Click [Add Step] for the first step.
Note
To add more branches from the first step, click on [Add Step] at the bottom of the first step and then click on the target campaign.
Click on [Add In-App Messages].
Fill in the required fields and publish the campaign.
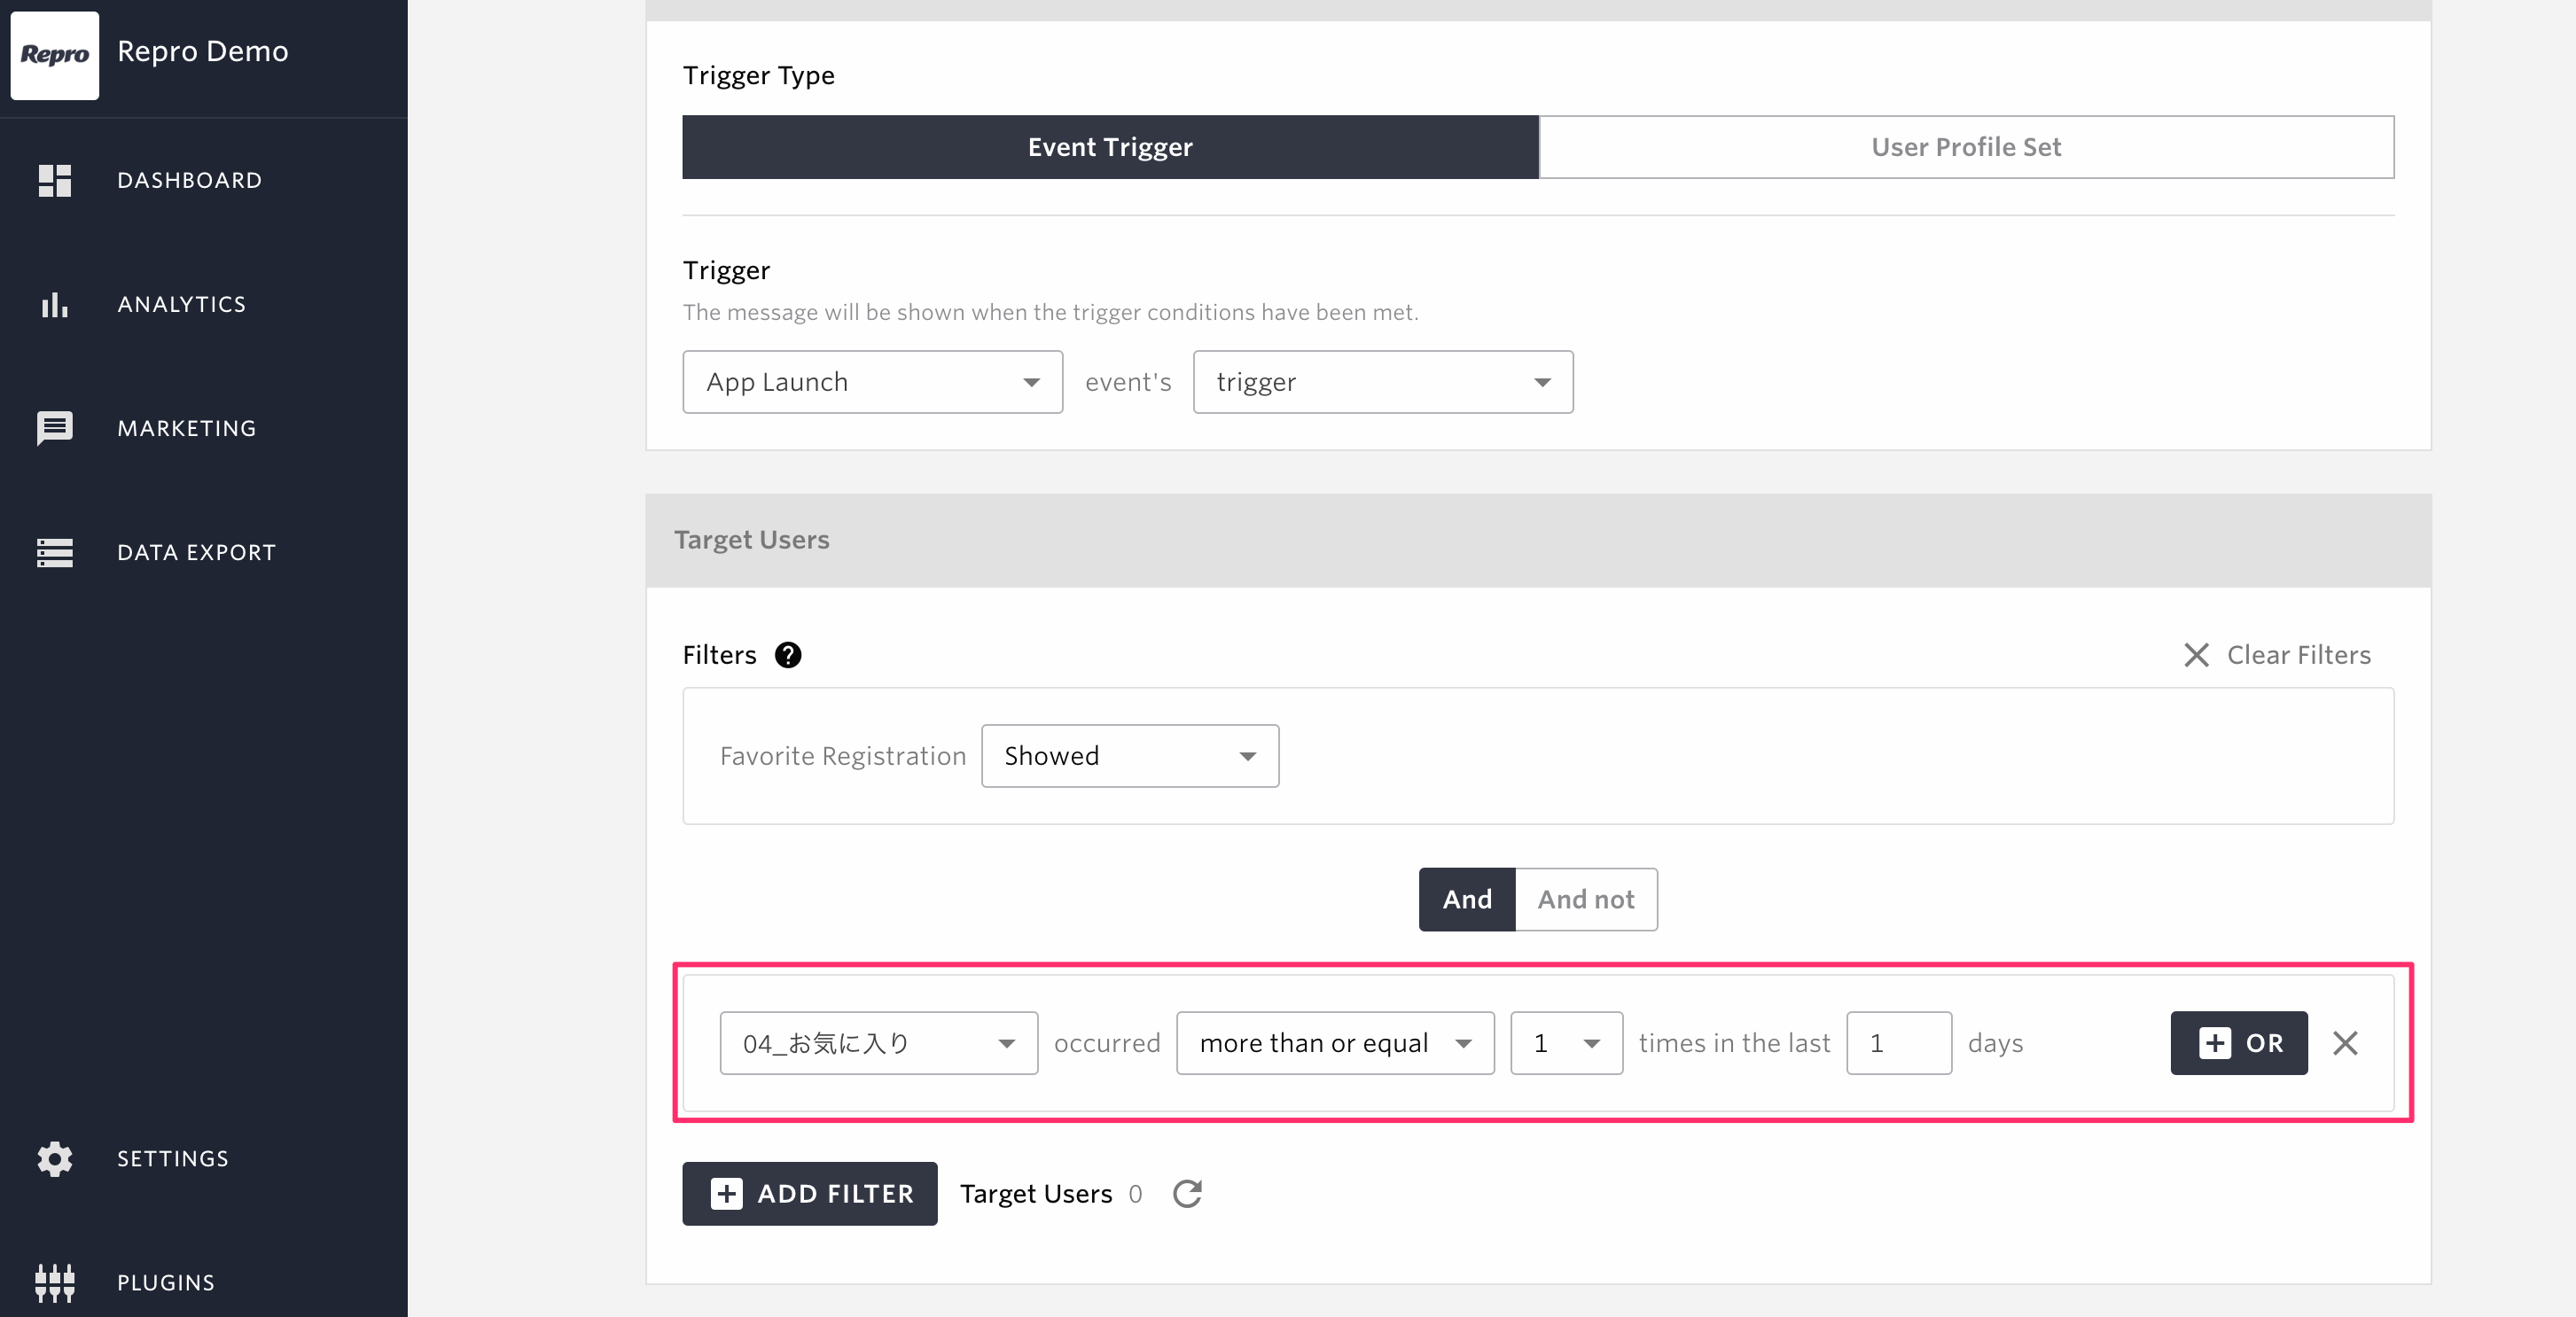
This time, contrary to the second step, add a filter similar to the second message’s delivery target with the and not condition.
Click LAUNCH/LAUNCH AS PRIVATE/PRIVATE to add steps.
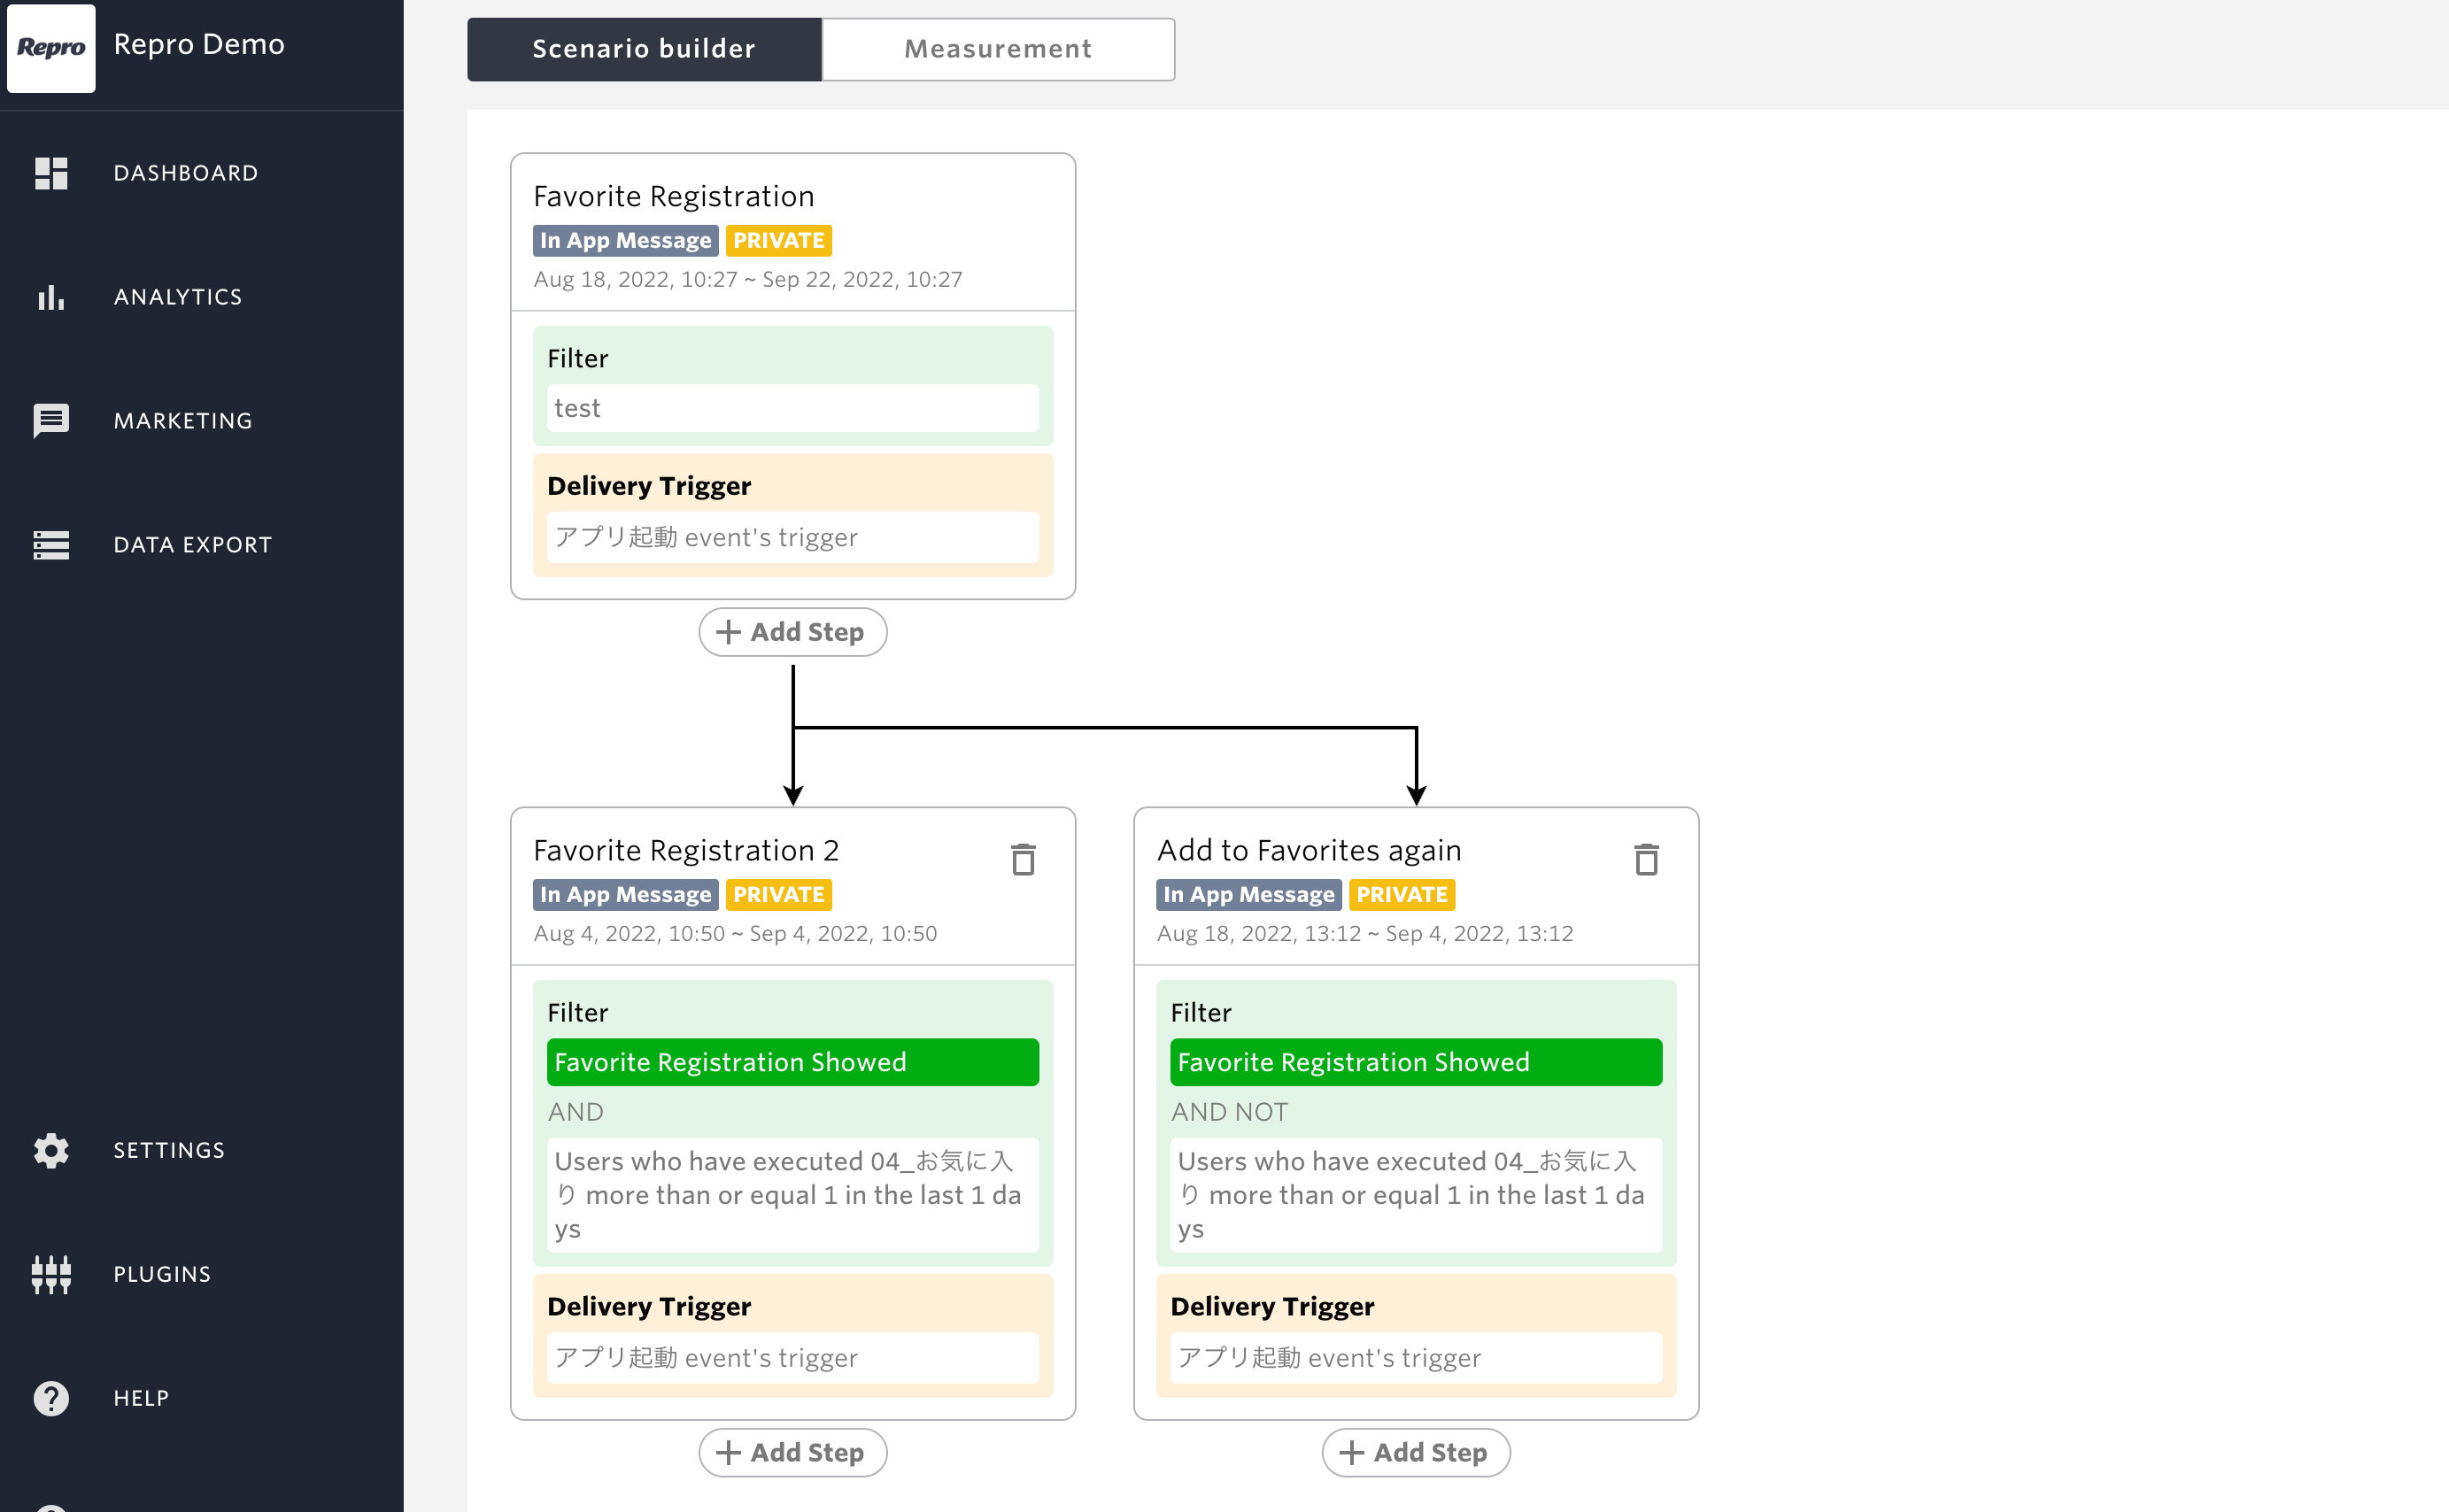
This allows users who did not register their favorites after the first message to be prompted to register their favorites again.
This completes the scenario.
Remove Steps
To remove a step, click the trash can icon for the target step in the scenario screen.
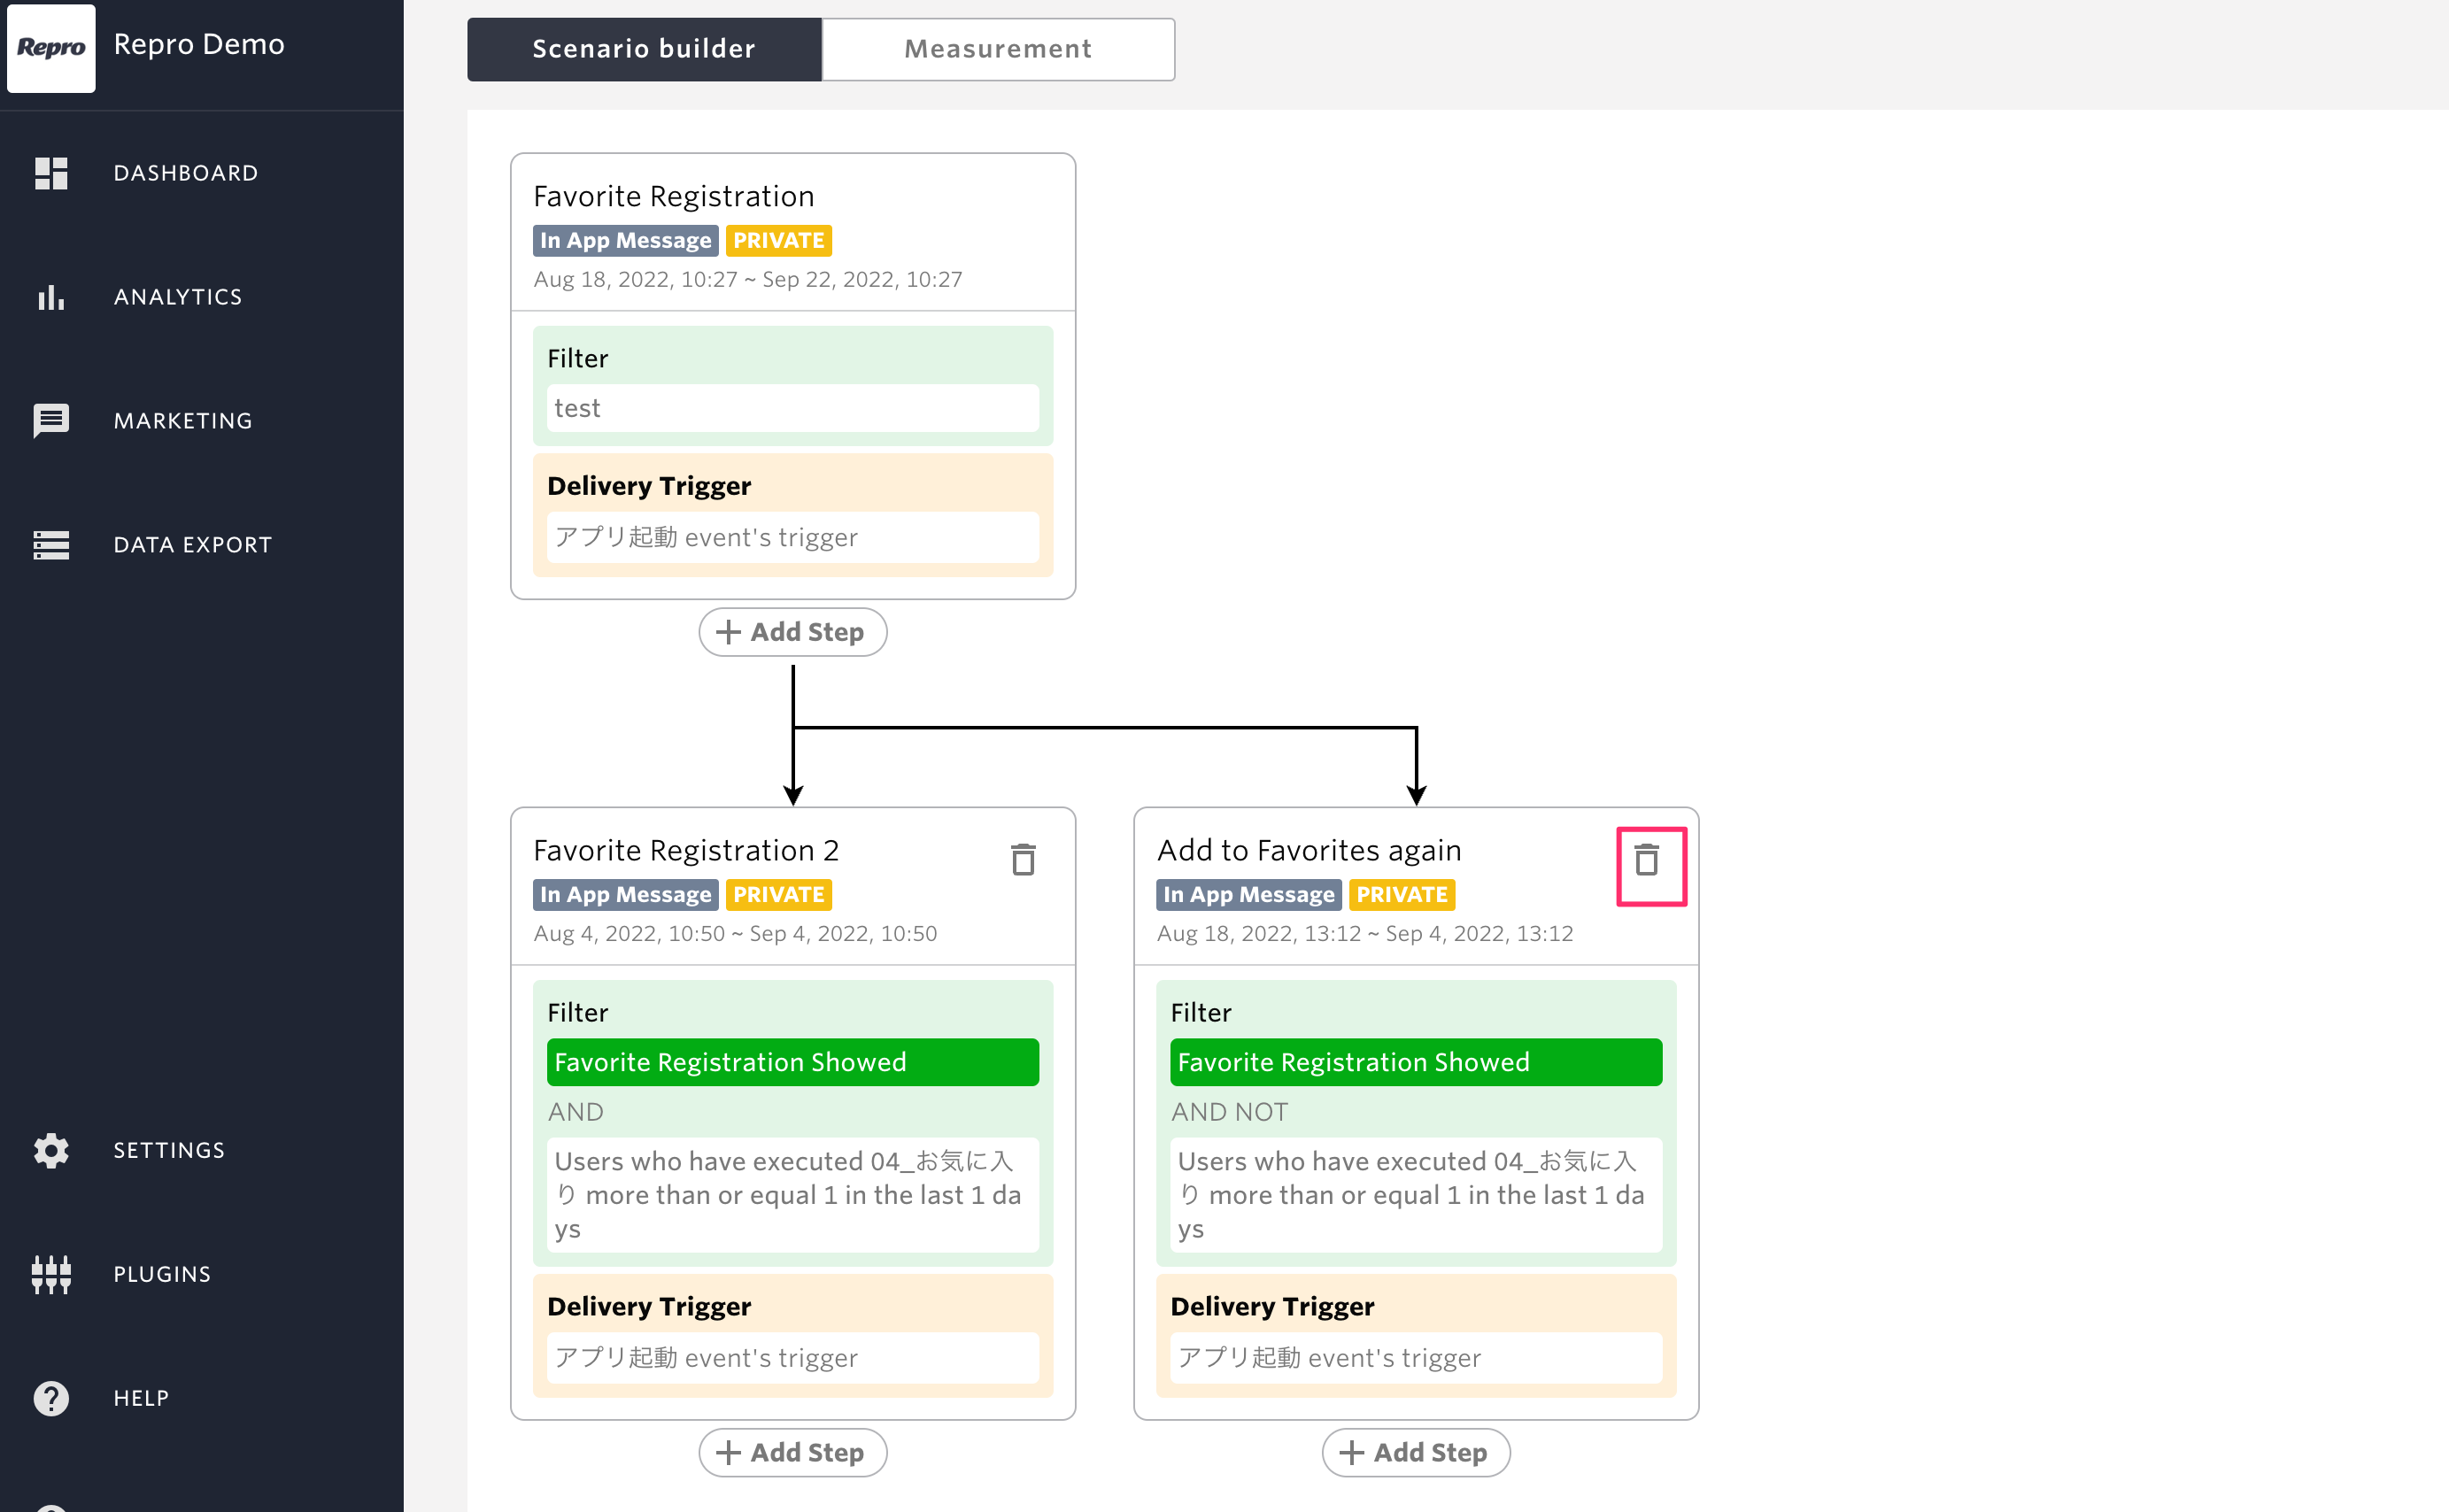
A pop-up confirmation message will appear. Click [Remove] to remove the step.

Note
When a step is removed, the campaign associated with the step is archived
Parent step cannot be removed
ACTIVE/PRIVATE of Scenarios
The scenario itself does not have a ACTIVE/PRIVATE status. Each step of the campaign is controlled by the ACTIVE/PRIVATE status of the scenario.
Example 1: If the first step is ACTIVE and the second step is PRIVATE

Only the first step is delivered; the second step is not.
Example 2: If the first step is PRIVATE and the second step is ACTIVE
Not a single campaign will be distributed.
Note
If you want to stop the scenario in the middle, set the campaign for the step you want to stop to PRIVATE.
The maximum number of each campaign used for a step
Campaigns created within a scenario will also be reflected in the number of each channel used.
The maximum number of campaigns can be found at the top of each campaign listing page.
For example, if you want to check the maximum number of Messaging, click on [MARKETING] > [MESSAGING] from the side menu and check the top of the screen.

Check the Measurement
From the scenario screen, click on the [Measurement] tab.

The results of the campaign distribution will be displayed.
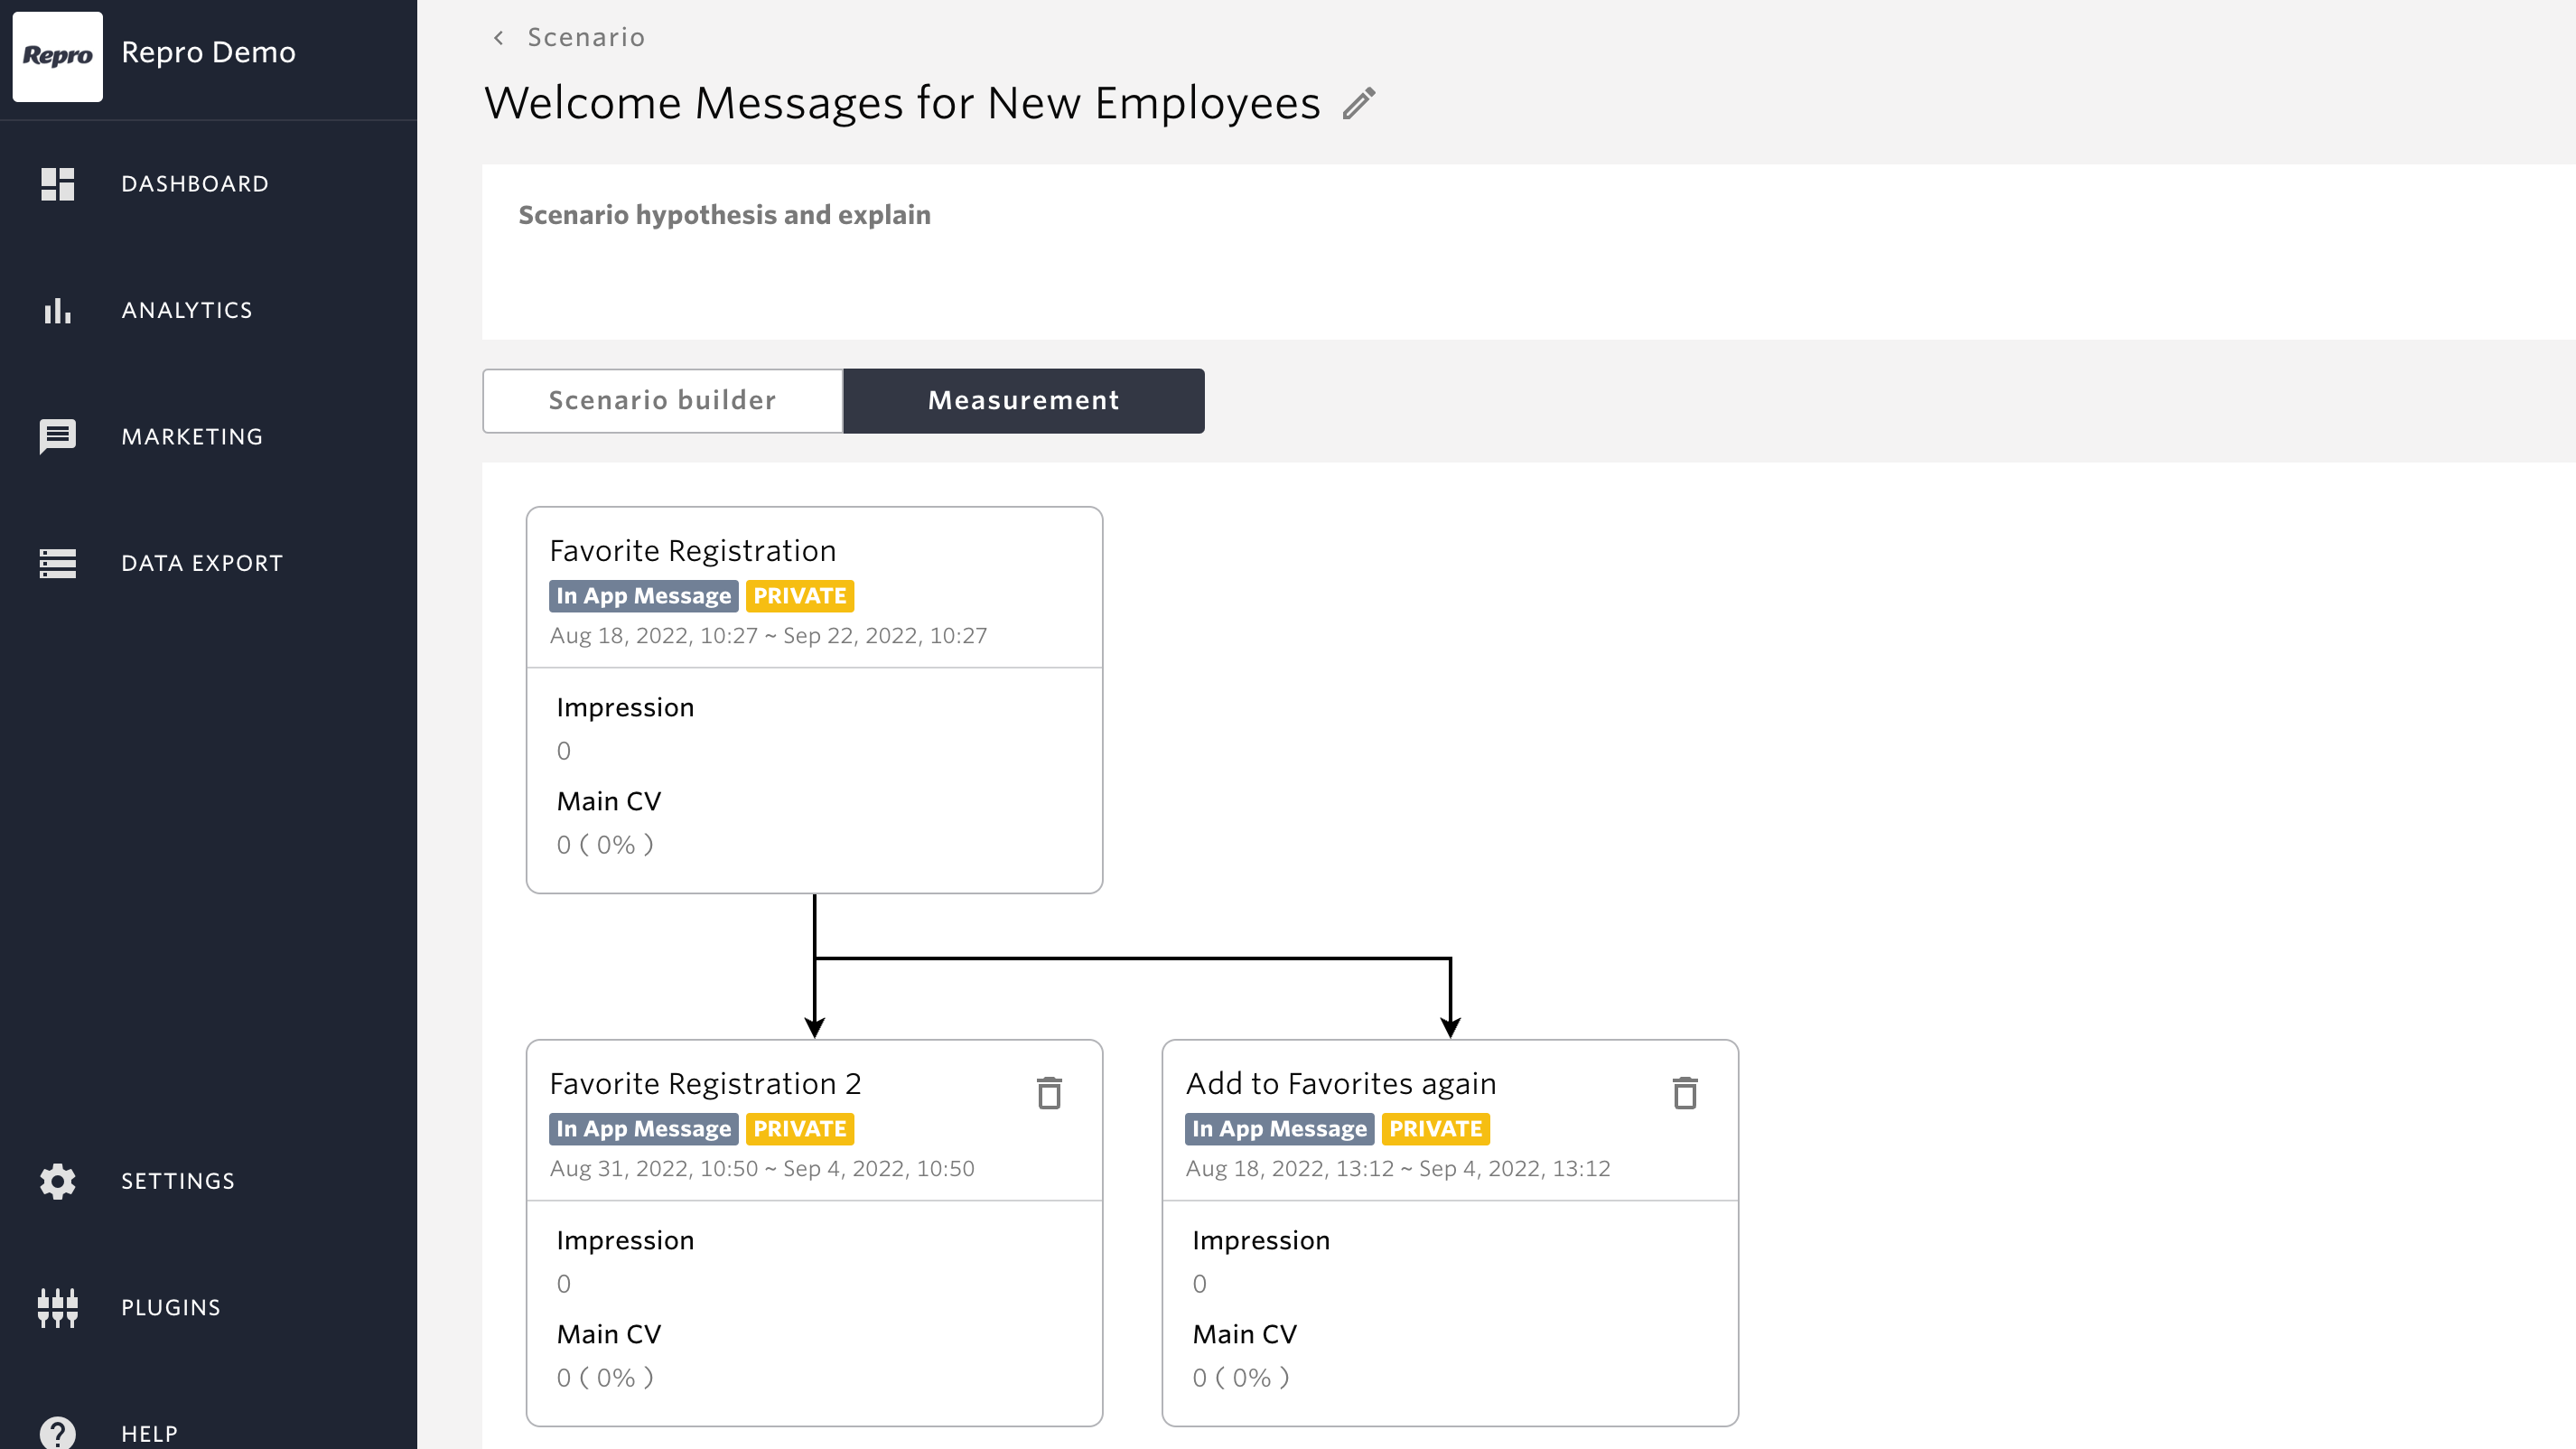
The items displayed in the distribution results vary depending on the campaign. The following is an explanation of each.
Push Notification
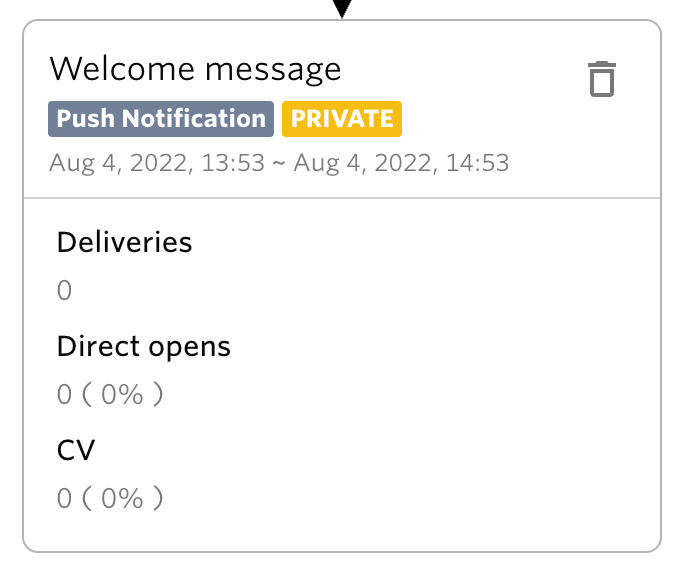
items |
Description |
|---|---|
Title |
The name of the campaign will be displayed. |
Campaign |
The Campaign type is displayed.
(Push Notification/Event Based Push Notification/In-App Message/Web Message/Broadcast Mail/Trigger Mail/LINE)
|
Status |
The status of the campaign will be displayed.
Private / Active / Ended / Draft / Archived
|
Delivery period |
The campaign distribution period will be displayed. |
Deliveries |
The number of campaigns delivered will be displayed. |
Direct opens |
The number and percentage of direct campaign opens will be displayed. |
CV |
The number and percentage of CVs for the campaign will be displayed. |
Event Based Push Notification
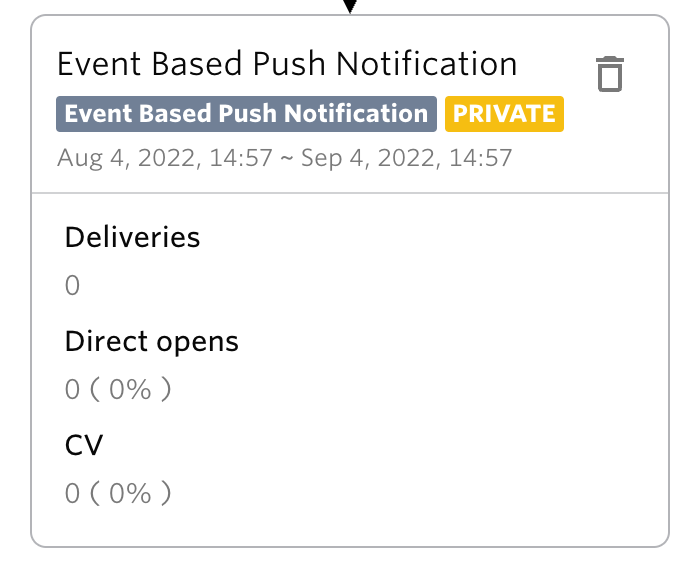
items |
Description |
|---|---|
Title |
The name of the campaign will be displayed. |
Campaign |
The Campaign type is displayed.
(Push Notification/Event Based Push Notification/In-App Message/Web Message/Broadcast Mail/Trigger Mail/LINE)
|
Status |
The status of the campaign will be displayed.
Private / Active / Ended / Draft / Archived
|
Delivery period |
The campaign distribution period will be displayed. |
Deliveries |
The number of campaigns delivered will be displayed. |
Direct opens |
The number and percentage of direct campaign opens will be displayed. |
CV |
The number and percentage of CVs for the campaign will be displayed. |
In-App Message
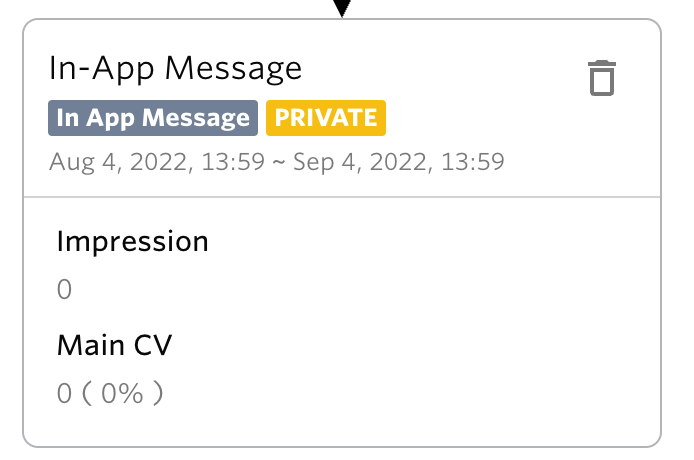
items |
Description |
|---|---|
Title |
The name of the campaign will be displayed. |
Campaign |
The Campaign type is displayed.
(Push Notification/Event Based Push Notification/In-App Message/Web Message/Broadcast Mail/Trigger Mail/LINE)
|
Status |
The status of the campaign will be displayed.
Private / Active / Ended / Draft / Archived
|
Delivery period |
The campaign distribution period will be displayed. |
Impressions |
The number of impressions for the campaign will be displayed. |
Main CV |
The number and percentage of main CVs for the campaign are displayed. |
Web Message
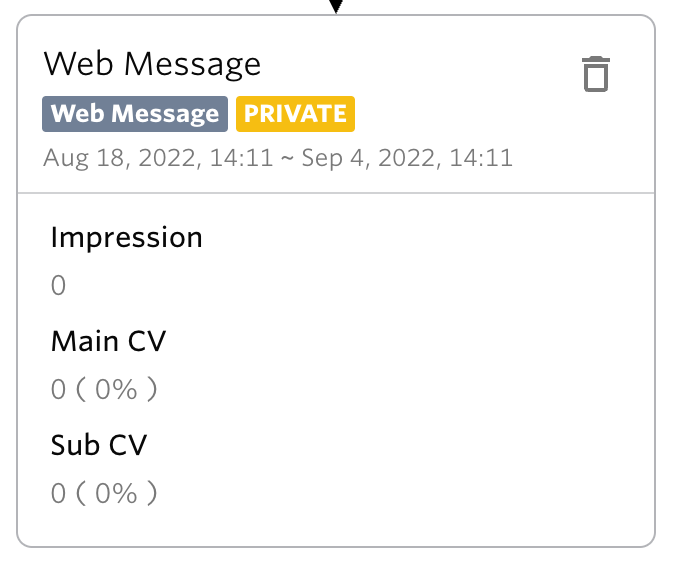
items |
Description |
|---|---|
Title |
The name of the campaign will be displayed. |
Campaign |
The Campaign type is displayed.
(Push Notification/Event Based Push Notification/In-App Message/Web Message/Broadcast Mail/Trigger Mail/LINE)
|
Status |
The status of the campaign will be displayed.
Private / Active / Ended / Draft / Archived
|
Delivery period |
The campaign distribution period will be displayed. |
Impressions |
The number of impressions for the campaign will be displayed. |
Main CV |
The number and percentage of main CVs for the campaign are displayed. |
Sub CV |
The number and percentage of sub-CVs for the campaign will be displayed.
(Displayed only if Sub CV is set)
|
Broadcast mail
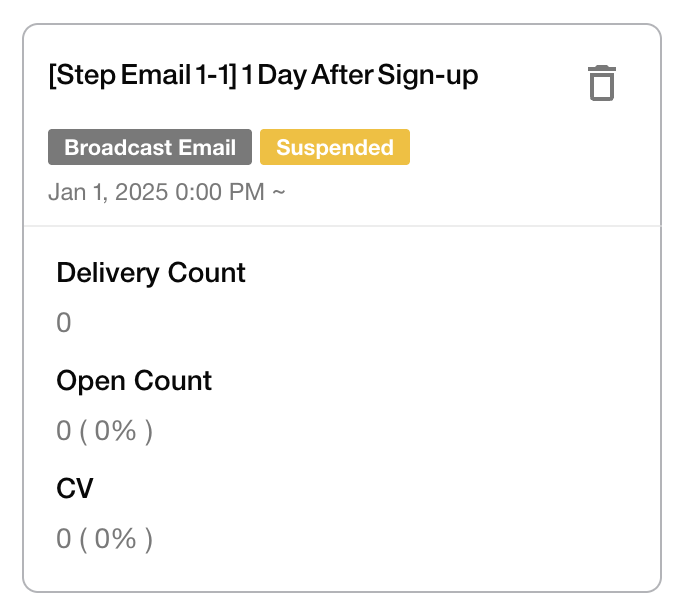
items |
Description |
|---|---|
Title |
The name of the campaign will be displayed. |
Campaign |
The Campaign type is displayed.
(Push Notification/Event Based Push Notification/In-App Message/Web Message/Broadcast Mail/Trigger Mail/LINE)
|
Status |
The status of the campaign will be displayed.
(Available / Reserved / Suspended / Finished / Draft / Archived)
|
Delivery period |
The campaign distribution period will be displayed. |
Delivery Count |
The number of campaign deliveries will be displayed. |
Open Count |
The number and percentage of campaign open will be displayed. |
CV |
The number and percentage of CVs for the campaign will be displayed.
|
Trigger mail
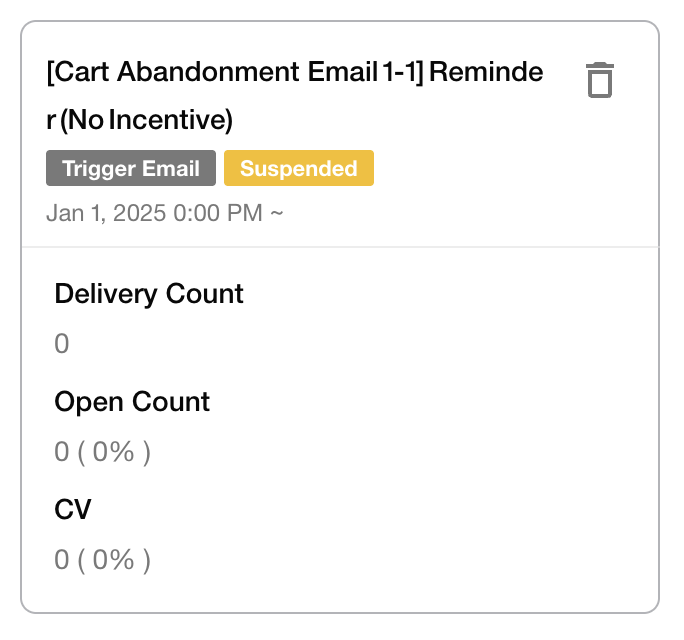
items |
Description |
|---|---|
Title |
The name of the campaign will be displayed. |
Campaign |
The Campaign type is displayed.
(Push Notification/Event Based Push Notification/In-App Message/Web Message/Broadcast Mail/Trigger Mail/LINE)
|
Status |
The status of the campaign will be displayed.
(Available / Reserved / Suspended / Finished / Draft / Archived)
|
Delivery period |
The campaign distribution period will be displayed. |
Delivery Count |
The number of campaign deliveries will be displayed. |
Open Count |
The number and percentage of campaign open will be displayed. |
CV |
The number and percentage of CVs for the campaign will be displayed.
|
LINE Message
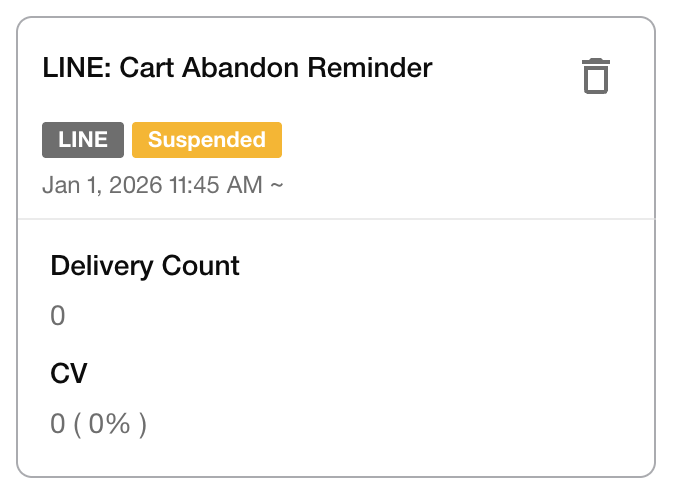
items |
Description |
|---|---|
Title |
The name of the campaign will be displayed. |
Campaign |
The Campaign type is displayed.
(Push Notification/Event Based Push Notification/In-App Message/Web Message/Broadcast Mail/Trigger Mail/LINE)
|
Status |
The status of the campaign will be displayed.
(Available / Reserved / Suspended / Finished / Draft / Archived)
|
Delivery period |
The campaign distribution period will be displayed. |
Delivery Count |
The number of campaign deliveries will be displayed. |
CV |
The number and percentage of CVs for the campaign will be displayed.
|
Important notes on delivery conditions and results
Warning
When you run an A/B test within a scenario, users in the control group who do not actually receive or show the message are still counted as users who were “Received” or “Showed”
Without setting a goal for the campaign, CVs will be zero
The criteria for ‘Converted’ differ by campaign and are defined as follows:
Push Notification: within 1 hour after delivery
Event-Based Push Notification: within 1 hour after delivery
In-app Message: within 24 hours after display
Web Message: within 24 hours after display
Broadcast mail: within 24 hours after open
Trigger mail: within 24 hours after open
LINE Message: within 24 hours after delivery
Check the Scenario index page
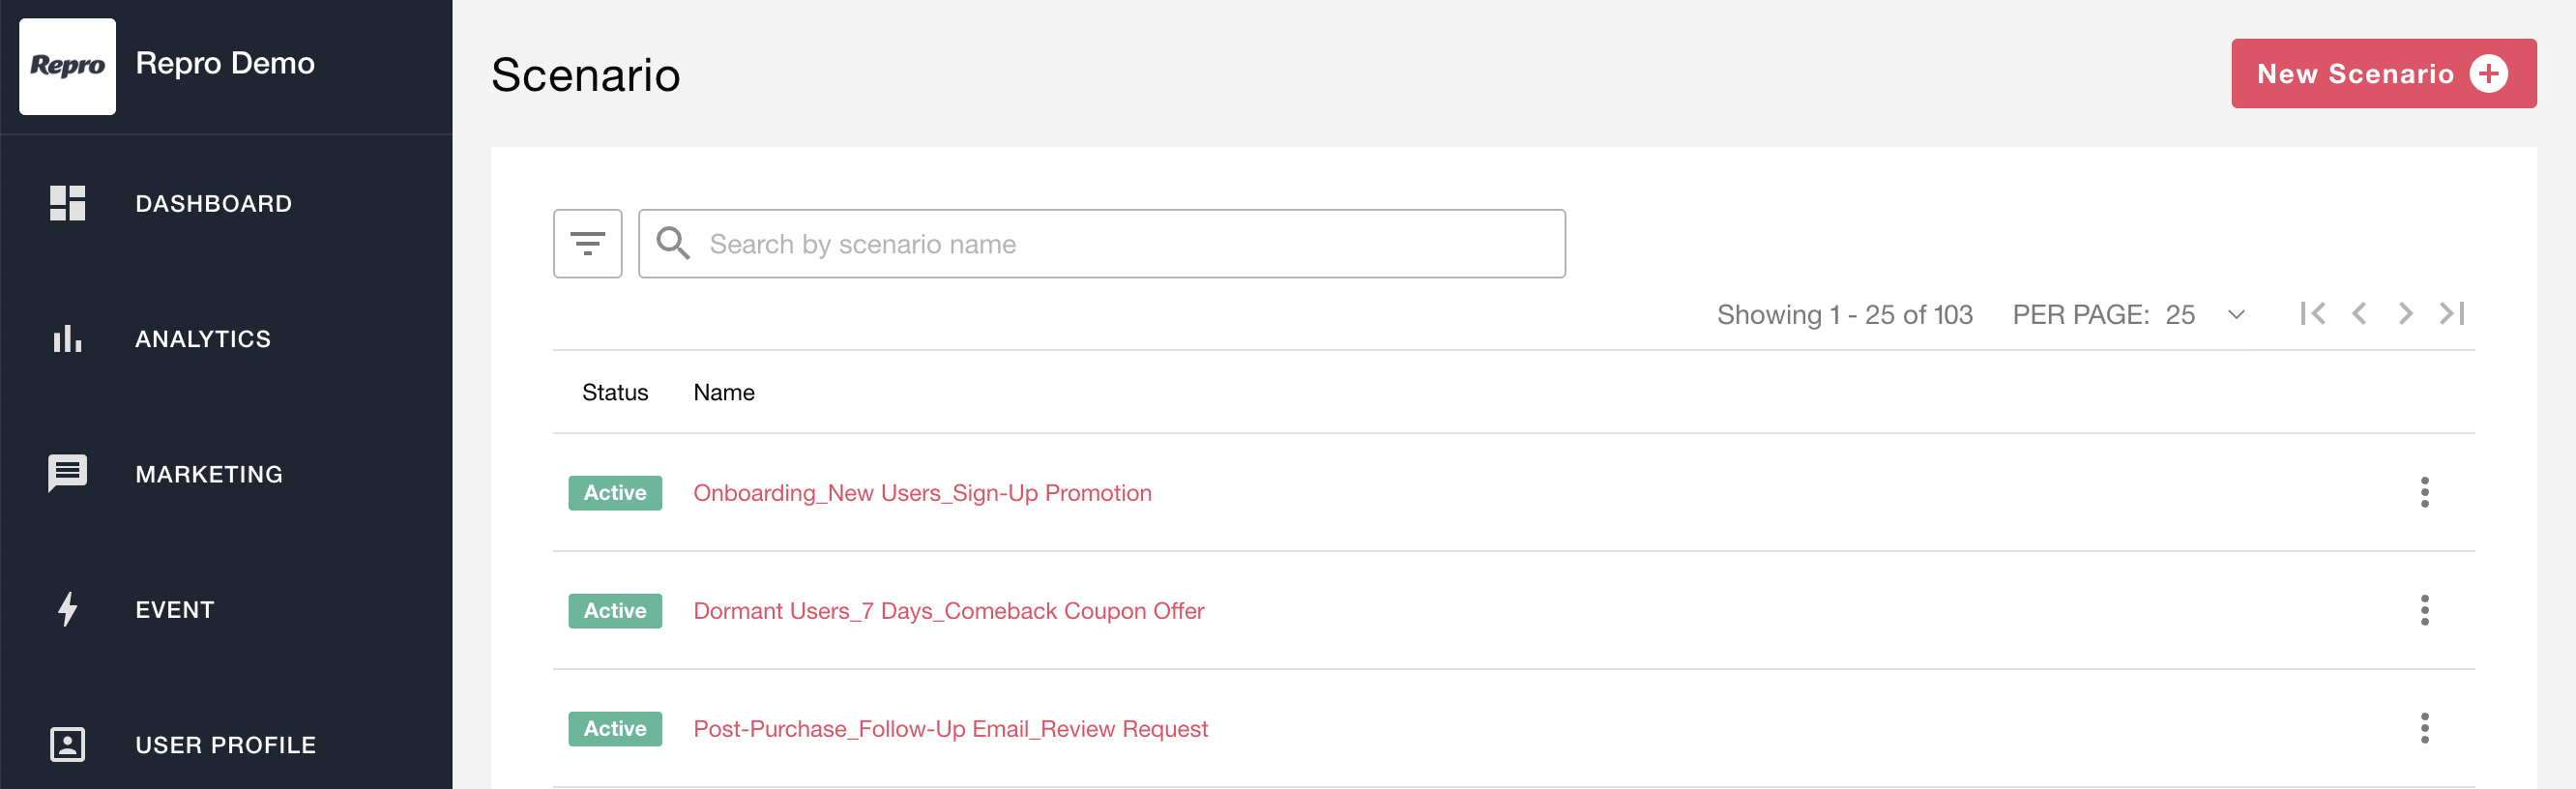
On the scenario index page, you can check the name and status of each created scenario. You can also delete scenarios that are in draft status and archive scenarios that have already been created.
items |
Description |
|---|---|
Status |
Displays the status. The status of the first step is shown. If there are no steps, no status is displayed. |
Name |
Displays the scenario name. Clicking it takes you to the scenario detail screen. |
Search by scenario name
You can search by entering a scenario name with partial matches. Searching for campaigns within a scenario is not supported.
Filter by status
You can filter scenarios by specifying a status. Check the statuses you want to filter by and click the “Apply” button to narrow the list to only those statuses.
Active
Private
Ended
Archived
Draft
Archiving and deleting scenarios

Click the ellipsis (⋮) button to the right of each item to archive or delete the scenario.
Action |
Description |
|---|---|
Delete |
If a scenario has no steps or only drafts, you can delete it. Deleting a scenario removes all drafts associated with it. |
Archive |
You can archive a scenario that includes published, private, and ended campaigns. When archived, all campaigns linked to the scenario are archived, and any drafts are deleted. |
Warning
Deleted or archived scenarios cannot be restored.